Crochet Christmas Teddy Bear Pattern: A Cozy Holiday Amigurumi Tutorial
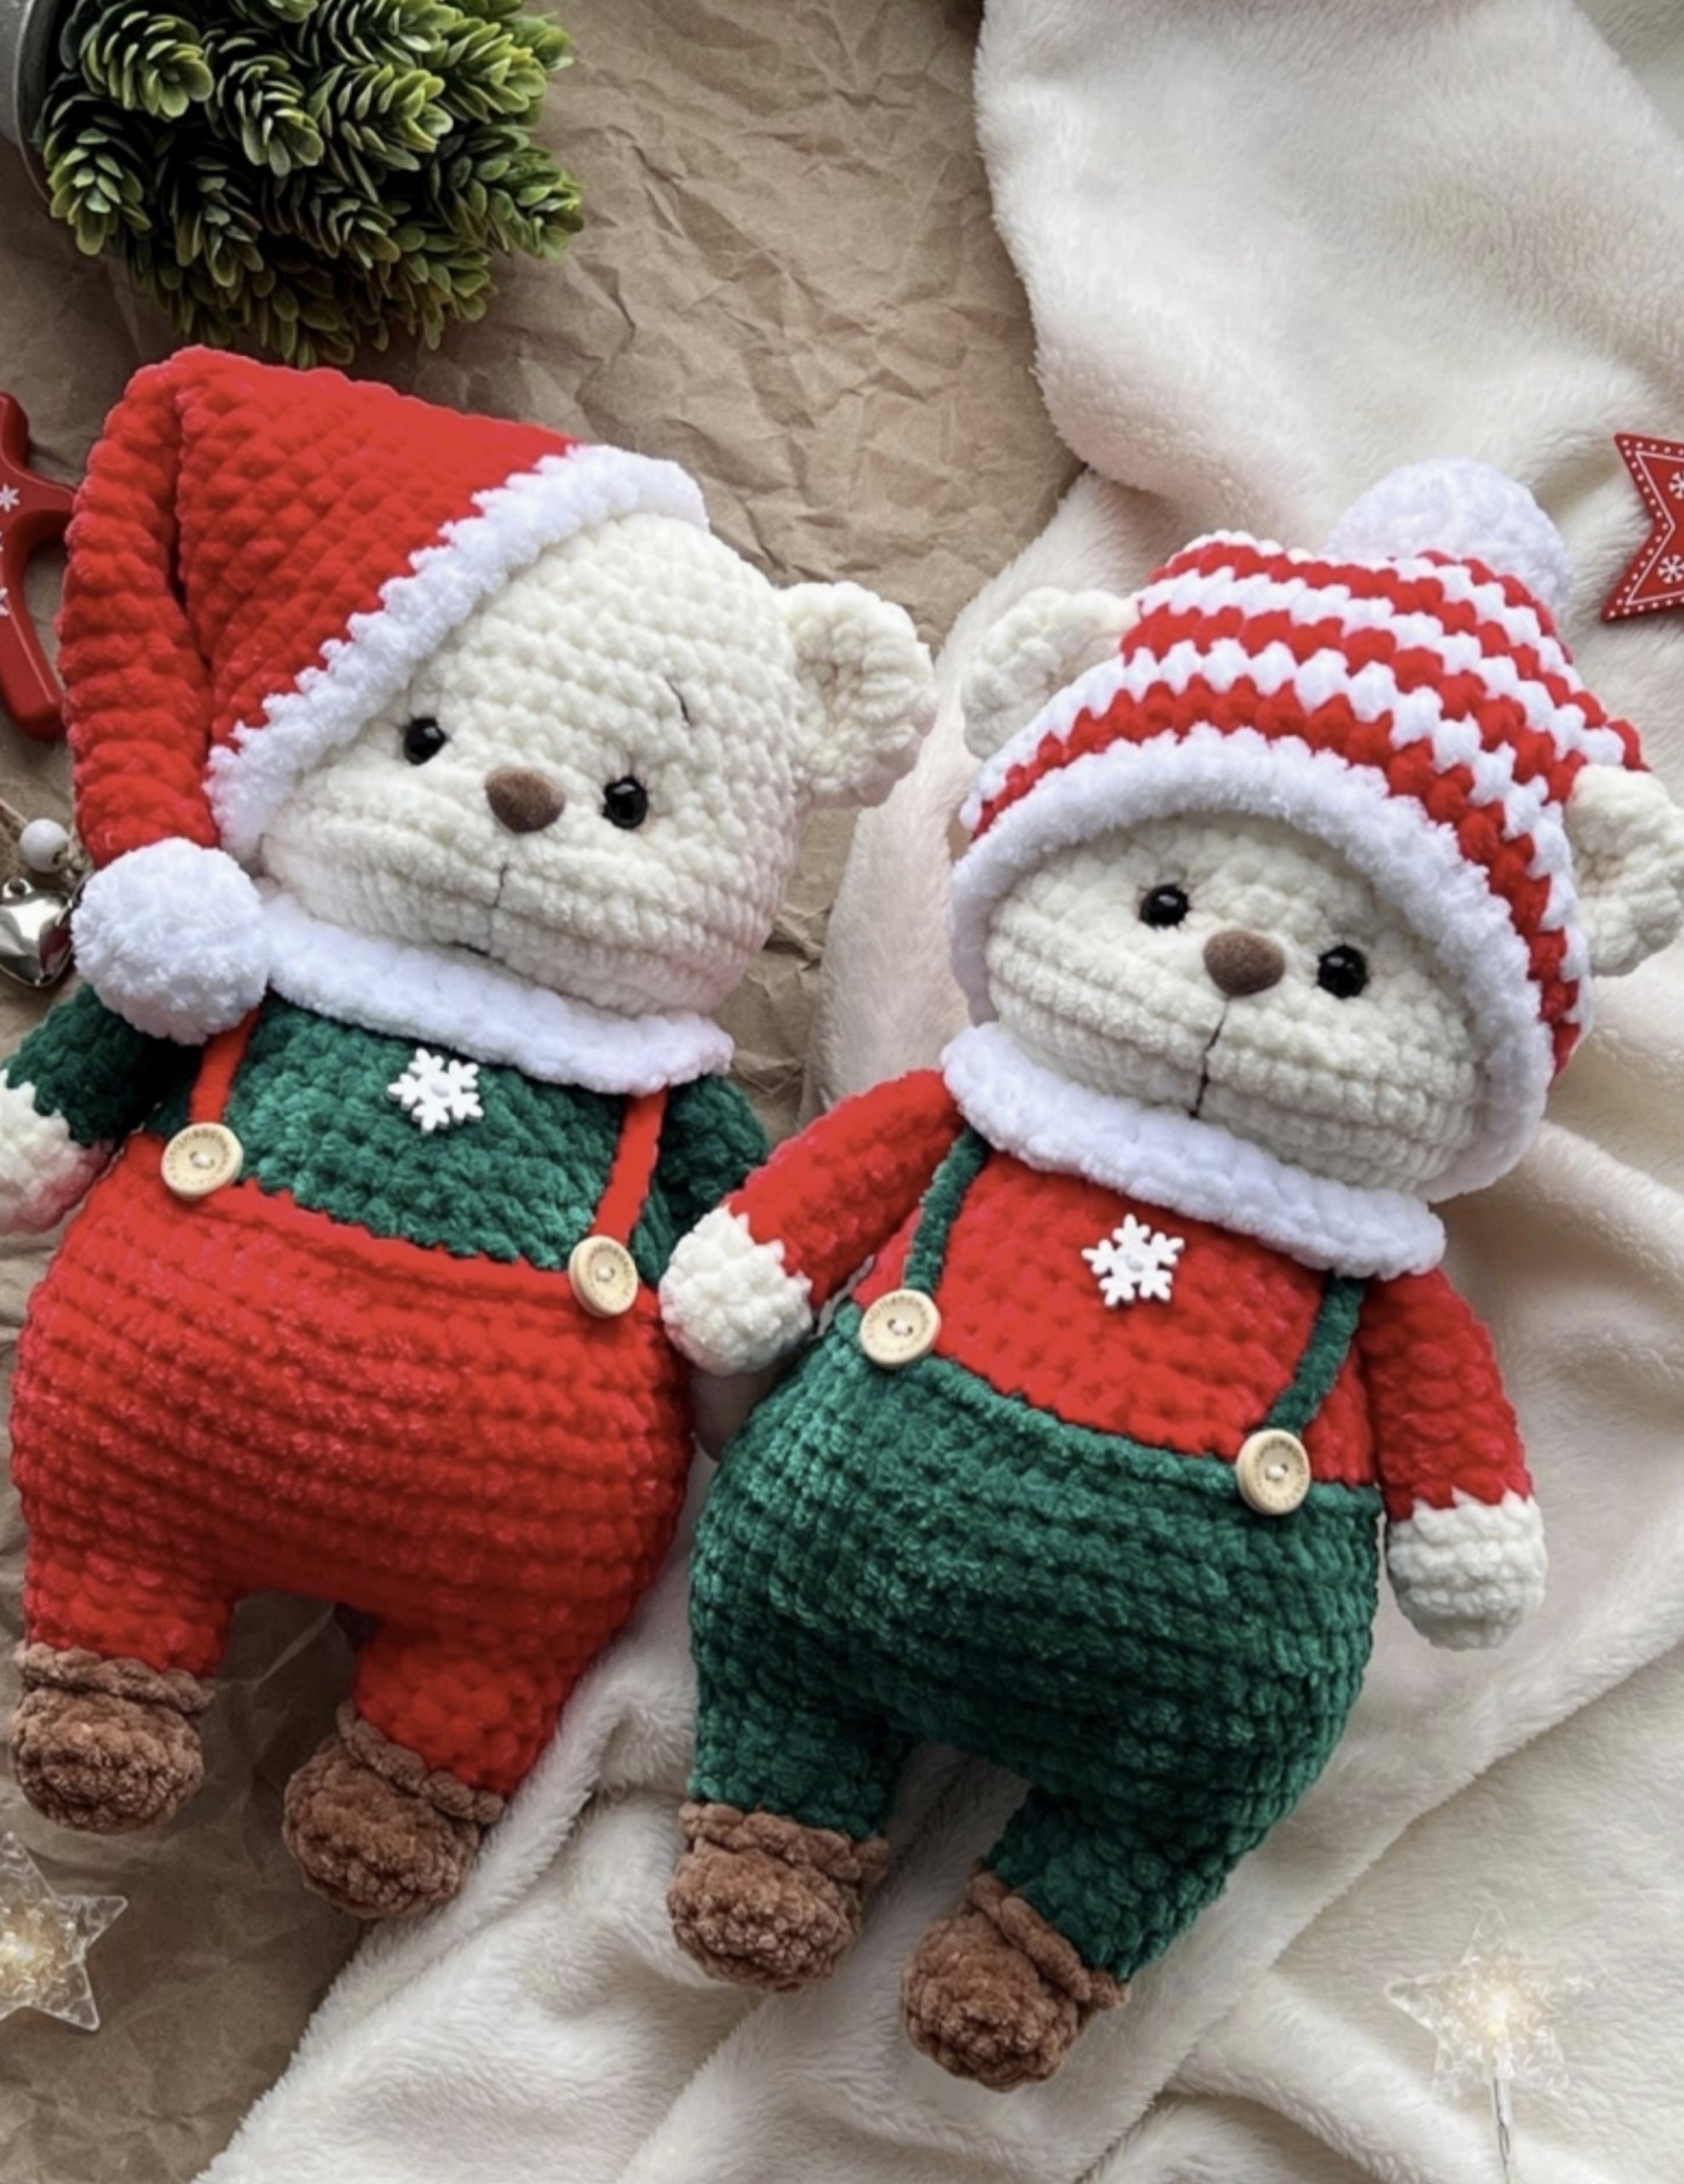
Get ready to bring some holiday magic into your home with this adorable, cozy Christmas Teddy Bear! This project is the perfect festive companion, whether you are looking to create a unique handmade gift for a loved one or simply want to add a touch of seasonal charm to your own decor. This little bear is dressed in a classic red and green holiday outfit, complete with a tiny hat and a warm scarf, making it a standout piece for any Christmas collection.
This pattern is designed to be beginner-friendly, utilizing standard amigurumi techniques. If you have a basic grasp of crochet, you will find this tutorial straightforward and incredibly rewarding. By the end of this project, you will have a soft, squishy little bear measuring approximately 10 inches tall.
Materials & Abbreviations
Materials Needed
- Plush Yarn: For that ultra-soft feel, use a velvet or chenille-style plush yarn.
- Main Color: Off-white or Milky (approx. 3-4 oz)
- Accent Colors: Emerald Green (for the sweater), Bright Red (for the pants and hat), and Dark Brown (for the boots and nose).
- Trim Color: Pure White (for the hat trim and pompom).
- Embroidery Yarn: A small amount of dark brown yarn for facial details like eyebrows and the snout line.
- Crochet Hook: 4mm (US size G/6).
- Stuffing: Approximately 7 oz (200g) of polyester fiberfill.
- Safety Eyes: 10mm safety eyes.
- Nose: A small plastic nose (approx. 0.5 inches or 14x11mm).
- Buttons: Two small snowflake-shaped buttons for the suspenders and one decorative button for the chest.
- Other Tools: A large-eye tapestry needle for assembly, a stitch marker, and scissors.
US Crochet Abbreviations
All measurements are provided in US terms. Unless otherwise stated, work in continuous rounds.
- MR: Magic Ring
- CH: Chain
- SC: Single Crochet
- HDC: Half Double Crochet
- DC: Double Crochet
- SL ST: Slip Stitch
- INC: Increase (2 SC in the same stitch)
- DEC: Decrease (sc 2 together)
- CH-1: Chain 1 (used as a turning chain)
- ST(s): Stitch(es)
Step-by-Step Instructions
The Arms (Make 2)
Start with the Main Color (Off-white).
- Rnd 1: 5 SC in a MR (5)
- Rnd 2: INC in each st around (10)
- Rnd 3-4: SC in each st around (10)
Switch to Emerald Green.
- Rnd 5: DEC, 8 SC (9)
- Rnd 6-12: SC in each st around (9)
Stuff the arm lightly (about 2/3 full). Fold the arm in half and SC through both sides for 4 stitches to close it. Fasten off.
The Legs and Pants
Start with Dark Brown.
Right Leg:
- Rnd 1: CH 4.
- Rnd 2: Starting in the 2nd CH from hook: INC, 1 SC, 3 SC in the last CH, then working on the other side of the chain: 2 SC (8)
- Rnd 3: 2 INC, 1 SC, 3 INC, 1 SC, 1 INC (14)
- Rnd 4: SC in each st around (14)
Switch to Bright Red.
- Rnd 5: 3 SC, 4 DEC, 3 SC (10)
- Rnd 6: SC in each st around (10)
- Rnd 7: Working in back loops only: 2 SC, 3 INC, 1 SC, 3 INC, 1 SC, 1 INC (13)
- Rnd 8-9: SC in each st around (13)
To join the legs: After Rnd 9, do not fasten off. To move to the inner thigh, work 5 SC along the side of the leg. Fasten off.
Left Leg: Repeat the steps for the Right Leg, but at the end of the red section, work 11 SC along the side instead of 5 to ensure they join correctly into the body.
Joining the Legs:
- Rnd 10: 13 SC along the right leg, 5 SC across the chain, 13 SC along the left leg, 5 SC across the other side of the chain (36)
- Rnd 11: (4 SC, INC, 1 SC, INC, 1 SC, INC) x 4 (48)
- Rnd 12: (7 SC, INC) x 6 (54)
- Rnd 13-16: SC in each st around (54)
- Rnd 17: (7 SC, DEC) x 6 (48)
- Rnd 18: SC in each st around (48). Stuff the legs and bottom firmly!
- Rnd 19: (6 SC, DEC) x 6 (42)
The Body
We will now create the sweater section. Switch to Emerald Green.
- Rnd 20: SC in each st around (42)
- Rnd 21: (5 SC, DEC) x 6 (36)
Switch back to Bright Red. Working in back loops only:
- Rnd 22: SC in each st around (36)
- Rnd 23: (4 SC, DEC) x 6 (30)
- Rnd 24: SC in each st around (30)
- Rnd 25: (3 SC, DEC) x 6 (24)
- Rnd 26: SC in each st around (24). Stuff the body firmly!
Attaching the Arms:
- Rnd 27: 6 SC, attach the first arm with 4 SC, 8 SC, attach the second arm with 4 SC, 2 SC (24)
- Rnd 28: (2 SC, DEC) x 6 (18)
The Head
Switch to the Main Color (Off-white).
- Rnd 29: INC in each st around (36)
- Rnd 30: (5 SC, INC) x 6 (42)
- Rnd 31: (6 SC, INC) x 6 (48)
- Rnd 32-34: SC in each st around (48)
- Rnd 35: (6 SC, DEC) x 6 (42)
- Rnd 36-39: SC in each st around (42)
Placement: Insert the 10mm safety eyes between rounds 35 and 36, about 5 or 6 stitches apart. Insert the nose between rounds 34 and 35.
Note: Stuff the neck area well before proceeding to the top of the head.
- Rnd 40: (5 SC, DEC) x 6 (36)
- Rnd 41: (4 SC, DEC) x 6 (30)
- Rnd 42: (3 SC, DEC) x 6 (24)
- Rnd 43: (2 SC, DEC) x 6 (18)
- Rnd 44: (1 SC, DEC) x 6 (12)
- Rnd 45: 6 DEC (6)
Fasten off and close the remaining hole using a tapestry needle.
Accessories
The Santa Hat
Work in stripes of Red and White using HDC.
- Foundation: CH 40 and join into a circle.
- Rnd 1 (Red): 2 CH-1, 39 HDC (40)
- Rnd 2 (White): 2 CH-1, 39 HDC (40)
- Rnd 3 (Red – creating ear holes): 2 CH-1, 9 HDC, CH 5, skip 5 sts, 11 HDC, CH 5, skip 5 sts, 9 HDC (40)
- Rnd 4 (White): 2 CH-1, 9 HDC, 5 HDC in the CH-5 space, 11 HDC, 5 HDC in the CH-5 space, 9 HDC (40)
- Rnd 5 (Red): 2 CH-1, 39 HDC (40)
- Rnd 6 (White): 2 CH-1, 39 HDC (40)
- Rnd 7-8 (Red): 2 CH-1, 39 HDC (40)
- Rnd 9 (Red): Work HDC decreases around to taper the top.
Finish with a small White Pompom (6 SC in MR, INC, (1 SC, INC)x6, 2 rounds of SC, then decrease) and sew to the top of the hat.
The Scarf (Snood)
- CH 30.
- Work 1 round of DC in each chain.
- Leave a 8-inch tail to tie around the bear’s neck.
Ears & Tail
- Ears (Make 2): 7 SC in MR, INC in each st (14), 2 rounds of 14 SC.
- Tail: 6 SC in MR, INC in each st (12), 1 round of 12 SC, then 6 DEC.
Finishing
Assembly
- Ears: Sew the ears onto the head, starting approximately 4 rounds down from the top.
- Tail: Sew the small tail to the back of the bear.
- Face Details: Use your embroidery yarn to stitch a small line on the snout and two subtle eyebrows.
- Clothing: Sew the suspender straps (using red yarn) onto the pants, and attach the decorative snowflake buttons.
- Scarf: Wrap the snood around the neck and sew it in place at the back.
Face Contouring (Pro-Tip)
To give your bear that professional “squished” face look, use a long piece of yarn. Thread it under the neck, then bring it up through the bottom corner of one eye, across to the bottom corner of the other eye, and back down under the neck. Pull slightly to tension the face, knot it, and hide the ends inside the head.
Tips for Success
- Tension is Key: When working with plush yarn, keep your tension even. If you crochet too loosely, the stuffing will show through the stitches.
- Mark Your Rounds: Always use a stitch marker. Because amigurumi is worked in continuous spirals, it is very easy to lose your place.
- Stuffing Technique: Stuff the head and body firmly, but be careful not to overstuff the limbs, or they may become difficult to sew on.
- Eye Placement: If your bear looks a bit “off,” try moving the eyes slightly. Even a few millimeters can change the expression!