How to Crochet a Spooky-Cute Black Cat: An Easy Amigurumi Pattern
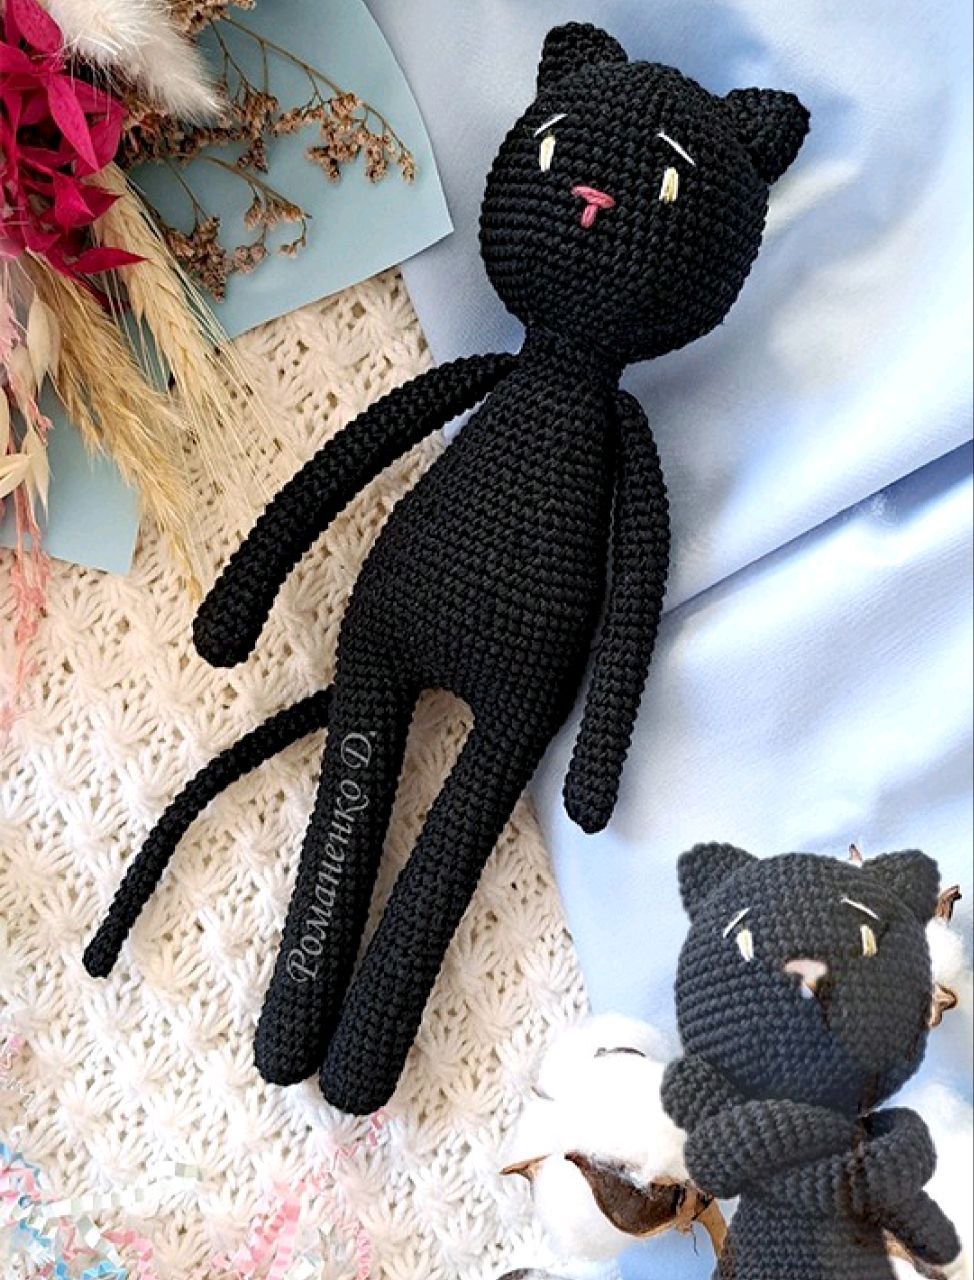
There is something undeniably charming about a little black cat. Whether you are looking to create a spooky companion for Halloween decor or a cute little desk friend for year-round enjoyment, this amigurumi black cat is the perfect project. This pattern is designed with a “spooky-cute” aesthetic in mind—featuring a slightly elongated, whimsical body and expressive, embroidered features that give it tons of personality.
If you are a beginner or looking for a quick weekend project, you have come to the right place. Amigurumi (the Japanese art of knitting or crocheting small, stuffed yarn creatures) is a wonderful way to practice your tension and stitch consistency. This cat is worked in continuous rounds, which helps keep those stitches tight and prevents the stuffing from peeking through. Grab your favorite black yarn, and let’s get started on this adorable feline friend!
Materials & Abbreviations
Before you pick up your hook, ensure you have all your supplies ready. Because this is a small project, you won’t need much yarn, but choosing the right weight will make a huge difference in the finished look.
Materials Needed
- Yarn: Medium weight (worsted weight) acrylic or cotton yarn in black. You will also need small amounts of white and pink embroidery thread (or scrap yarn) for the facial details.
- Crochet Hook: A 3.5mm (E) or 4.0mm (G) hook is recommended. Using a slightly smaller hook than the yarn suggests helps ensure the stitches are tight enough to hold the stuffing.
- Stuffing: Polyester fiberfill is the easiest to work with. The original design mentions using wood shavings/sawdust for the arms to give them a specific weight, but standard fiberfill works perfectly for a soft, squishy feel.
- Tapestry Needle: A blunt-tipped needle for weaving in ends and sewing the pieces together.
- Stitch Markers: Highly recommended to mark the beginning of each round.
- Scissors: For cutting your yarn.
Abbreviations (US Terms)
This pattern uses standard US crochet terminology. Please ensure you are following US instructions to avoid confusion with stitch heights!
- MR: Magic Ring (or Magic Circle)
- sc: Single crochet
- inc: Increase (2 single crochets in the same stitch)
- dec: Decrease (Invisible decrease is preferred for amigurumi)
- ch: Chain
- sl st: Slip stitch
- st(s): Stitch(es)
Step-by-Step Instructions
The Head
The head is worked in a continuous spiral. Do not join at the end of each round unless specified.
- R1: 6 sc in a MR (6)
- R2: 6 inc (12)
- R3: (inc, 1 sc) x 6 (18)
- R4: (inc, 2 sc) x 6 (24)
- R5: (inc, 3 sc) x 6 (30)
- R6: (inc, 4 sc) x 6 (36)
- R7: (inc, 5 sc) x 6 (42)
- R8: (inc, 6 sc) x 6 (48)
- R9: (inc, 7 sc) x 6 (54)
- R10-21: 54 sc (54)
- R22: (dec, 7 sc) x 6 (48)
- R23: (dec, 6 sc) x 6 (42)
- R24: (dec, 5 sc) x 6 (36)
- R25: (dec, 4 sc) x 6 (30)
- Start stuffing the head firmly with fiberfill.
- R26: (dec, 3 sc) x 6 (24)
- R27: (dec, 2 sc) x 6 (18)
- R28: (dec, 1 sc) x 6 (12)
- R29: 6 dec (6)
Fasten off, leaving a long tail for sewing the head to the body later.
The Ears (Make 2)
The ears are worked in a flat manner. Leave a long tail for sewing.
- R1: 6 sc in a MR (6)
- R2: (1 sc, inc) x 3 (9)
- R3: (2 sc, inc) x 3 (12)
- R4: (3 sc, inc) x 3 (15)
- R5: (4 sc, inc) x 3 (18)
The Arms (Make 2)
These arms are long and thin. You can choose to leave them unstuffed for a floppier look, or lightly stuff them with fiberfill.
- R1: 6 sc in a MR (6)
- R2: 1 sc, 5 inc (11)
- R3-32: 11 sc (11)
- R33: 5 dec, sl st (11)
Fasten off and leave a long tail for sewing.
The Tail
- R1: 6 sc in a MR (6)
- R2-39: 6 sc (6)
- R40: Work a triple decrease (sc 3 stitches together) (3)
Fasten off and leave a long tail for sewing.
The Body and Legs
The body is worked starting from the bottom legs and moving upward to create a single cohesive piece.
- R1: 6 sc in a MR (6)
- R2: 6 inc (12)
- R3: (inc, 3 sc) x 3 (15)
- R4-33: 15 sc (15)
- Stuff the legs as you work.
Joining the legs: After R33, do not fasten off the first leg. Crochet the second leg as instructed above, but when you reach the end of the second leg, join it to the first leg using a chain.
- R34: 15 sc along the first leg, 4 sc along the chain bridge, 15 sc along the second leg, 4 sc along the other side of the chain bridge (38)
- R35: (inc, 13 sc, inc, 4 sc) x 2 (42)
- R36: (inc, 6 sc) x 6 (48)
- R37-47: 48 sc (48)
- R48: (dec, 6 sc) x 6 (42)
- R49-51: 42 sc (42)
- R52: (dec, 5 sc) x 6 (36)
- R53-55: 36 sc (36)
- R56: (dec, 4 sc) x 6 (30)
- R57-59: 30 sc (30)
- R60: (dec, 3 sc) x 6 (24)
Attaching the Arms
Now, we will attach the arms to the body to finish the main structure.
- R61: 4 sc, then (5 sc and work around the arm), 7 sc, then (5 sc and work around the arm), 3 sc (24)
- R62-63: 24 sc (24)
Fasten off, leaving a long tail for sewing the body to the head.
Finishing
Now comes the most important part: bringing your cat to life! This is where the character truly emerges.
Assembly
- Attach the Head: Use your tapestry needle and the long tail from the head to sew the head onto the top of the body. Ensure it is centered and secure.
- Attach the Ears: Sew the ears to the top of the head. You can angle them slightly outward or upward depending on the look you prefer.
- Attach the Tail: Sew the tail to the back of the body.
Facial Details
To achieve the look in the photo, use embroidery thread or thin scrap yarn:
- Eyes: Embroider two simple, slightly curved lines for eyes. Using white or light yellow thread can create a “glowing” effect.
- Nose/Mouth: Embroider a small, pink “v” or heart shape for the nose to add a touch of cuteness to the spooky aesthetic.
Tips for Success
To ensure your amigurumi cat looks professional and polished, keep these pro-tips in mind:
Use the Invisible Decrease
Standard decreases can sometimes leave small gaps in your stitches. For amigurumi, I highly recommend the “invisible decrease.” To do this, instead of inserting your hook into the two stitches, insert it only into the front loops of the next two stitches, then yarn over and pull through. This creates a much smoother, tighter appearance.
Maintain Even Tension
Since we are working with black yarn, it can be harder to see your stitches. Take your time! If your tension is too loose, the stuffing will show through. If it’s too tight, your hands might tire quickly. Try to maintain a consistent pull on the yarn throughout the entire project.
Stuffing Strategy
When stuffing the head and body, work in small clumps of fiberfill. This prevents large, hard lumps from forming. For the body, make sure to stuff the bottom leg area firmly so the cat can sit upright without tipping over.
Dealing with Black Yarn
Black yarn is notoriously difficult to see. If you find yourself struggling to find your stitches, try using a lighter-colored stitch marker or even a small piece of chalk to mark your starting point. Working in a well-lit area is also essential when working with dark colors!