Adorable Crochet Sheep Pattern: A Step-by-Step Amigurumi Tutorial
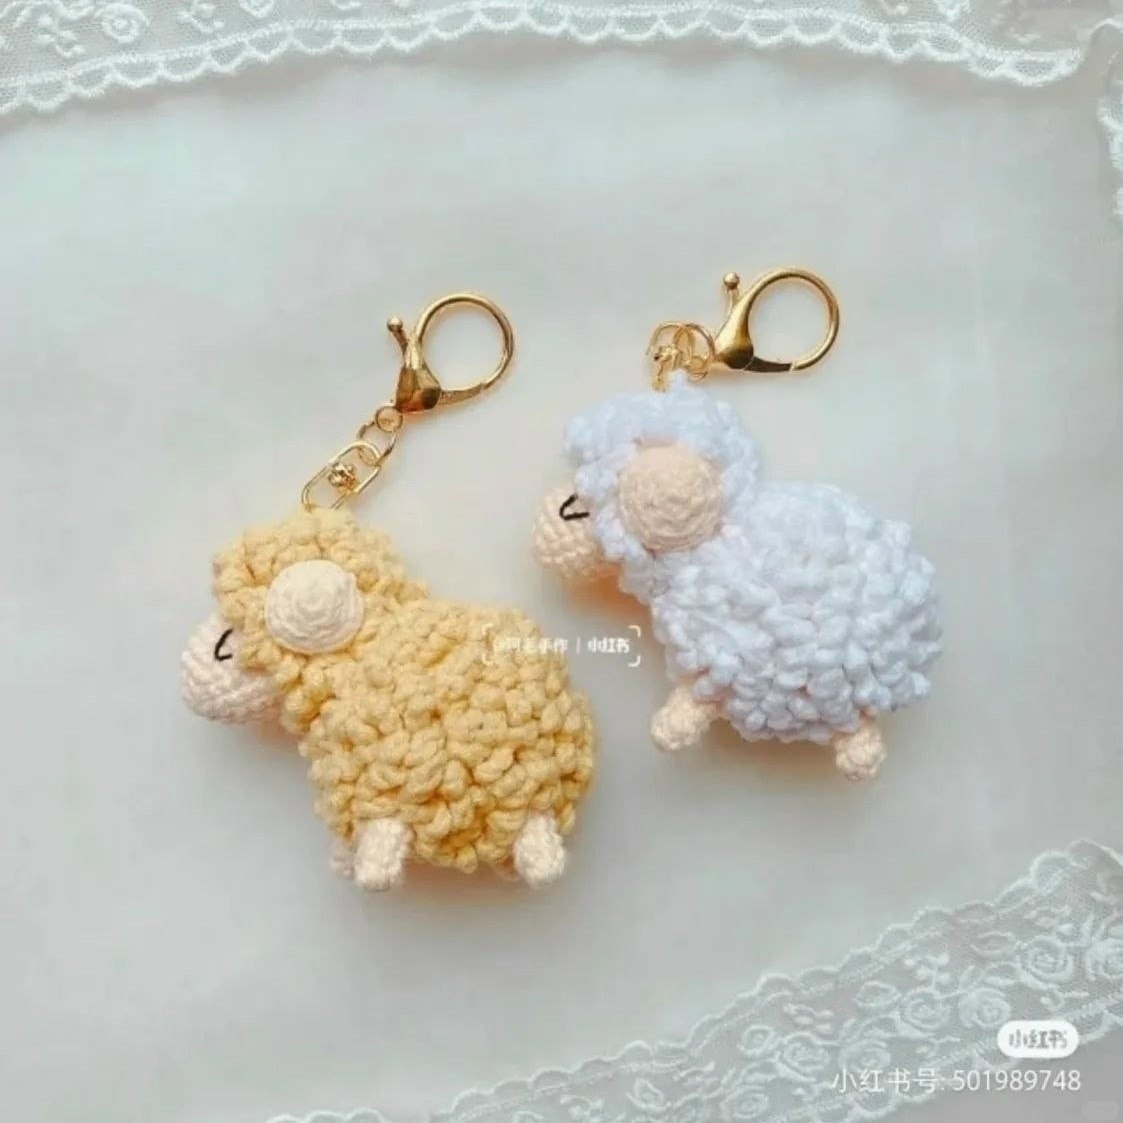
Are you looking for a quick, sweet, and absolutely darling crochet project? Look no further! This adorable little sheep is the perfect project for anyone looking to dive into the world of amigurumi. Whether you want to make a cute keychain to hang on your bag, a tiny desk companion, or a sweet gift for a friend, this little lamb is sure to bring a smile to anyone’s face.
This pattern is designed to be beginner-friendly, focusing on basic stitches and simple shapes. The most exciting part of this project is the texture! By using a few clever techniques, we will create a “fluffy” wool effect that makes your sheep look incredibly soft and cuddly. Grab your hook and some yarn, and let’s get started on this tiny woolly friend!
Materials & Tools
To complete this project, you will need the following supplies. Since this is a small amigurumi, we recommend using a finer yarn to ensure the stitches are tight and the stuffing doesn’t peek through.
- Yarn: Medium weight cotton or acrylic yarn in two colors:
- A “skin tone” or light tan color (for the face and legs).
- A bright white color (for the fluffy body).
- Crochet Hook: A hook appropriate for your yarn weight (typically 2.5mm to 3.5mm).
- Fiberfill: A small amount of polyester stuffing to make your sheep plump.
- Safety Eyes: 6mm or 8mm black safety eyes (or you can embroider eyes with black thread).
- Tapestry Needle: A blunt-tipped needle for sewing the pieces together.
- Scissors: For trimming your yarn.
- Keychain Ring: An optional lobster clasp or split ring if you want to make it a keychain.
Abbreviations
This pattern uses standard US crochet terms. Please ensure you are using the US versions of these stitches!
- MR: Magic Ring
- sc: single crochet
- inc: increase (2 sc in the same stitch)
- dec: decrease (sc 2 stitches together)
- BLO: back loop only
- FLO: front loop only
- st(s): stitch(es)
- ch: chain
Step-by-Step Instructions
The Head
We begin with the face using the skin tone yarn. This will form the snout and the base of the head.
R1: 6 sc in a Magic Ring (6)
R2: 6 inc (12)
R3: (1 sc, inc) repeat 6 times (18)
R4–6: 18 sc (18)
R7: (2 sc, inc) repeat 6 times (24)
R8: Change to white yarn, 24 sc (24)
R9: 24 sc in BLO (24)
R10: (3 sc, inc) repeat 6 times (30)
R11: 30 sc in BLO (30)
R12: 30 sc (30)
R13: 30 sc in BLO (30)
R14: (3 sc, dec) repeat 6 times (24)
R15: (2 sc, dec) repeat 6 times in BLO (18)
R16: (1 sc, dec) repeat 6 times (12)
R17: 12 sc in BLO, then 6 dec (6)
Note: Stuff the head firmly as you work.
The Ears (Make 2)
Use the skin tone/tan yarn for the ears.
R1: 6 sc in a Magic Ring (6)
R2: 6 inc in BLO (12)
R3: (1 sc, inc) repeat 6 times in BLO (18)
R4: 18 sc in BLO.
Fold the ear flat and sew the edges together to create a leaf shape, leaving the bottom open for sewing to the head.
The Legs (Make 4)
Use the skin tone/tan yarn for all four legs.
R1: 6 sc in a Magic Ring (6)
R2–5: 6 sc (6)
Fasten off, leaving a long tail for sewing. Stuff lightly.
The Body
Use the white yarn for the body to create the main woolly mass.
R1: 6 sc in a Magic Ring (6)
R2: 6 inc (12)
R3: (1 sc, inc) repeat 6 times in BLO (18)
R4: (2 sc, inc) repeat 6 times (24)
R5: (3 sc, inc) repeat 6 times in BLO (30)
R6: 30 sc (30)
R7: 30 sc in BLO (30)
R8: (4 sc, inc) repeat 6 times (36)
R9: 36 sc in BLO (36)
R10: 36 sc (36)
R11: 36 sc in BLO (36)
R12: 36 sc (36)
R13: 36 sc in BLO (36)
R14: (4 sc, dec) repeat 6 times (30)
R15: 30 sc in BLO (30)
R16: (3 sc, dec) repeat 6 times (24)
R17: (2 sc, dec) repeat 6 times in BLO (18)
R18: (1 sc, inc) repeat 6 times (12)
R19: 12 sc in BLO, then 6 inc (18)
Stuff the body firmly.
Finishing & Assembly
This is where your little sheep comes to life! Precision during assembly makes a huge difference in how professional your amigurumi looks.
Adding the “Wool” Texture
To get that curly, sheep-like wool effect, follow this special technique on the head and body:
- Insert your hook into the front loop of the designated row (Row 9 of the head or Row 3 of the body).
- Pull up a loop of yarn.
- Instead of continuing with a stitch, immediately crochet 5 chains (ch 5).
- Repeat this around the designated area to create small, curly loops of “wool.”
Sewing the Pieces Together
- The Head: Attach the head to the body by sewing the head between rows 11–13 to the body rows 14–16.
- The Ears: Sew the ears onto the sides of the head between rows 9 and 14. Don’t forget to add a little stuffing to the ears first!
- The Front Legs: Sew these to the bottom of the body between rows 13 and 16. Leave a space of about 4–5 stitches between them.
- The Back Legs: Sew these to the bottom of the body between rows 5 and 8. Leave a space of about 4–5 stitches between them.
- The Face:
- Eyes: Place your safety eyes (or embroider them) on the head at row 4, approximately 8 stitches apart.
- Nose: Embroider a small nose using black thread between rows 6 and 8.
Tips for Success
Crocheting amigurumi is a wonderful way to relax, but it can be tricky at first. Here are a few tips to help you achieve the best results:
- Count Your Stitches: It is very easy to accidentally add or lose a stitch, especially when working in rounds. Always count your stitches at the end of every row to ensure your shape remains consistent.
- Tension is Key: Try to keep your tension even. If you crochet too loosely, the stuffing will show through the holes. If you crochet too tightly, it might be hard to insert your hook.
- Use Stitch Markers: When working in rounds, it can be hard to see where a row starts. Use a stitch marker (or even a scrap piece of contrasting yarn) to mark the first stitch of every round.
- Working in BLO/FLO: Remember that working in the Back Loop Only (BLO) creates a ridge. This is what gives our sheep its structured, bumpy look. Be careful to identify the correct loop!
- Customization: Don’t be afraid to get creative! You can use different colors for the body to make a “rainbow sheep” or add a tiny pink blush to the cheeks using a little bit of makeup or pink yarn.
Happy crocheting! We hope you enjoy making this tiny, fluffy little sheep as much as we enjoyed sharing the pattern with you.