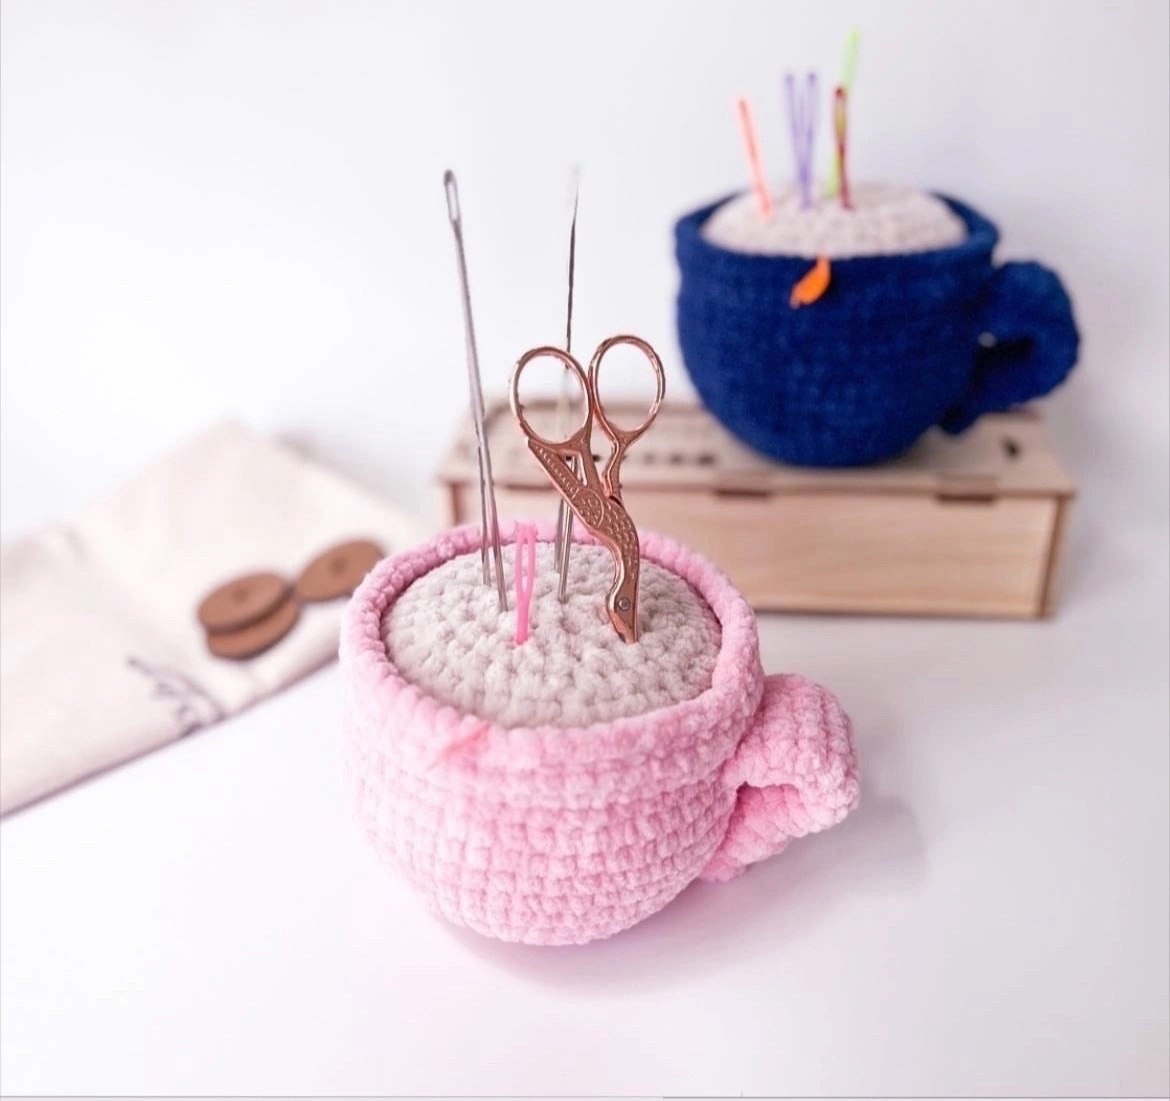
DIY Crochet Coffee Cup Pincushion: A Cute and Easy Amigurumi Pattern
Are you looking for a cozy, practical, and adorable project to add to your crochet collection? This crochet coffee cup pincushion is the perfect solution. Whether you are looking to declutter your sewing space or want to create a sweet, handmade gift for a crafting friend, this little amigurumi cup is a winner. It combines the trendy aesthetic of “chunky” plush yarn with a functional design that keeps your needles and pins organized.
This pattern is designed with beginners in mind. While it uses standard amigurumi techniques, the result looks professional and high-end. Once finished, this little cup becomes a sturdy holder for your sewing essentials, looking just like a miniature latte or cafe au lait sitting on your desk.
Materials & Abbreviations
Before you pick up your hook, make sure you have all your supplies ready. Because this pattern uses plush yarn, it works up very quickly and feels incredibly soft to the touch.
Materials Needed
- Plush Yarn: You will need a main color (enough for slightly more than half a skein) and a small amount of a secondary color to represent the “coffee” or “foam” inside the cup. Velvet or chenille-style yarns work best for this look.
- Crochet Hook: A 4.5 mm (US size 7) hook is recommended to ensure your stitches are tight enough to hold the stuffing.
- Fiberfill Stuffing: To give your cup its shape.
- Cardboard: A small, sturdy circle of cardboard approximately 2 to 2.5 inches in diameter. This will be inserted into the bottom to provide a flat, stable base.
- Tapestry Needle: For sewing the handle and weaving in ends.
- Stitch Markers: Highly recommended to keep track of your rounds.
Abbreviations (US Terms)
Please note that all instructions are written using US crochet terminology:
- MR: Magic Ring
- sc: Single crochet
- inc: Increase (2 sc in the same stitch)
- dec: Decrease (invisible decrease is preferred for amigurumi)
- BLO: Back Loops Only
- FLO: Front Loops Only
- st(s): Stitch(es)
Step-by-Step Instructions
Follow these steps carefully. For amigurumi, try to maintain even tension so there are no visible gaps between your stitches.
Part 1: The Cup Body
Start with your Main Color.
- Round 1: Create a Magic Ring and work 8 sc into it. (8)
- Round 2: 8 inc. (16)
- Round 3: (1 sc, 1 inc) repeat 8 times. (24)
- Round 4: (2 sc, 1 inc) repeat 8 times. (32)
- Round 5: 32 sc in BLO (Back Loops Only). This helps create the base. (32)
- Round 6: (2 sc, 1 inc) repeat 10 times, then 2 sc. (42)
- Rounds 7-8: 42 sc. (42)
- Round 9: (3 sc, 1 inc) repeat 10 times, then 2 sc. (52)
- Rounds 10-15: 52 sc. (52)
Creating the Rim Height
To give the cup its beautiful, tall shape, we need to work a few extra rows before we start the decrease section. At the end of Round 15, instead of immediately changing color, you will work 3 additional rounds using only the Front Loops (FLO) of the previous row. This builds up the “wall” of the cup.
Part 2: The “Coffee” Section
Now, switch to your Secondary Color.
- Round 16: 52 sc in BLO. (52)
- Round 17: (4 sc, 1 dec) repeat 8 times, then 4 sc. (44)
- Round 18: (3 sc, 1 dec) repeat 8 times, then 4 sc. (36)
- Round 19: (2 sc, 1 dec) repeat 9 times. (27)
Important Step: Before finishing the top, insert your cardboard circle into the bottom of the cup. Once the cardboard is in place, begin stuffing the cup with fiberfill. Be careful not to overstuff the top “coffee” portion; you want it to sit nestled inside the cup rather than bulging out the top.
- Round 20: (1 sc, 1 dec) repeat 9 times. (18)
- Round 21: 13 dec, working through the Front Loops Only (FLO). This ensures there are no holes at the top opening. Once finished, fasten off and pull the thread tight to close.
Part 3: The Handle
Use your Main Color for the handle.
- Round 1: Create a Magic Ring and work 6 sc into it. (6)
- Rounds 2-3: 6 sc. (6)
- Round 4: 6 inc. (12)
- Rounds 5-15: 12 sc. (12)
Once the handle is finished, do not fasten off completely. Instead, fold the long tube in half. Crochet 6 sc through both layers of the tube to close it up. Leave a long tail of yarn attached for sewing the handle to the cup later.
Finishing & Assembly
Assembly is the most important part to ensure your coffee cup looks sturdy and sits correctly. Follow these steps to sew the handle on:
Attaching the Handle
- Positioning: Take your handle and place it “upside down” (with the narrow end toward the top) against the cup. Aim for the penultimate row (the row just before you changed colors for the coffee section).
- First Attachment: Sew the top of the handle to the cup.
- The Twist: Give the handle a slight twist to create a natural curve, then sew the front side of the handle to the very last row of the “coffee” section (the secondary color part).
- The Base: Pull your sewing thread through to the area where the bottom of the handle will sit. Position the handle so it is comfortable to hold.
- Final Stitching: Secure the bottom of the handle by sewing through all three rows (approximately 6 sc worth of space) at the base. Finally, weave your yarn tail into the body of the cup and hide the end.
Tips for Success
To make your coffee cup pincushion look its absolute best, keep these professional tips in mind:
Work Tight Stitches
Since you are using this as a pincushion, the stuffing needs to stay contained. If you find your stitches are a bit loose, try using a slightly smaller hook than suggested. This prevents the pins from poking through the sides of the cup.
The Cardboard Secret
Don’t skip the cardboard! Amigurumi can sometimes become “wobbly” or round like a ball. The cardboard circle provides the structural integrity needed to make the cup sit flat on your desk, making it much more practical for use.
Managing Plush Yarn
Plush yarn can be a bit slippery and can hide your stitches easily. We highly recommend using stitch markers for every single round. If you struggle to see your stitches, use a metal crochet hook rather than plastic, as it often provides better definition in the loops.
Perfect Stuffing
When stuffing, use small clumps of fiberfill at a time. If you push one giant ball in, it can create lumps. For the “coffee” part of the pattern, remember to keep it slightly under-stuffed so the rim of the cup stays clean and defined.