Adorable Amigurumi Frog Crochet Pattern: A Step-by-Step Guide
Introduction
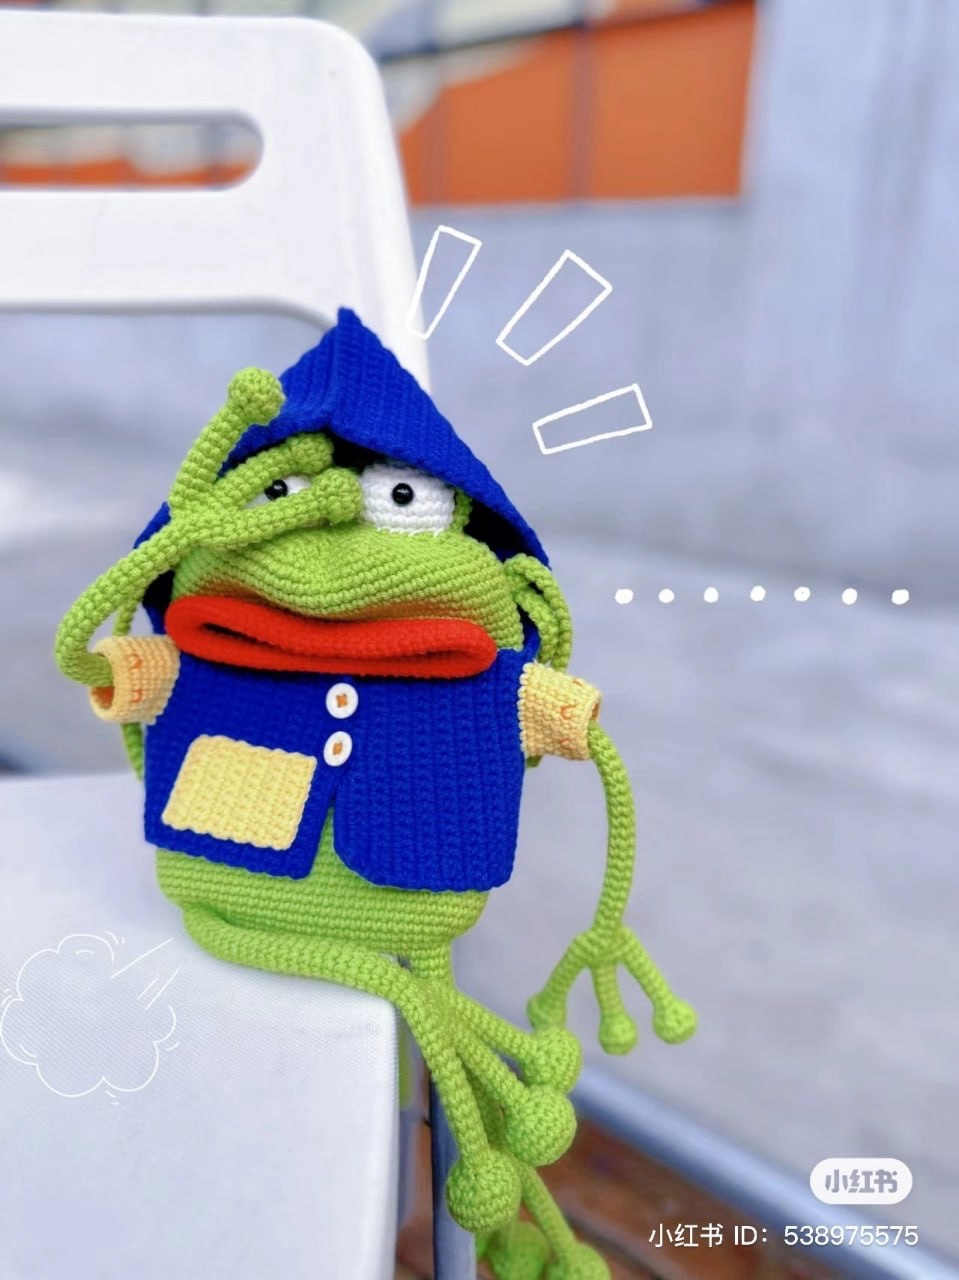
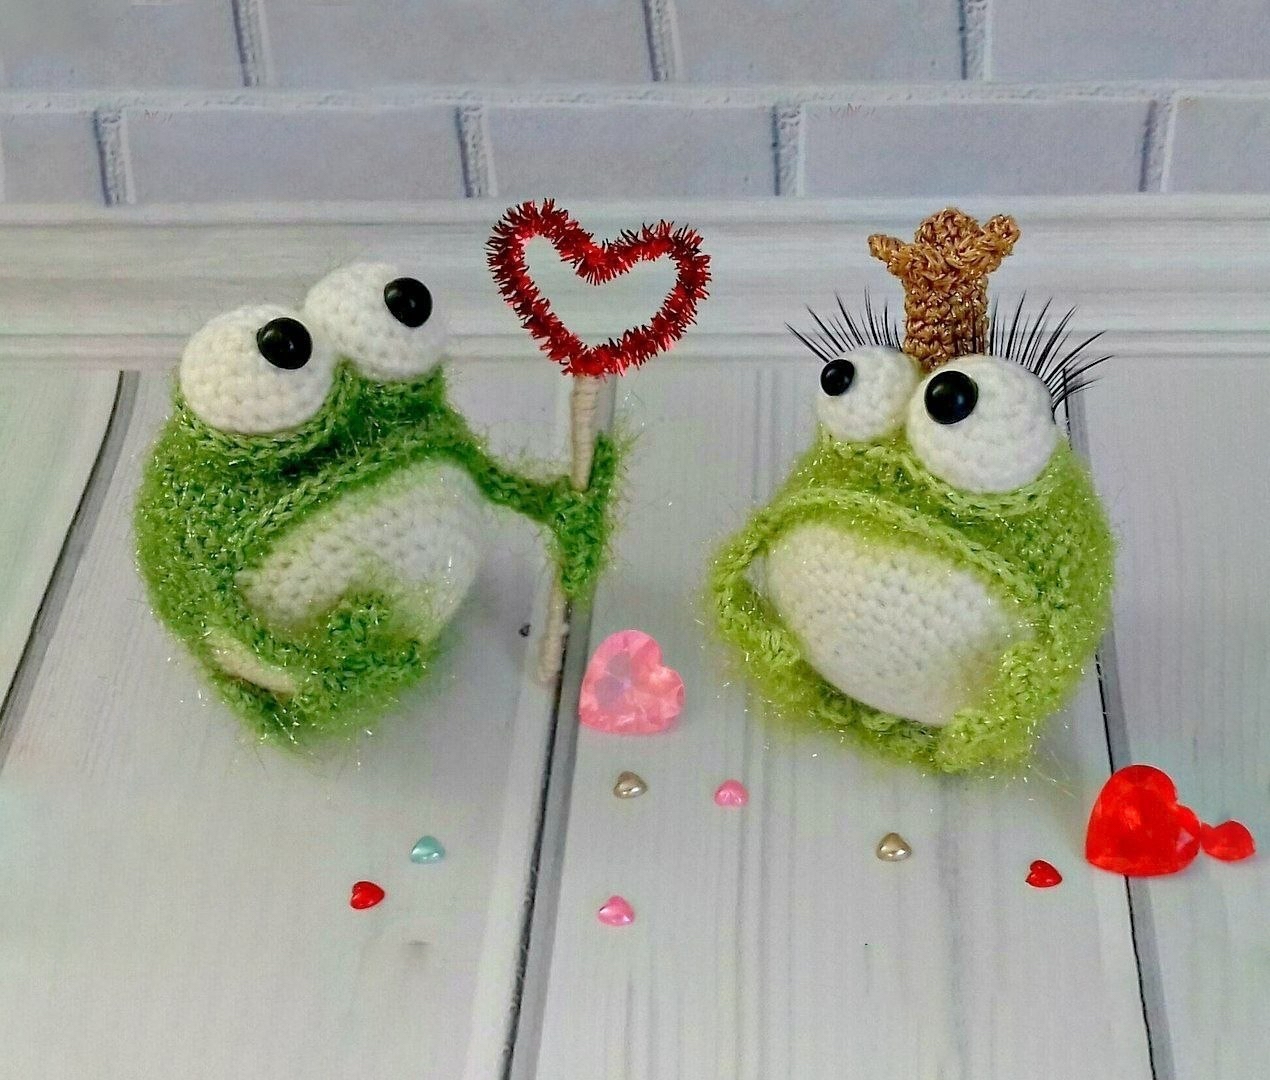
Are you looking for your next adorable crochet project? If you love all things “kawaii” and quirky, you are going to fall in love with this tiny, wide-eyed amigurumi frog! This little guy is designed to be incredibly expressive, with oversized eyes and a fuzzy, textured body that makes him look like a little forest sprite.
This pattern is perfect for intermediate beginners or seasoned crocheters looking for a quick, fun project. When finished, your frog will stand approximately 4 inches tall, making it the perfect size to sit on your desk, decorate a nursery, or serve as a unique handmade gift for a friend. Because we use a mix of textured and smooth yarns, you can customize his look to be as wild or as subtle as you like. Let’s grab our hooks and get started!
Materials & Abbreviations
Materials Needed
- Textured Yarn: A fuzzy or “eyelash” style yarn (approximately 2.6 yards per 50g ball). This will be used for the main body and limbs.
- Smooth Cotton Yarn: A standard weight cotton yarn in a contrasting color (like cream or white) for the belly and eyes (approximately 360 yards per 100g).
- Crochet Hook: 1.75 mm (or a size appropriate for your chosen yarn to ensure tight stitches).
- Stuffing: Polyfill or fiberfill.
- Eyes: 10-12 mm safety eyes, or large beads/half-pearls for a similar effect.
- Sewing Needle: A tapestry needle for assembly and weaving in ends.
- Decorations: Optional beads, sequins, bells, or small felt scraps for a tongue.
- Optional: A small pet slicker brush or the hook side of a piece of Velcro to brush out the yarn for extra fluffiness.
Crochet Abbreviations (US Terms)
Note: All instructions are worked in a continuous spiral. Please use a stitch marker to keep track of your rounds. Do not use turning chains.
- MR: Magic Ring
- ch: Chain
- sc: Single crochet
- hdc: Half double crochet
- dc: Double crochet
- sl st: Slip stitch
- inc: Increase (2 sc in one stitch)
- dec: Decrease (sc 2 stitches together)
- BLO: Back Loops Only
- FLO: Front Loops Only
Step-by-Step Instructions
The Body and Head
We will start with the textured yarn to create the main shape. This piece combines the head and body into one seamless unit.
Round 1: Create a Magic Ring and work 6 sc into it (6).
Round 2: (inc) in each stitch around (12).
Round 3: (1 sc, inc) repeat 6 times (18).
Round 4: (2 sc, inc) repeat 6 times (24).
Round 5: (3 sc, inc) repeat 6 times (30).
Round 6: (4 sc, inc) repeat 6 times (36).
Round 7: (5 sc, inc) repeat 6 times (42).
Round 8: (6 sc, inc) repeat 6 times (48).
Rounds 9-15: sc in each stitch around (7 rounds total of 48 sc).
Round 16 (The Mouth/Lip): This is a partial round worked in the Front Loops Only (FLO) to create the mouth shape. Work: 3 sc, 3 hdc, 4 dc, 3 hdc, 3 sc. Join with a sl st. Fasten off and hide the tail.
Switching to Smooth Yarn:
Attach your smooth cotton yarn to the Back Loops of the stitches from Round 16. Work 48 sc around the back loops.
Round 18: 48 sc.
Round 19: (6 sc, dec) repeat 6 times (42).
Round 20: (5 sc, dec) repeat 6 times (36).
Round 21: (4 sc, dec) repeat 6 times (30).
Round 22: (3 sc, dec) repeat 6 times (24).
Round 23: (2 sc, dec) repeat 6 times (18).
Stuff the piece firmly with fiberfill. If you want your frog to make noise, you can tuck a small squeaker inside at this stage!
Round 24: (1 sc, dec) repeat 6 times (12).
Round 25: (dec) repeat 6 times (6). Fasten off and weave in the end.
The Upper Arms (Make 2)
Using the textured yarn:
Chain 11. Starting in the 3rd chain from the hook, work a cluster stitch (a group of 2 or 3 dc in one stitch), then a sl st. In the next 6 chains, work: (in the 3rd chain from hook, work a cluster stitch, then sl st) repeat twice. Sl st in the remaining chains to finish the limb. Fasten off, leaving a long tail for sewing.
The Lower Legs (Make 2)
Using the textured yarn. Note: Do not stuff these pieces.
Round 1: MR, 6 sc (6).
Round 2: (1 sc, inc) repeat 3 times (9).
Round 3: 9 sc.
Round 4: (2 sc, inc) repeat 3 times (12).
Round 5: 12 sc.
Joining the legs: Fold the piece in half. You will now crochet through both halves to join them. Chain 5. In the 3rd chain from the hook, work a cluster stitch (2-3 dc), then a sl st. Work sc along the chain. In the next stitch, work 2 sc on the foot. In the next 6 chains, work: (in the 3rd chain from hook, work a cluster stitch, then sl st), then 2 sc along the chain, 2 sc on the foot, and 5 chains. In the 3rd chain from hook, work a cluster stitch, sl st, and sc along the remaining chain. Fasten off, leaving a long tail.
The Eyes
To give your frog its signature look, you will make two differently sized eyes using the smooth cotton yarn.
Small Eye
Round 1: MR, 6 sc (6).
Round 2: (inc) in each stitch (12).
Rounds 3-6: 12 sc (4 rounds total).
Round 7: (dec) repeat 6 times (6). Stuff firmly and close the hole.
Large Eye
Round 1: MR, 6 sc (6).
Round 2: (inc) in each stitch (12).
Round 3: (1 sc, inc) repeat 6 times (18).
Rounds 4-8: 18 sc (5 rounds total).
Round 9: (1 sc, dec) repeat 6 times (12).
Round 10: (dec) repeat 6 times (6). Stuff firmly and close the hole.
Optional Eyelids
If you want a more “sleepy” or dramatic look, you can crochet eyelids using the textured yarn.
Chain 25. Starting in the 2nd chain from the hook, work: 3 sc, 3 hdc, 10 dc, 4 hdc, and 4 sc. Fasten off and sew them just above the eyes.
Finishing
Assembly
- Place the Eyes: Sew the eyes onto the head, positioned just above the mouth (the lip area created in Round 16). Aim for roughly the 12th or 13th row of the body.
- Add Pupils: Glue your safety eyes or beads into the center of the crochet eye spheres to give them life. You can even add tiny eyelashes with thread!
- Attach Arms: Sew the upper arms to the body at Round 15.
- Attach Legs: Sew the lower legs to the bottom. Tip: Test the balance of your frog before sewing them permanently to ensure he sits upright!
Final Touches
Once assembled, you can customize your frog. Use scissors to trim any excess fuzz around the mouth area for a cleaner look. You can add a tiny tongue made from felt or fleece, or even use acrylic paint or glitter to add highlights to the body. For an extra touch of personality, sew on a few beads or sequins!
Tips
How to get that “Fluffy” look: If you used a textured or eyelash yarn, your frog might look a bit “neat” at first. To get that wild, fuzzy look seen in the photos, use a pet slicker brush or the rough side of a Velcro strip. Gently brush the textured parts of the crochet to pull out the fibers and create a soft, cloud-like texture.
Color Play: Don’t feel limited to one color! You can make a rainbow frog, a swamp-green frog, or even a bright neon one. Using different colors for the belly and the body is the easiest way to make the character pop.
Balance is Key: Since these frogs are quite round, the placement of the legs is vital. I recommend sitting the body on a flat surface and moving the legs around until he stays upright without tipping over before you finish sewing.
Happy crocheting!