Crochet Frog Phone Bag Pattern: A Cute and Easy Amigurumi Tutorial
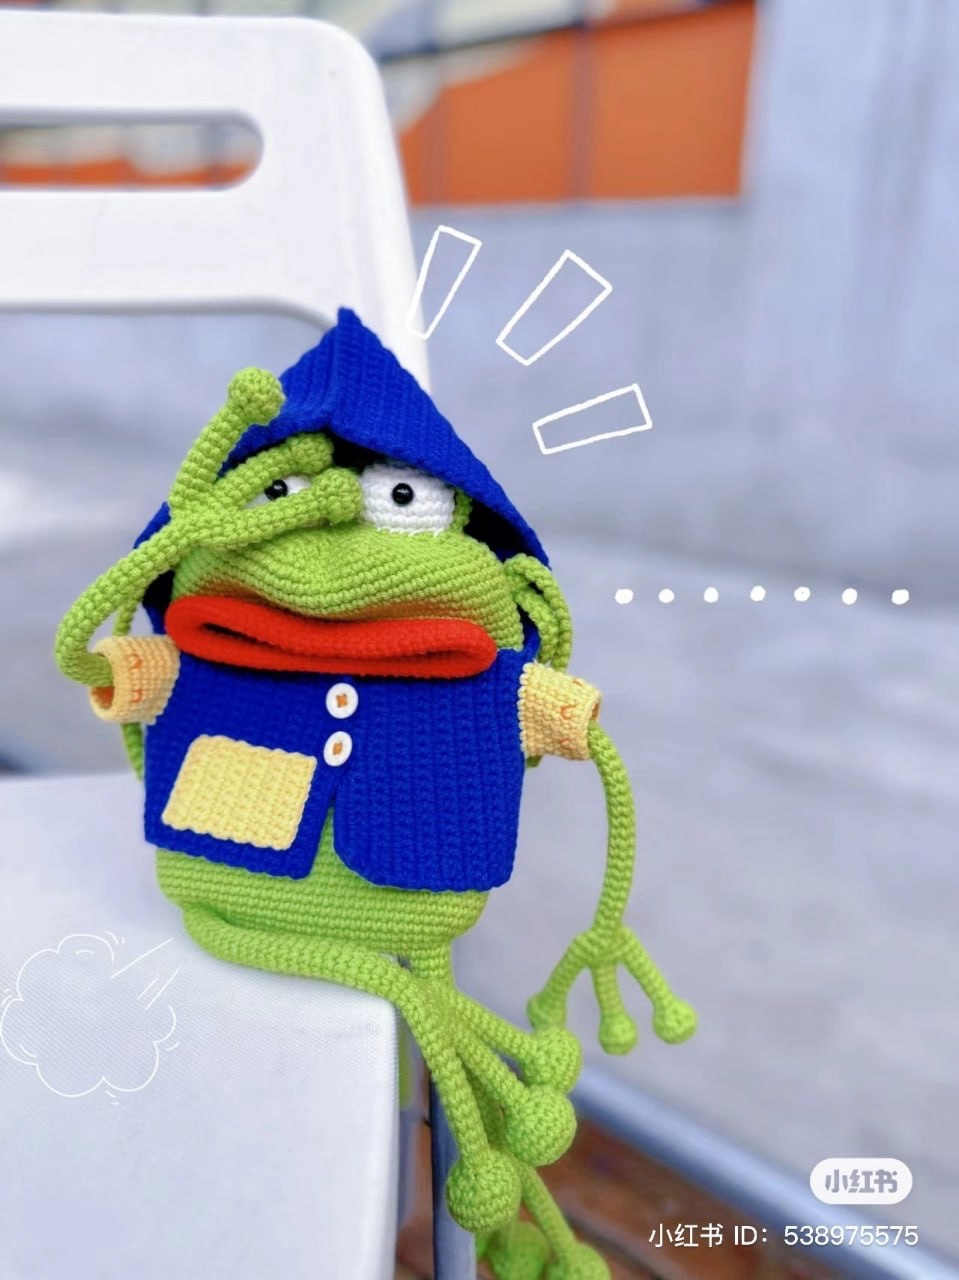
Are you looking for a way to keep your smartphone safe while adding a splash of personality to your daily outfit? Look no further! This adorable crochet frog phone bag is the perfect blend of functionality and whimsy. Whether you are looking to create a unique gift for a friend or want a quirky new accessory for yourself, this amigurumi-style bag is a project you will love to show off.
This pattern is designed to be accessible for intermediate crocheters or ambitious beginners who are comfortable with basic amigurumi techniques. The frog features a charming little outfit, complete with a tiny vest, a cozy hood, and even little pockets! By the time you finish, you’ll have a handmade companion that’s as useful as it is cute.
Materials & Abbreviations
Before we pick up our hooks, let’s make sure you have everything you need. Because this project relies on structure to hold your phone, using a high-quality cotton yarn is highly recommended.
Materials Needed:
- Yarn: Cotton yarn in 5 different colors. You will need green (for the frog body), blue (for the vest/hood), red (for the mouth), yellow/cream (for the pocket/details), and white (for the eyes).
- Crochet Hook: 3 mm (approximately 1/8 inch) crochet hook.
- Stuffing: Polyester fiberfill to give the frog its shape.
- Button: One 11 mm (approximately 7/16 inch) button for decoration or function.
- Other: Yarn needle for sewing and scissors.
Abbreviations (US Terms):
- MR: Magic Ring
- ch: Chain
- sc: Single crochet
- inc: Increase (2 sc in the same stitch)
- dec: Decrease (sc 2 stitches together)
- sl st: Slip stitch
- st(s): Stitch(es)
Step-by-Step Instructions
Follow these steps carefully. Remember to work in continuous rounds for the amigurumi parts unless otherwise stated!
The Legs and Feet
The legs consist of a foot made of three toes. We will first make the toes and then join them together.
The Toes (Make 6 total: 3 for each leg)
Each foot needs 3 toes. We will make them individually.
- Row 1: 6 sc in a MR
- Row 2: 6 inc (12)
- Row 3: (1 sc, inc) * 6 (18)
- Rows 4-5: 18 sc
- Row 6: (1 sc, dec) * 6 (12)
- Row 7: 6 dec
Stuff the toes firmly. For two of the toes, fasten off and leave a tail. For the third toe, do not fasten off; you will use this yarn to join the toes together.
Joining the Toes to Form the Foot
- Row 17: 6 sc around the 1st toe, 3 sc on the side of the 2nd toe, 6 sc around the 3rd toe, 3 sc on the other side of the 2nd toe, and sl st to the 1st toe (18).
- Row 18: 18 sc
- Row 19: (4 sc, dec) * 3
- Row 20: (1 dec, 3 sc) * 3
- Row 21: (1 sc, 1 dec) * 4
- Rows 22-45: 8 sc
For the first leg, fasten off. For the second leg, do not fasten off; you will continue directly into the body.
The Body and Head
We will join the two legs together to create the base of the frog’s body.
Joining the Legs
Connect the two legs using a chain of 20 ch.
- Row 1: 8 sc on the 1st leg, 20 sc along the chain, 8 sc on the 2nd leg, and 20 sc along the other side of the chain (56).
- Rows 2-36: 56 sc
Creating the Mouth Opening
The mouth is a special gap in the middle of the body.
- Row 37: 26 ch, skip 26 stitches, 30 sc.
- Row 38: 26 sc along the chain, 30 sc.
The Head Section
- Rows 39-42: 56 sc
- Row 43: Skip 1 st, 55 sc
- Row 44: Skip 1 st, 54 sc
- Row 45: Skip 1 st, 53 sc
- Row 46: Skip 1 st, 52 sc
- Row 47: (4 sc, dec) * 8
- Row 48: (dec, 3 sc) * 8
- Row 49: (2 sc, dec) * 8
- Row 50: (sc, dec) * 8
- Row 51: 8 dec. Fasten off and close the hole.
The Arms and Hands
Just like the legs, the arms consist of three fingers joined together.
The Fingers (Make 6 total: 3 for each arm)
- Row 1: 6 sc in a MR
- Row 2: 6 inc (12)
- Row 3: 12 sc
- Row 4: 6 dec
- Rows 5-11: 6 sc
For two fingers, fasten off. For the third, leave the yarn attached to join them.
Joining the Fingers to Form the Hand
- Row 6: 6 sc on the 1st finger, 3 sc on the 2nd finger, 6 sc on the 3rd finger, 3 sc on the other side of the 2nd finger, and sl st to the 1st finger (18).
- Row 13: 18 sc
- Row 14: (sc, dec) * 6
- Row 15: 6 dec
- Rows 16-40: 6 sc. Leave long tails for sewing the arms to the body.
The Face (Eyes and Eyelids)
To give your frog its expressive look, we will crochet the eyes and eyelids separately and then sew them on.
The Eyes (Make 2)
- Row 1: 6 sc in a MR
- Row 2: 6 inc (12)
- Row 3: (1 sc, inc) * 6 (18)
- Row 4: (2 sc, inc) * 6 (24)
- Rows 5-7: 24 sc. Stuff lightly and leave a tail for sewing.
The Eyelids (Make 2)
- Row 1: 6 sc in a MR
- Row 2: 6 inc (12)
- Row 3: (1 sc, inc) * 6 (18)
- Row 4: (2 sc, inc) * 6 (24)
- Row 5: (3 sc, inc) * 6 (30)
- Rows 6-10: 30 sc. Leave a tail for sewing.
The Outfit (Vest, Hood, and Pockets)
The clothing is worked in flat rows (turning your work at the end of each row).
The Vest
- Row 1: 21 ch, starting from the 2nd ch from hook: 20 sc.
- Rows 2-17: 20 sc.
- Row 18: 8 sc, skip 8 sts, 1 sc, 11 sc (this creates the first armhole).
- Rows 19-48: 20 sc.
- Row 49: 11 sc, 8 ch, skip 8 sts, 1 sc (this creates the second armhole).
- Rows 50-61: 20 sc.
- Row 62: Skip 1 st, 2 sc, 2 ch, skip 2 sts, 2 sc, 2 ch, skip 2 sts, 12 sc.
Sleeves: Join your yarn at the armhole and work 5-6 rows of sc.
The Hood
The hood size can vary slightly based on your tension. Aim for approximately 30-34 stitches.
Join your yarn to the starting stitch of the first sleeve and work across to the end of the second sleeve (along the back). Work 27-30 rows in turning rows. Once finished, fold the piece in half and sew the edges together to form the hood shape.
The Pockets
Front Pocket: 9 ch, work 6 rows in turning rows. Fasten off.
Back Pocket: 18 ch, work 10 rows in turning rows. Fasten off.
The Strap
To make the strap, chain 250. Work 2 rows of sc. Note that because this yarn is elastic, you don’t want to make the strap too long, or it might sag too much! Adjust the length based on your preference.
Finishing
Now comes the best part—bringing your frog to life!
- Assembly: Use your yarn needle to sew the arms to the sides of the body and the legs to the bottom.
- The Face: Carefully sew the eyes onto the head, then sew the eyelids over them to give the frog its unique expression.
- The Details: Sew the front and back pockets onto the vest. Attach your button as a decorative element.
- The Strap: Sew the long strap to the sides of the frog body so it is ready to wear.
Tips for Success
- Tension is Key: When working amigurumi, keep your stitches tight. This prevents the stuffing from peeking through the gaps.
- Consistent Stuffing: When stuffing the head and body, try to distribute the fiberfill evenly so the frog doesn’t look lumpy.
- Symmetry: When sewing on eyes and eyelids, it helps to mark the center of the face first to ensure everything is even and looking forward.
- Experiment: Don’t be afraid to play with different colors! A pink frog or a blue frog could be just as adorable.