Adorable DIY Crochet Baby Bunny Pattern: A Fluffy Amigurumi Tutorial
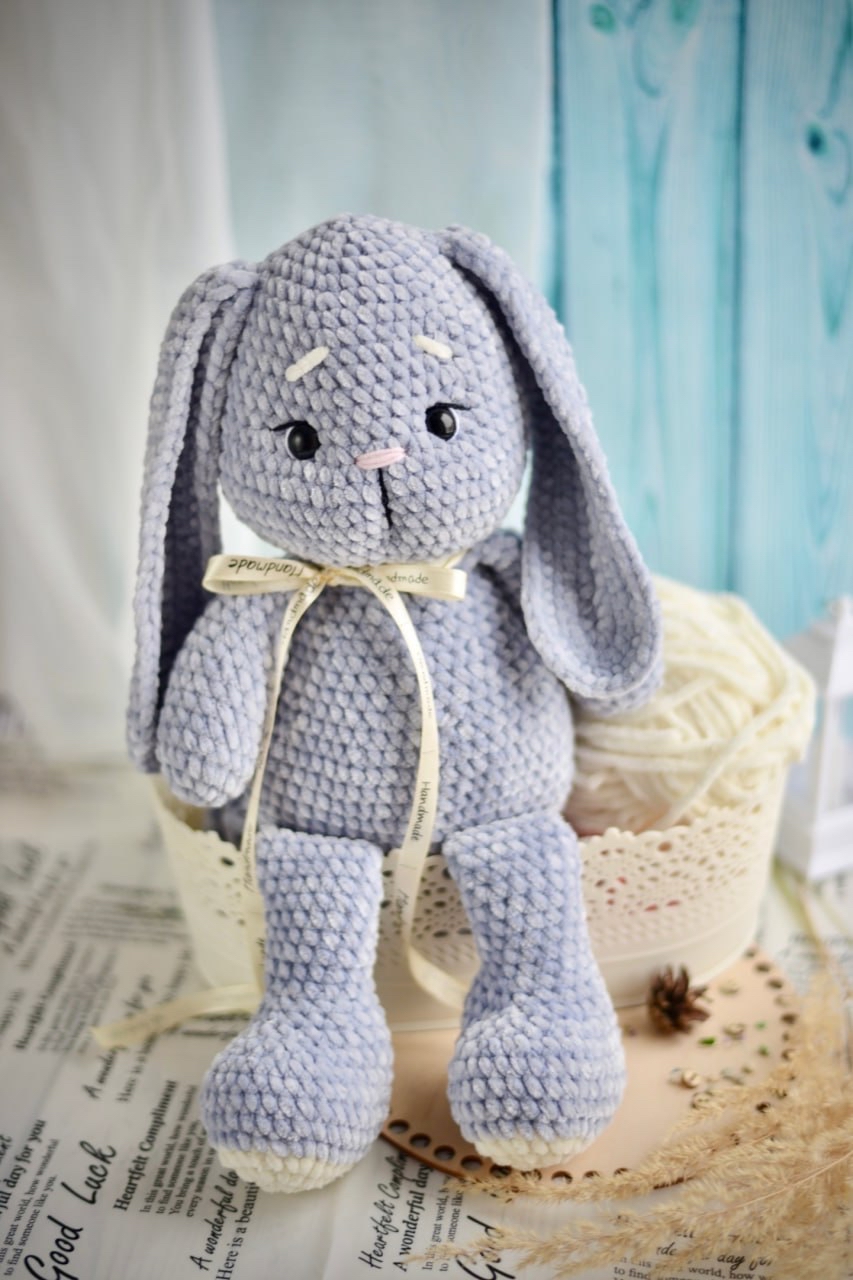
There is nothing quite as heartwarming as a handmade plushie, especially one as sweet and cuddly as a tiny baby bunny. If you are looking for your next crochet project, this fluffy amigurumi bunny is the perfect choice. Whether you are making a nursery decoration, a gift for a newborn, or a new friend for your own collection, this little bunny is sure to steal hearts.
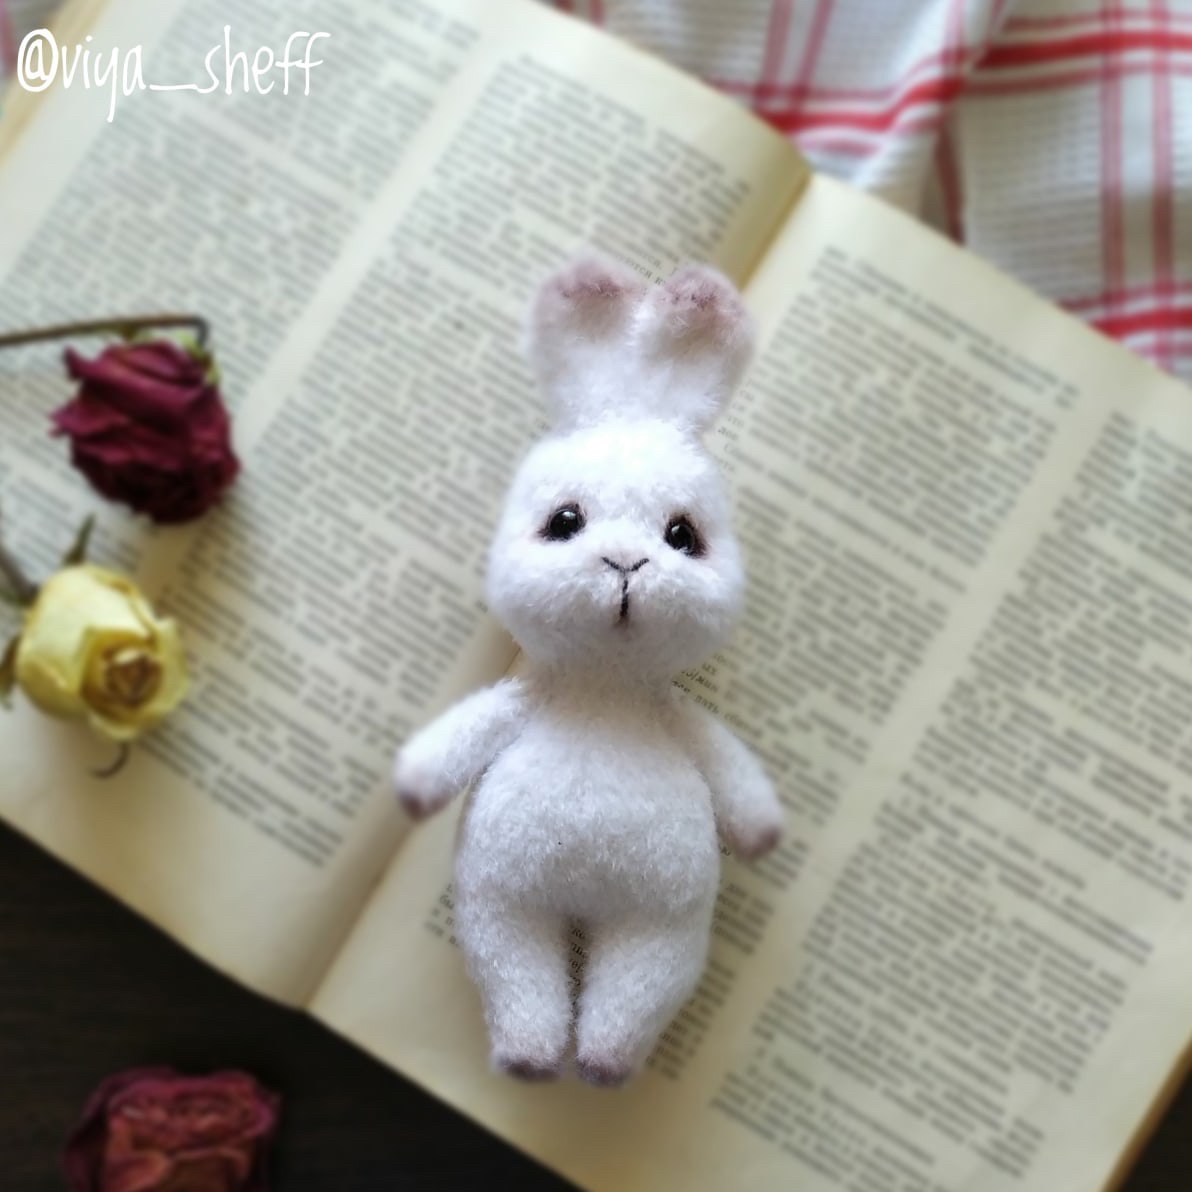
What makes this pattern special is the texture. By using specific yarn techniques, we can create a bunny that feels incredibly soft and “fuzzy,” giving it that high-end, boutique look. In this tutorial, I will walk you through every step—from the tiny feet to the adorable sculpted face—ensuring you have a successful and stress-free crafting experience.
Materials & Abbreviations
To ensure your bunny turns out exactly like the photos, I recommend using a textured or “fuzzy” yarn. This is the secret to that cloud-like appearance!
Materials Needed:
- Yarn: Approximately 1.4 oz (40g) of fuzzy, textured yarn (such as a bamboo-blend “grass” yarn).
- Crochet Hook: 1.5 mm (or the size recommended to achieve a very tight tension).
- Safety Eyes: 7 mm (approx. 0.27 inches).
- Stuffing: High-quality polyester fiberfill.
- Buttons: Two 0.4-inch (10 mm) buttons that match your yarn color (for the arm attachments).
- Tools: A tapestry needle, sewing thread, and fabric markers or pastels for toning.
- Optional: Cotton swabs for applying color.
US Crochet Abbreviations:
- ch: chain
- sc: single crochet
- hdc: half double crochet
- inc: increase (2 stitches in one stitch)
- dec: decrease (sc two stitches together)
- st(s): stitch(es)
- R: round/row
- Note: Numbers in parentheses indicate the total stitch count at the end of the round.
Pro Tip: When working with textured or fuzzy yarn, always crochet with the wrong side facing out. This allows the long fibers to sit on the outside of the toy, making it much fluffier!
Step-by-Step Instructions
This bunny is worked in one continuous piece from the feet up to the tips of the ears, making assembly much easier. We will start with the legs and build the body upward.
The Body (Worked from Feet Up)
We begin by creating the legs. Note that the body is joined to the legs in a specific way to create a seamless look.
First Leg:
- R1: Ch 2, then work 6 sc into the 2nd ch from the hook (6).
- R2: (1 sc, inc) repeat 3 times (9).
- R3: 8 sc, inc (10).
- R4: 9 sc, inc (11).
- R5: 10 sc, inc (12).
- R6: 11 sc, inc (13).
- R7: 12 sc, inc (14).
- R8: 13 sc, inc (15).
- R9: 14 sc, inc (16).
- R10-11: Sc in each st around (16).
Fasten off the first leg.
Second Leg & Joining:
Do not fasten off after the second leg! We will use the yarn from the second leg to join them together.
- Work the second leg exactly like the first, but do not cut the yarn after R9.
- Instead, work 8 sc, ch 3, and then join to the first leg. Ensure you are working in a mirror image to keep the legs symmetrical.
- R12: 16 sc along the first leg, 3 sc through the ch-3 space, 16 sc along the second leg, 3 sc through the ch-3 space (38).
- R13: 37 sc (place a stitch marker here to identify the start of your rounds) (38).
- R14: 9 sc, inc, (8 sc, inc) repeat 2 times, 9 sc, inc (42).
- R15: (6 sc, inc) repeat 6 times (48).
- R16-21: Sc in each st around for 6 rounds (48).
Shaping the Lower Body:
- R22: (6 sc, dec) repeat 6 times (42).
- R23: Sc in each st around (42).
- R24: (5 sc, dec) repeat 6 times (36).
- R25: Sc in each st around (36).
- R26: (4 sc, dec) repeat 6 times (30).
- R27: Sc in each st around (30).
- R28: (3 sc, dec) repeat 6 times (24).
- R29: Sc in each st around (24).
- R30: (2 sc, dec) repeat 6 times (18).
- R31-32: Sc in each st around (18).
Stop here and stuff the lower body lightly. We will add more stuffing later.
Expanding the Upper Body & Head:
- R33: (2 sc, inc) repeat 6 times (24).
- R34: (3 sc, inc) repeat 6 times (30).
- R35: (4 sc, inc) repeat 2 times, (4 hdc, inc hdc) repeat 2 times, (4 sc, inc) repeat 2 times (36).
- R36: (5 sc, inc) repeat 2 times, (5 hdc, inc hdc) repeat 2 times, (5 sc, inc) repeat 2 times (42).
- R37: (6 sc, inc) repeat 2 times, (6 hdc, inc hdc) repeat 2 times, (6 sc, inc) repeat 2 times (48).
- R38-41: Sc in each st around for 4 rounds (48).
- R42: 10 sc, (2 sc, dec) repeat 3 times, 4 sc, (dec, 2 sc) repeat 3 times, 10 sc (42).
- R43: 10 sc, (1 sc, dec) repeat 3 times, 4 sc, (dec, 1 sc) repeat 3 times, 10 sc (36).
- R44-48: Sc in each st around for 5 rounds (36).
- R49: (4 sc, dec) repeat 6 times (30).
- R50: (3 sc, dec) repeat 6 times (24).
- R51: (2 sc, dec) repeat 6 times (18).
Now, stuff the head firmly.
The Ears
Make two ears following this pattern:
- R1: 9 sc in a magic ring (9).
- R2: Sc in each st around (9).
- R3: (2 sc, inc) repeat 3 times (12).
- R4-5: Sc in each st around (12).
- R6: (3 sc, inc) repeat 3 times (15).
- R7: Sc in each st around (15).
- R8: (4 sc, inc) repeat 3 times (18).
- R9-10: Sc in each st around (18).
- R11: (1 sc, dec) repeat 6 times (12).
Fasten off, leaving a long tail for sewing. Decrease until the ear is closed and hide the thread inside.
The Arms
Make two arms:
- R1: Ch 2, work 8 sc into the 2nd ch from the hook (8).
- R2-11: Sc in each st around for 10 rounds (8).
Stuff the arms lightly. You can attach these to the body using the button method (using the buttons mentioned in the materials list) or simply sew them on with thread.
Finishing
Face Sculpting (Tensioning)
To give your bunny its cute, expressive face, we will use a technique called “tensioning” or sculpting. This involves pulling thread through the head to create indentations for the eyes and snout.
Using a needle and thread, follow these steps to create the facial features:
- Create the Eye Sockets: Insert the needle at the center of the face (Point 1), pull through to the side (Point 2). Tighten slightly and do not cut the thread. Repeat this from Point 3 to Point 1, Point 1 to Point 4, and Point 5 to Point 1. This creates the depth for the eyes.
- Create the Nose and Mouth: Insert the needle at the bottom center (Point 6), pull through to the side (Point 7). Then, insert at Point 6 and pull through to Point 8. Finally, insert at Point 6 and pull through back to Point 1 (the nose tip). Do not pull too tight here; you just want to create a little “button” nose shape.
Final Touches
- Eyes: Glue or sew your 7 mm safety eyes into the eye sockets you just sculpted.
- Toning: This is the most important step for a professional look! Use fabric markers, oil paints, or soft pastels to add a bit of color to the tension points, the tips of the ears, the tips of the paws, and the nose. Use a cotton swab to blend the color so it looks natural.
- Assembly: Sew the ears to the top of the head and the arms to the body.
Tips for Success
- Tension is Key: When making amigurumi, your stitches should be very tight so that the stuffing doesn’t peek through. If you find holes, try using a smaller hook.
- The “Fluff” Factor: Remember, the magic of this pattern is in the texture. Always keep that “wrong side” of the yarn facing outward!
- Stuffing: Don’t be afraid to stuff the head firmly. A well-stuffed head provides a better canvas for the face sculpting.
- Embrace Imperfection: If your bunny’s face looks a little different than the photo, don’t worry! That’s the beauty of handmade items—every bunny has its own unique personality.
Happy crocheting!