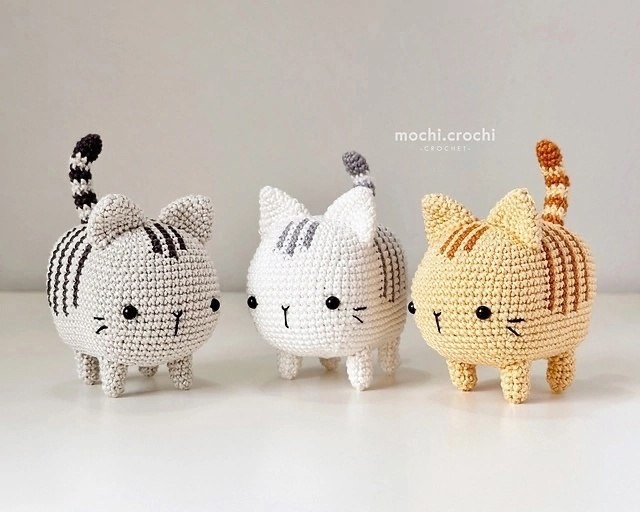
Adorable Chubby Crochet Kitten Pattern: A Beginner-Friendly Amigurumi Tutorial
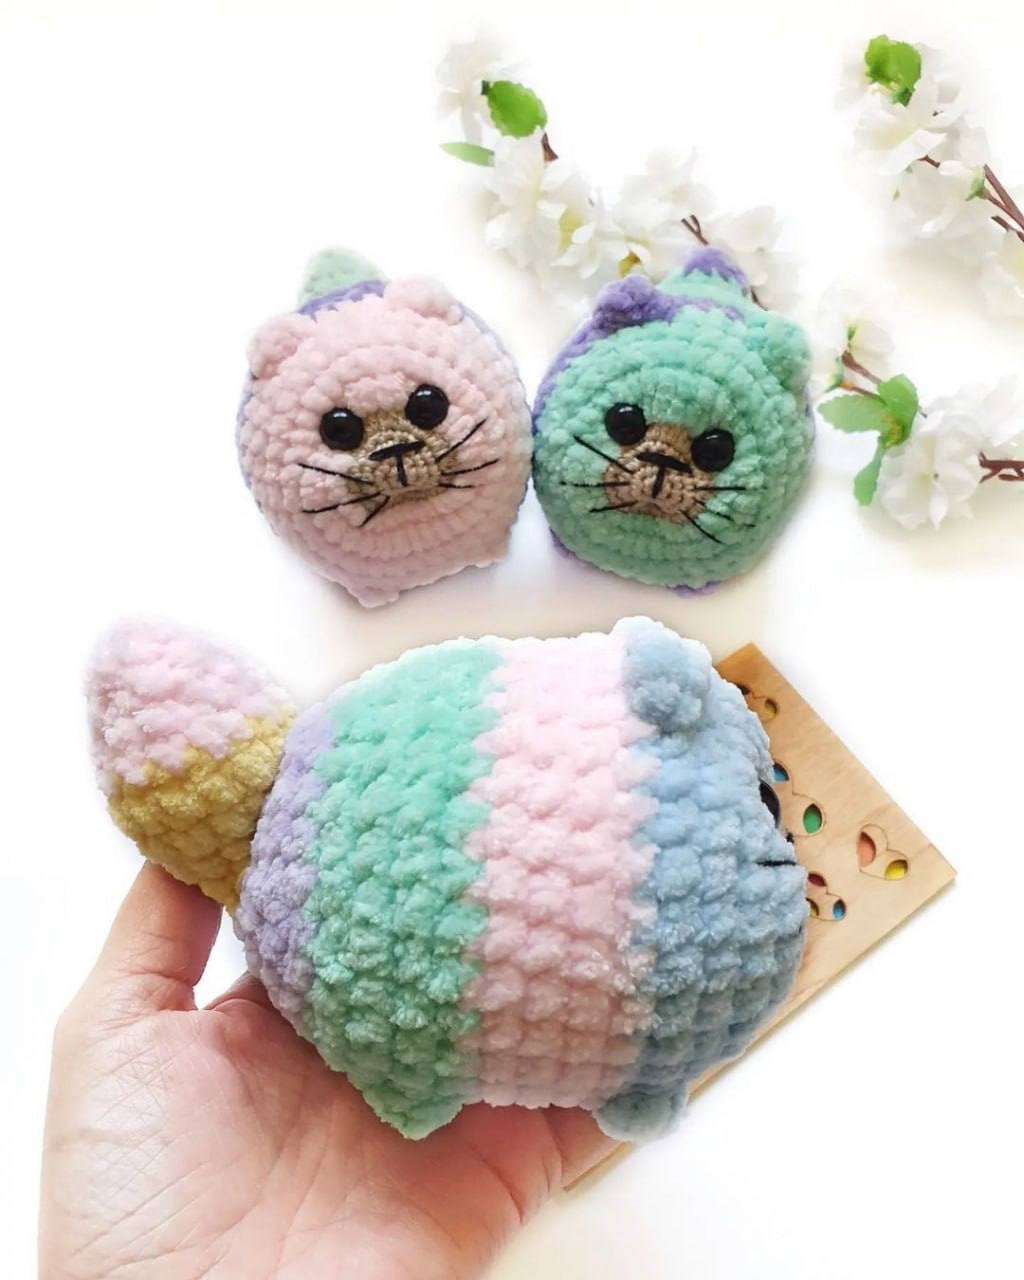
Are you looking for your next cozy crochet project? There is nothing quite as charming as a round, chubby little animal to brighten up your home or to gift to a loved one. If you are a fan of the “kawaii” aesthetic—where everything is oversized, soft, and incredibly cute—then you are going to love this DIY crochet kitten pattern!
This chubby kitty is designed to be worked in one continuous piece for the head and body, making it a fantastic project for intermediate beginners who want to practice shaping and color changes. Once you master the basic stitches, you will be able to whip up these little feline friends in no time. Whether you want a solid-colored kitty or a striped tabby, this pattern is versatile enough to accommodate all your yarn color preferences. Grab your favorite hook and let’s get started on making your very own crochet plushie!
Materials & Abbreviations
Before we dive into the stitches, let’s make sure you have everything you need on your crafting table. To achieve the tight, professional look seen in the photos, I recommend using a smaller hook than the yarn label might suggest. This prevents stuffing from peeking through the stitches.
What You Will Need
- Yarn: A medium weight (DK or Sport weight) cotton or acrylic blend works best. For the classic look, use a main color (like white, grey, or yellow) and a contrasting color for the stripes (like orange or dark grey).
- Crochet Hook: 2.2mm (or the closest size you have to achieve a tight tension).
- Safety Eyes: 6mm safety eyes.
- Stuffing: High-quality polyester fiberfill.
- Tools: A tapestry needle for sewing, scissors, and a stitch marker.
Pattern Abbreviations
All terms used in this pattern are standard US crochet terms:
- MR: Magic Ring
- ch: Chain
- sl st: Slip stitch
- sc: Single crochet
- hdc: Half double crochet
- dc: Double crochet
- tr: Treble crochet
- inc: Increase (2 stitches in one stitch)
- dec: Decrease (sc two stitches together)
- FLO: Front Loop Only
- BLO: Back Loop Only
Stitch Patterns for Stripes
To create the beautiful textured stripes on your kitten, we will use three specific stitch sequences. Prepare to switch colors during these rows:
- A1: [1 sc, 2 dc] repeat twice, then 1 sc
- A2: 5 sc (a plain row)
- A3: [1 sc, 2 dc] repeat three times, then 1 sc
Step-by-Step Instructions
The Head and Body (Worked in one piece)
We will begin by creating an oval base. This gives the kitten its plump, rounded shape. Note that for the color-changing stripes, follow the instructions for the specific sequence (A1, A2, or A3) mentioned in the row.
Round 1: Start with 11 ch. From the 2nd chain from the hook: inc, [A1], 7 sc, 1 sc, 4 sc in one stitch. Now, working on the other side of the chain: [A1], 1 sc, inc.
Round 2: 2 inc, [A1], 1 sc, 4 inc, [A1], 1 sc, 2 inc.
Round 3: 2 sc, 2 inc, [A1], 1 sc, 2 inc, 1 sc, 1 sc, 2 dc, 2 inc, [A1], 1 sc, 2 inc, 2 sc. (Total: 40 stitches)
Round 4: 3 sc, 2 inc, 1 sc, [A1], 2 sc, 2 inc, [A2], 2 inc, 2 sc.
Round 5: 4 sc, 2 inc, 2 sc, [A1], 3 sc, 2 inc, 1 sc, [A2], 1 sc, 2 inc, 3 sc, [A1], 3 sc, 2 inc, 4 sc. (Total: 56 stitches)
Round 6: 5 sc, 2 inc, [A3], 8 sc, [A2], 8 sc, [A3], 1 sc, 2 inc, 5 sc.
Round 7: 6 sc, 2 inc, 1 sc, [A3], 4 sc, 2 inc, 2 sc, [A2], 2 sc, 2 inc, 4 sc, [A3], 2 sc, 2 inc, 6 sc.
Round 8: 11 sc, [A3], 10 sc, [A2], 10 sc, [A3], 12 sc.
Round 9: 11 sc, [A3], 12 sc, 1 sc, 12 sc, [A3], 12 sc.
Round 10: 11 sc, [A3], 25 sc, [A3], 12 sc.
Round 11: 11 sc, [A3], 5 sc, 2 inc, 12 sc, 2 inc, 4 sc, [A3], 12 sc.
Rounds 12-16: 11 sc, [A3], 29 sc, [A3], 12 sc.
Round 17 (Color Change Row): 14 sc, 1 sc, 2 sc, 1 sc, 35 sc, 1 sc, 2 sc, 1 sc, 15 sc. (Use your stripe color here!)
Round 18: 6 sc, 2 dec, 52 sc, 2 dec, 6 sc.
Round 19: 68 sc.
Round 20: 24 sc, 2 dec, 12 sc, 2 dec, 24 sc.
Rounds 21-22: 64 sc.
Eye Placement: Before continuing to the next round, insert your 6mm safety eyes between Rounds 16 and 17. Make sure they are spaced approximately 12 stitches apart.
Round 23: 5 sc, 2 dec, 14 sc, 2 dec, 10 sc, 2 dec, 14 sc, 2 dec, 5 sc.
Round 24: 56 sc.
Round 25: 4 sc, 2 dec, 12 sc, 2 dec, 8 sc, 2 dec, 12 sc, 2 dec, 4 sc.
Round 26: 3 sc, 2 dec, 10 sc, 2 dec, 6 sc, 2 dec, 10 sc, 2 dec, 3 sc.
Round 27: 2 sc, 2 dec, 8 sc, 2 dec, 4 sc, 2 dec, 8 sc, 2 dec, 2 sc.
Round 28: 1 sc, 2 dec, 6 sc, 2 dec, 2 sc, 2 dec, 6 sc, 2 dec, 1 sc.
Round 29: 2 dec, 4 sc, 4 dec, 4 sc, 2 dec.
Fasten off, leaving a long tail. Stuff the body firmly with fiberfill, then use the tail to sew the opening closed.
The Ears (Make 2)
Using your main color:
Round 1: MR, 5 sc.
Round 2: 5 inc.
Round 3: (4 sc, inc) repeat twice.
Round 4: (5 sc, inc) repeat twice.
Round 5: (6 sc, inc) repeat twice.
Round 6: (7 sc, inc) repeat twice.
Do not stuff the ears. Leave a long tail for sewing.
The Legs (Make 2)
Using your main color:
Round 1: MR, 4 sc.
Round 2: 4 inc.
Round 3: 8 sc.
Round 4: (3 sc, inc) repeat twice.
Round 5: 10 sc.
Fasten off, leaving a long tail for sewing.
The Tail
For a striped tail, switch colors according to the rounds indicated.
Round 1: MR, 4 sc.
Round 2: 4 inc.
Rounds 3-4: 8 sc.
Rounds 5-6: 2 sc, 2 dc, 2 sc, 2 hdc.
Round 7: 2 sc, 2 dc, 2 sc, 2 hdc.
Round 8: 8 sc.
Rounds 9-10: 8 sc.
Rounds 11-12: 8 sc.
Rounds 13-14: 8 sc.
Rounds 15-16: 8 sc.
Fasten off, leaving a long tail for sewing.
Finishing
Assembly Guide
Now comes the fun part—bringing your kitten to life! Use your tapestry needle and the tails left from your pieces to sew everything together securely.
- Ears: Sew the ears onto the top of the head between Rounds 2 and 9.
- Tail: Attach the tail between Rounds 6 and 8 on the back of the body.
- Legs: Sew the legs to the bottom of the body between Rounds 24 and 26.
- Face: Using black embroidery thread or thin yarn, embroider a small “Y” shape for the nose and a few straight lines on either side for the whiskers.
Tips for Success
Creating amigurumi can be tricky at first, but these tips will help you achieve a professional result:
- Use Stitch Markers: When working in the round, it is very easy to lose track of where your round begins. Always use a stitch marker at the first stitch of every round.
- Master the Invisible Decrease: Instead of a standard decrease, try the “invisible decrease” (inserting the hook into the front loops only of the next two stitches). This prevents large gaps in your work.
- Stuffing Tension: Stuff your project firmly, but be careful not to overstuff near the decrease sections, as this can cause the shape to look bumpy.
- Color Changes: To make your color changes look clean, pull the new color through the last two loops of the final stitch of the previous color.