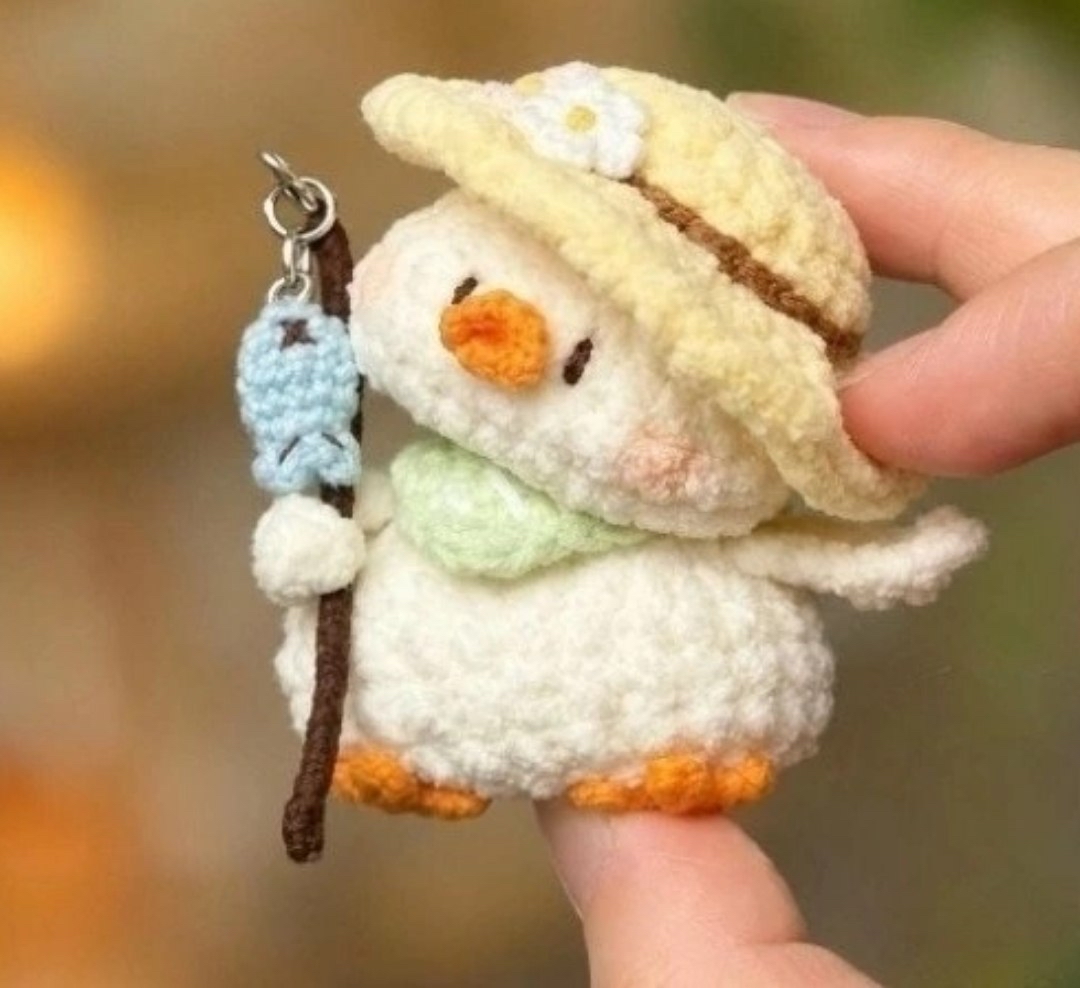
Looking for a sweet and quirky new project to add to your crochet collection? This adorable little fishing duck is the perfect companion! Whether you want to create a cute keychain, a nursery decoration, or a unique gift for a friend, this little duckling is sure to bring a smile to everyone’s face. With its tiny hat, little apron, and even a miniature fishing rod, this amigurumi character is bursting with personality.
This pattern is designed to be accessible for beginners who have mastered the basic stitches. The project is small and quick to work up, making it an excellent choice for a weekend craft session. Grab your favorite yarn and let’s get started on this little aquatic adventure!
Materials & Abbreviations
Before we dive into the stitches, let’s make sure you have everything you need on your hook. Since this is an amigurumi project, you’ll want to use a slightly smaller hook than usual to ensure your stuffing stays tucked inside and the stitches remain tight.
What You’ll Need
- Yarn: Medium weight (worsted) or light weight yarn in yellow (for the body/feet), white (for the body/hat), brown (for the hat trim), and small scraps of color for the flower and fish.
- Crochet Hook: A 3.25mm (D) or 3.5mm (E) hook is recommended.
- Stuffing: Polyester fiberfill to give your duck its shape.
- Tapestry Needle: For sewing the pieces together.
- Scissors: To trim your yarn.
- Safety Eyes (Optional): If you aren’t embroidering the eyes, you can use small safety eyes, though embroidery is often safer for small toys.
Abbreviations (US Terms)
Please ensure you are using US crochet terminology to follow this pattern correctly:
- MR: Magic Ring
- ch: Chain
- sc: Single crochet
- inc: Increase (2 sc in one stitch)
- dec: Decrease (2 sc worked together)
- hdc: Half double crochet
- dc: Double crochet
- sl st: Slip stitch
- FLO: Front loop only
- BLO: Back loop only
- 3 sc in one stitch: Three single crochets worked into a single stitch
Step-by-Step Instructions
Work in a continuous spiral for all amigurumi pieces. Do not join rounds unless specifically instructed.
Head & Body
We will work the head and body as one continuous piece to create a seamless look. You may want to stuff the head more firmly than the body.
R1: Create a magic ring and work 6 sc into the ring (6).
R2: 6 inc (12).
R3: (1 sc, 1 inc) repeat 6 times (18).
R4: 18 sc (18).
R5: 4 sc, 4 inc, 2 sc, 4 inc, 4 sc (26).
R6–R8: 26 sc for 3 rounds (26).
R9: 4 sc, 4 dec, 2 sc, 4 dec, 4 sc (18).
R10: 9 dec (9).
R11: Working in the Front Loops Only (FLO), 9 inc (18).
R12: (2 sc, 1 inc) repeat 6 times (24).
R13: (3 sc, 1 inc) repeat 6 times (30).
R14: 3 sc, 3 sc in one stitch, 8 sc, 3 sc in one stitch, 8 sc, 3 sc in one stitch, 3 sc (36).
R15: 36 sc (36).
R16: 6 sc, 2 dec, 9 sc, 2 dec, 7 sc (32).
R17–R18: 32 sc for 2 rounds (32).
R19: 6 sc, 4 dec, 14 sc (28).
R20: 5 sc, 3 dec, 13 sc (25).
R21: 10 dec, 1 sc (15).
R22: 5 dec, 1 sc (6).
Fasten off, leaving a long tail for sewing. Stuff the piece firmly before closing.
Feet (Make 2)
Use yellow yarn.
R1: Create a magic ring: 3 ch, 2 dc, 2 hdc, 1 sl st into the ring. Fasten off.
Arms & Wings (Make 2)
Use yellow yarn or a color that matches the body.
Instructions: Ch 6. Starting from the 2nd chain from your hook: 2 sc, 2 hdc, 1 dc. Fasten off.
Beak
R1: Create a magic ring and work 5 sc into the ring (5).
R2: 3 inc, 1 sl st (8).
Fasten off, leaving a tail for sewing.
Hat
Use white yarn for the main body and brown yarn for the trim.
R1: Create a magic ring and work 10 hdc into the ring (10).
R2: 10 inc (20).
R3: 20 hdc (20).
R4: 20 inc (40).
Edging: Using brown yarn, work 20 sl st around the edge of the hat to create a rim. Fasten off.
Apron (Bib)
R1: 2 ch, turn, 2 inc, turn (2).
R2: 2 ch, from the 2nd ch: 1 inc, turn (4).
R3: 1 ch, turn, 1 inc, 2 sc, 1 inc (6).
Edging: Work 1 round of sc around the entire perimeter of the apron. Fasten off.
Decorative Flower (Make 1)
Instructions: Create a magic ring and work 5 petals using the following sequence: (2 ch, 2 dc, 2 ch, 1 sl st) repeat 5 times. Fasten off.
Mini Fish (Make 2)
R1: Create a magic ring and work 6 sc into the ring (6).
R2: (1 sc, 1 inc) repeat 3 times (9).
R3–R5: 9 sc for 3 rounds (9).
R6: (1 sc, 1 dec) repeat 3 times (6).
R7 (Tail): 2 inc, 1 sl st, 2 inc, 1 sl st. Fasten off.
Finishing
Now comes the fun part—bringing your little fisherman to life! Use your tapestry needle to sew the pieces together in the following order:
- Head and Body: Sew the head onto the top of the body.
- Feet: Sew the two feet to the bottom of the body.
- Arms/Wings: Attach the arms to the sides of the body.
- Beak: Carefully sew the beak onto the face.
- Hat: Place the hat on the head and secure it with a few small stitches.
- Apron: Sew the apron onto the front of the body.
- Final Details: For a personalized touch, sew the little flower onto the hat or the apron. You can also sew the tiny fish to the arms or use them as little charms hanging from the fishing rod!
Tips
To ensure your duck looks as professional as possible, keep these tips in mind:
- Consistent Tension: Try to keep your tension even throughout the project. If your stitches are too loose, the stuffing might show through.
- Stitch Markers: Use a stitch marker at the beginning of every round. Amigurumi can be tricky, and it is very easy to lose count!
- Embroider the Eyes: If you aren’t using safety eyes, use black yarn to embroider two small eyes. Placing them slightly lower on the head often gives amigurumi a cuter, more “kawaii” look.
- Customization: Don’t be afraid to play with colors! A pink duck or a blue hat can make this pattern feel entirely your own.