Tiny Crochet Frog Pattern: An Easy Amigurumi Tutorial for Beginners
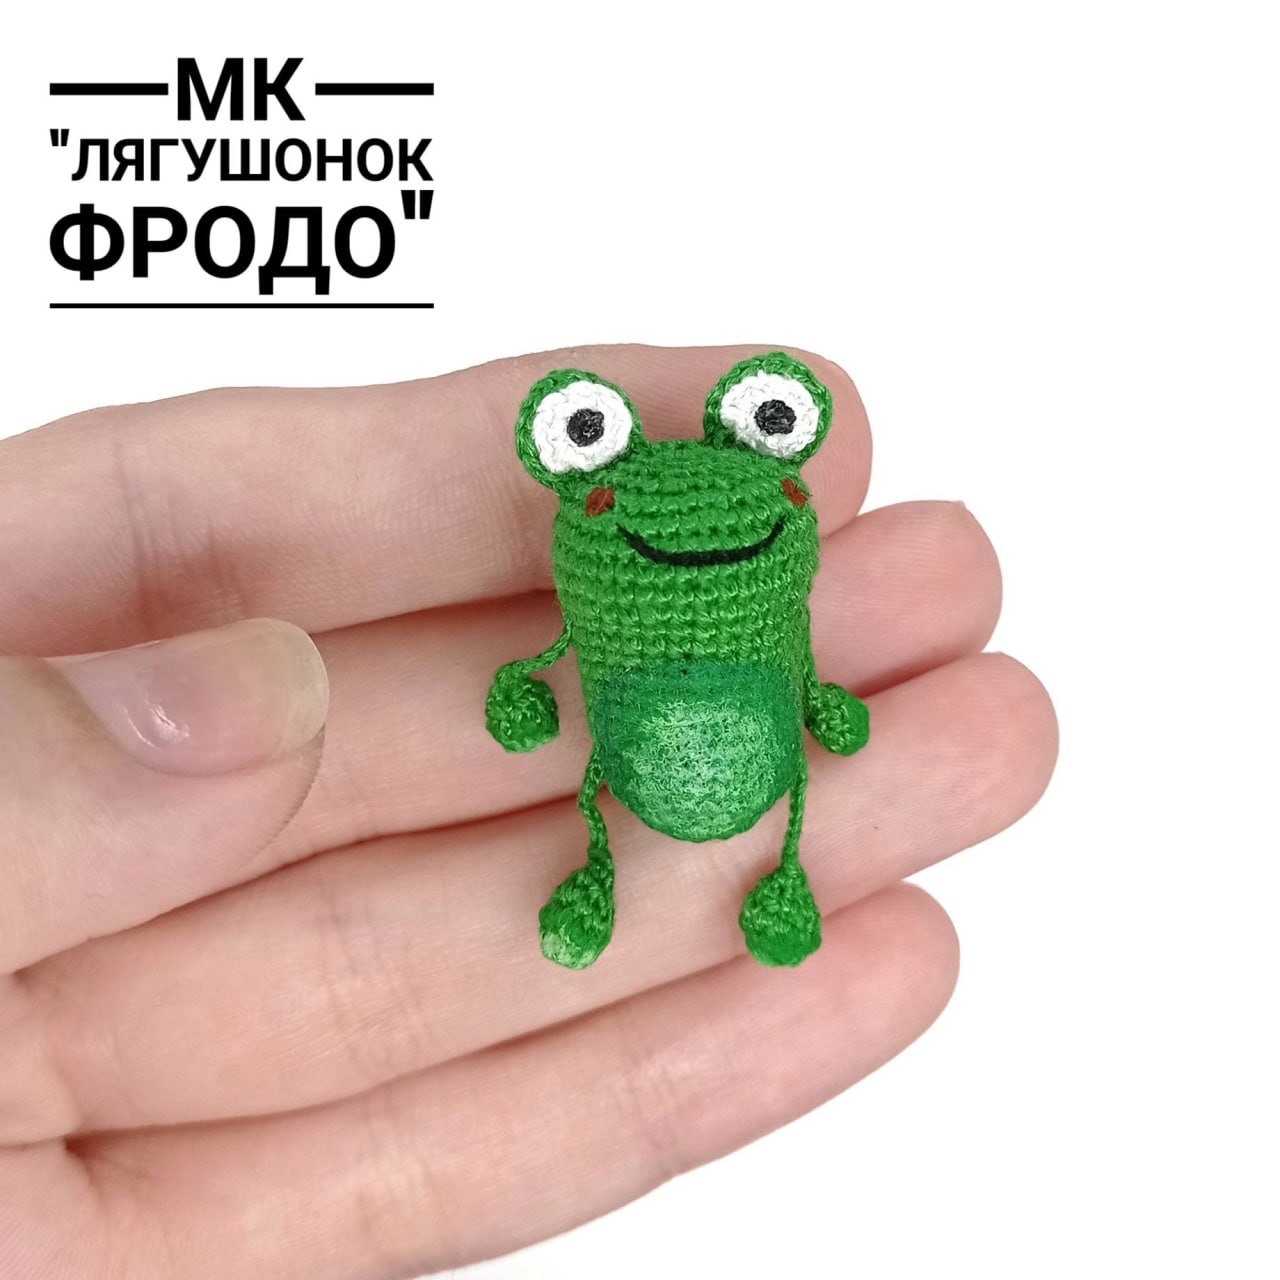
Are you looking for a quick, adorable, and incredibly tiny crochet project? Look no further! This tiny crochet frog pattern is the perfect way to practice your micro-crochet skills or simply create a collection of miniature friends. This little frog, which we’ll call Frodo, is small enough to sit on your fingertip, making him a wonderful desk companion or a cute charm for a keychain.
While this pattern is perfect for beginners who want a fast win, working with such small materials requires a bit of patience and a steady hand. Don’t worry, though—once you get the rhythm down, you’ll be making these little green friends in no time! Grab your smallest hook and let’s dive into this charming amigurumi tutorial.
Materials & Abbreviations
Because this is a micro-crochet project, the materials are much finer than your standard bulky yarn projects. To achieve this tiny scale, we will be using embroidery floss instead of traditional yarn.
What You Will Need
- Embroidery Floss: You will need green, white, and black floss. Any brand will work, but ensure the colors are vibrant.
- Crochet Hook: A very small hook, specifically between 0.5mm and 0.6mm.
- Fiberfill: A small amount of polyester stuffing (poly-fill) to shape the body.
- Tools: Sharp scissors, a tapestry needle for sewing, and a stitch marker.
- Watercolor Paints: To add personality, you’ll need two shades of green, white, and red.
- Brushes: A thick brush and a very fine detail brush for the painting stage.
Pro Tip: For this pattern, you will be working with two strands of embroidery floss held together as if they were a single strand of yarn.
Abbreviations (US Terms)
- MR: Magic Ring
- sc: Single crochet
- inc: Increase (2 sc in the same stitch)
- dec: Decrease (2 sc worked together)
- ch: Chain
- sl st: Slip stitch
- \*number: Repeat the preceding sequence the specified number of times
- (number): The total stitch count at the end of the round
Note: When working with embroidery floss, you can perform decreases by simply skipping one stitch rather than pulling two together, which can be easier for such tiny stitches.
Step-by-Step Instructions
The finished frog will be approximately 1.5 inches (4 cm) tall. Always remember to use a stitch marker to keep track of the start of your rounds.
The Body
Stuff the body as you work through the rounds to ensure it maintains a nice, plump shape.
- Round 1: 6 sc in a MR (6)
- Round 2: 6 inc (12)
- Round 3: (1 sc, 1 inc) * 6 (18)
- Round 4: (2 sc, 1 inc) * 6 (24)
- Round 5: (3 sc, 1 inc) * 6 (30)
- Round 6-15: 30 sc (10 rounds total)
- Round 16: (2 sc, 1 inc) * 10 (40)
- Round 17-20: 40 sc (4 rounds total)
- Round 21: (3 sc, 1 dec) * 8 (32)
- Round 22: (2 sc, 1 dec) * 8 (24)
- Round 23: (2 sc, 1 dec) * 6 (18)
- Round 24: (1 sc, 1 dec) * 6 (12)
- Round 25: (1 sc, 1 dec) * 4 (8)
Fasten off. Use a needle to weave the tail through the remaining stitches to close the hole completely, then hide the thread inside the body.
The Eyes (Make 2 of each color)
To give your frog those big, expressive eyes, we will create two separate layers: a green base and a white center.
Green Eye Base (Make 2)
- Round 1: 6 sc in a MR (6)
- Round 2: 6 inc (12)
- Round 3: 4 inc, 1 sl st (16)
Leave a long tail for sewing.
White Eye Center (Make 2)
- Round 1: 5 sc in a MR (5)
- Round 2: 5 inc (12)
Leave a long tail for sewing.
The Legs (Make 2)
These legs can be lightly stuffed or left empty for a flatter look.
- Round 1: 6 sc in a MR (6)
- Round 2: 6 inc (12)
- Round 3: 12 sc (12)
- Round 4: (1 sc, 1 dec) * 4 (8)
- Round 5: 4 dec (4)
After completing the rounds, chain 10 and fasten off, leaving a long tail for sewing.
The Arms (Make 2)
- Round 1: 5 sc in a MR (5)
- Round 2: 5 inc (10)
- Round 3: 10 sc (10)
- Round 4: 5 dec (5)
- Round 5: 4 dec (4)
- Round 6: 1 dec (3)
After the final decrease, chain 8 and fasten off, leaving a long tail for sewing.
Finishing & Assembly
Now that all your pieces are ready, it is time to bring your little frog to life!
Assembling the Parts
- Eyes First: Carefully sew the white eye centers onto the green eye bases. Once attached, sew the eyes onto the top of the frog’s head. Try to place them symmetrically so your frog looks balanced.
- Limbs: Mark where you want the arms and legs to go on the body. Use a few stitches to securely sew the arms to the sides and the legs to the bottom.
Adding Color and Personality
This is where the magic happens! Using your watercolor paints and brushes, we will add the final details.
- The Belly: Paint a round belly on the frog. Start with a dark green circle, then add a slightly lighter green inside that, and finally, add a small dab of white in the very center. Try not to use too much water, or the paint may bleed too much. Let this dry before moving on.
- Limb Accents: To make the arms and legs pop, paint the tips with light green, and then add a tiny dot of white in the center of each tip.
- The Mouth: You can use black oil paint to draw a tiny smile, or for a more “crochet” look, simply embroider a small smile using black thread and a needle.
- The Cheeks: Using your finest brush and red paint, add two tiny rosy dots to the cheeks for an extra dose of cuteness!
Tips for Success
Micro-crochet can be a little tricky at first. Here are a few tips to help you along the way:
- Lighting is Key: Since you are working with such tiny stitches, make sure you are in a well-lit area so you can clearly see your loops.
- Don’t Rush the Painting: When working with watercolors on thread, it’s tempting to finish quickly, but letting the layers dry between steps prevents the colors from turning into a muddy mess.
- Tension Matters: Try to keep your tension consistent. If you crochet too tightly, it becomes difficult to insert the hook; if too loose, the stuffing might show through.
- Use a Marker: Even with a tiny project, a stitch marker is your best friend to ensure you don’t lose count of your rounds.