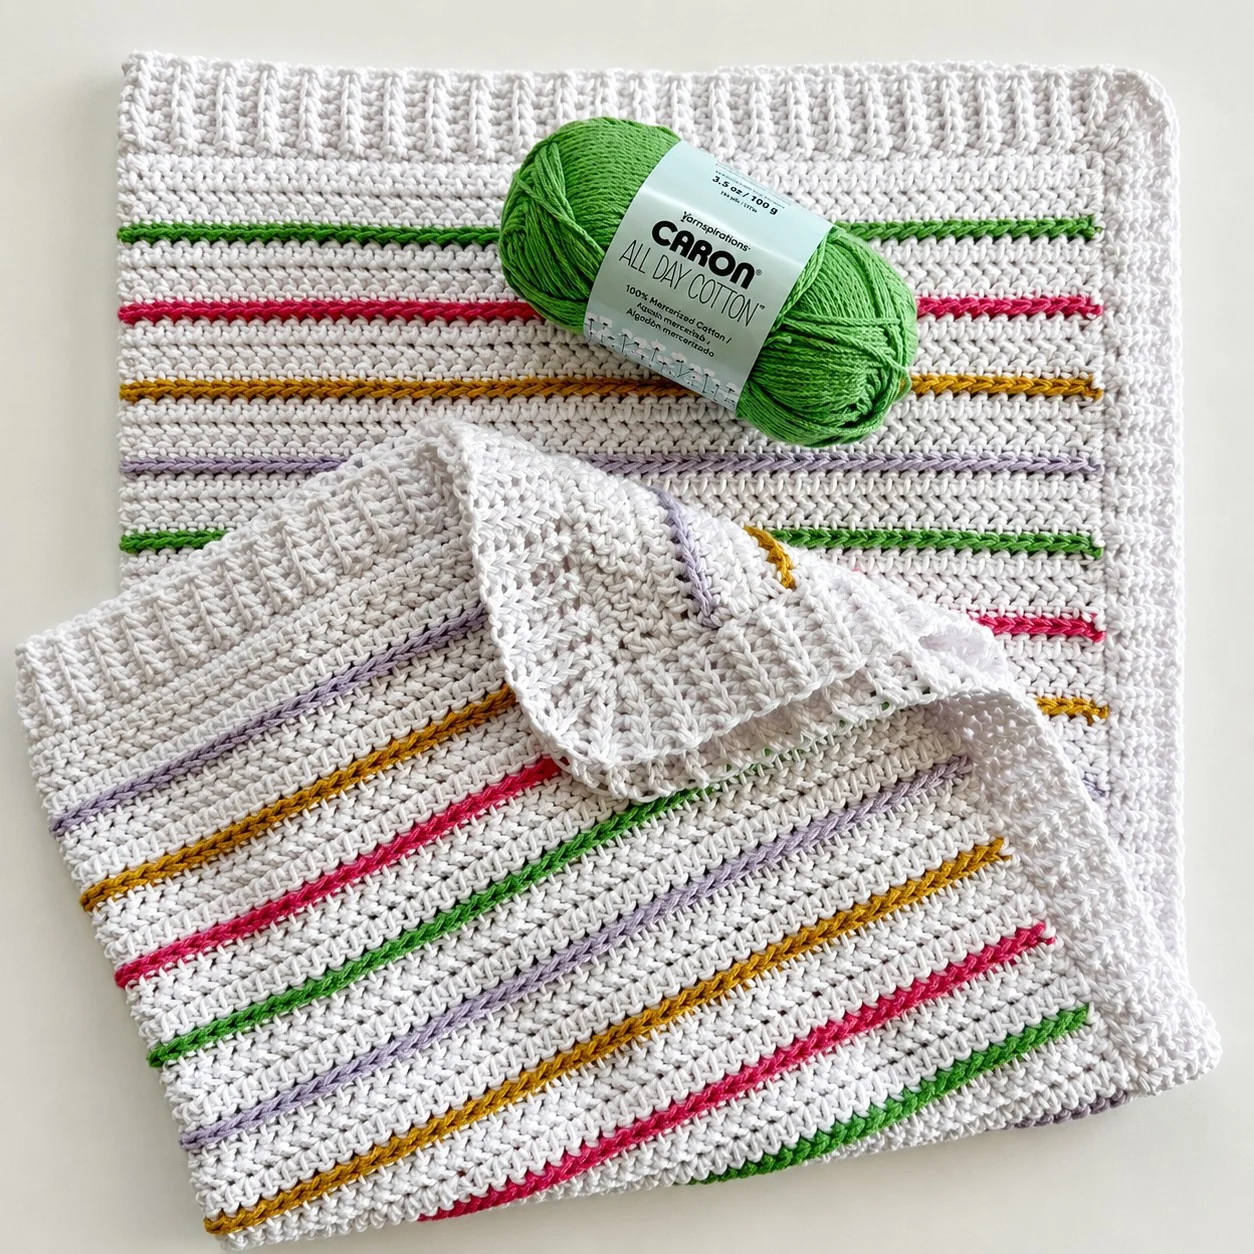
Colorful Striped Cotton Crochet Blanket Pattern
If you are looking for a project that combines vibrant color, beautiful texture, and a beginner-friendly approach, you have come to the right place. This striped cotton crochet blanket is the perfect addition to your home decor. Whether you want to drape it over the back of a favorite armchair or use it as a lightweight throw for breezy summer evenings, this pattern delivers a high-end, textured look with minimal effort.
The beauty of this blanket lies in its simplicity and the wonderful play between different crochet stitches. By alternating between the Herringbone Half Double Crochet and the Half Double Slip Stitch, you create a rhythmic, striped effect that is visually stunning. Plus, using a 100% mercerized cotton ensures that the colors stay bright and the finished product has a lovely, subtle sheen.
Grab your favorite hook and let’s dive into this colorful adventure!
Materials & Abbreviations
Before you begin, make sure you have all your supplies ready. This project uses a medium-weight cotton yarn, which provides great stitch definition and a sturdy feel.
Yarn Requirements
You will need approximately five skeins of Caron All Day Cotton (or a similar 100% mercerized cotton that provides approximately 173 yards per 3.5 oz skein). To achieve the look in this pattern, you will need the following colors:
- White Shirt: 4 skeins
- Grass Green: 1 skein
- Cherry: 1 skein
- Grape Popsicle: 1 skein
- Golden: 1 skein
Tools
- Size H (5.00mm) crochet hook
- Tapestry needle (for weaving in ends and sewing corners)
- Scissors
Gauge
Your gauge should be approximately 15 stitches and 15 rows of pattern equaling 4 inches. Remember, gauge is important to ensure your blanket ends up the desired size!
Finished Size
The finished blanket will measure approximately 28 inches by 28 inches.
Stitch Guide & Abbreviations
Please ensure you are using US crochet terms. If you are new to these specific stitches, here is a quick breakdown:
- HHDC (Herringbone Half Double Crochet): Yarn over (YO), insert your hook into the stitch, YO, pull up a loop, and pull that loop directly through the first loop on your hook. YO and pull through the remaining two loops on the hook.
- HDSS (Half Double Slip Stitch): YO, insert your hook into the stitch, YO, pull up a loop, and pull that loop directly through the two loops on your hook.
- SC (Single Crochet): Insert your hook into the stitch, YO, pull up a loop, YO, and pull through the two loops on your hook.
- SL ST (Slip Stitch): Insert your hook into the stitch, YO, pull up a loop, and pull that loop directly through the loop on your hook.
Step-by-Step Instructions
The Main Body
The main body of the blanket is built on a foundation of stripes that alternate between textured herringbone stitches and sleek slip stitches.
Starting Foundation: Begin by making a foundation chain of 90 stitches using the White yarn. (Note: You can adjust this number to make the blanket larger or smaller, just ensure your starting chain is a multiple that works with your desired width).
Row 1: Starting in the second chain from the hook, work 1 HHDC in each chain across. Chain 1 and turn.
Rows 2 – 3: Work 1 HHDC in each stitch across the row. On the very last stitch of Row 3, perform a color change by pulling through with the Grape Popsicle yarn on the final step of the stitch. Chain 1 and turn.
Pro Tip: At this stage, you have two options for managing your yarn. You can “carry” the White yarn across the top of your work as you crochet the next color row to minimize ends, or you can cut the White yarn and leave a long tail to weave in later. Carrying the yarn is often faster for reducing the amount of weaving required!
Row 4: Using the Grape Popsicle yarn, work 1 row of HDSS across the entire row. On the last stitch, pull through with the White yarn. Chain 1 and turn.
Row 5: Using the White yarn, work 1 HHDC in each stitch across the row. To create the specific texture for this row, make sure you are inserting your hook into the front bottom loop (FBLO) of each stitch.
Rows 6 – 7: Using the White yarn, work 1 HHDC in each stitch across the row. Chain 1 and turn.
Repeating the Pattern: To continue the blanket, repeat Rows 4 through 7. You will alternate your color rows between Grape Popsicle, Golden, Cherry, and Grass Green. For a balanced look, try repeating each color sequence five times before finishing your desired length.
The Border
Once you have reached your desired size, you can either tie off and weave in your ends now, or you can work directly into the final chain to begin the border. For a seamless look, we recommend chaining 1 and starting the border immediately.
Round 1: Work one round of SC around the entire perimeter of the blanket. To ensure your corners stay sharp and defined, work 3 SC into each corner space. Work 1 SC into every stitch along the sides. When you reach your starting corner, slip stitch into the first stitch and Chain 6.
Round 2: Starting in the second chain from the hook, work HDSS in each of the 5 chains, working back toward the edge of the blanket.
The Corner Sequence: Slip stitch into the next stitch, and then into the next stitch. Turn your work and work HDSS into the back loops of each of the 5 HDSS you just created. Chain 1 and turn. Work back down the HDSS, working only into the back loops. Repeat this process across each side.
Important Note on Corners: When you reach a corner space during this round, only slip stitch once before turning and working the HDSS sequence back up to the top of the border. Return to the corner and slip stitch once into the corner space. Repeat this two more times, then resume slip stitching into the next two stitches and working across the side.
Finishing
Once you have completed the final round of the border, work the starting corner the same way you worked the others. Stop when you reach the top of the border and tie off your yarn securely.
To give the blanket a professional, polished look, use your tapestry needle to sew the corners together where they meet. Finally, go through and weave in all your loose ends on the back of the blanket. Your beautiful, striped cotton blanket is now ready to be enjoyed!
Tips for Success
Crocheting can sometimes be tricky, especially when working with borders and color changes. Here are a few tips to help you achieve the best results:
- Corner Adjustments: If you find that your corners aren’t looking rounded enough, try slip stitching an additional time into the corner and working up and down an extra row with the HDSS. Conversely, if the border is starting to ripple or wave, try slip stitching into the corner only two times instead of three to reduce tension.
- Tension Control: When working the HDSS (Half Double Slip Stitch), keep your tension even. This stitch is slightly different from a standard half double crochet, and consistent tension will make the stripes look much cleaner.
- Color Transitions: When changing colors, try to do it on the final pull-through of the last stitch of the previous color. This creates a much smoother transition between your stripes.
- Mercerized Cotton: Because this pattern uses mercerized cotton, it is less stretchy than wool. Don’t pull your stitches too tight, or the blanket may feel a bit stiff. Let the stitches breathe!