The Magic Touch: A Beginner’s Guide to Blocking Crochet Finished Projects
You’ve spent hours—maybe weeks—pouring your heart and soul into a gorgeous crochet project. You finally fast-forward through the last few stitches, snip the yarn, and pull it through. But then you lay it on the table and… well, it’s a little wonky. Maybe the edges are curling, your “perfect” square is more of a trapezoid, or your beautiful lace shawl looks like a crumpled napkin.
First of all: don’t panic! This is completely normal. In fact, it’s exactly why we have a secret weapon called blocking.
If you’ve never heard of blocking crochet finished projects, consider this your official introduction to the “magic” step of the crafting process. Blocking is the difference between something that looks “homemade” and something that looks “professional.” Let’s dive into what it is, why you need it, and how to do it without stressing out.
Wait, What Exactly is Blocking?
In the simplest terms, blocking is the process of wetting your finished crochet piece and then pinning it into the correct shape and size. By adding moisture to the fibers, you’re essentially “relaxing” the yarn, which allows you to gently nudge the stitches into their ideal positions. Once the piece dries, the fibers set in that new position, and your project keeps its shape.
Think of it like ironing a dress. You wouldn’t wear a shirt straight out of the dryer if it were all wrinkled, right? Blocking is basically the “ironing” phase for your yarn work.
Why Bother? (The “Before and After” Effect)
I know, I know. You just finished the project; the last thing you want to do is more work. But hear me out! Blocking does a few incredible things for your work:
- Fixes “Wonkiness”: We all have those days where our tension is a bit tighter on the left side than the right. Blocking evens everything out.
- Opens Up Stitch Work: If you’re making a lace project or something with a lot of “holes” (like a granny square blanket), blocking opens those stitches up so the pattern actually pops.
- Hits the Right Dimensions: If you’re making a garment (like a sweater or a hat), blocking ensures the piece actually fits the measurements you were aiming for.
- Professional Finish: It flattens out curling edges and gives the fabric a polished, high-end look.
Which Blocking Method Should You Use?
Not all yarns are created equal, and neither are blocking methods. Using the wrong technique on the wrong yarn can lead to disaster (like accidentally melting your project!). Here are the three most common ways to handle blocking crochet finished projects.
1. Wet Blocking (The Gold Standard)
This is the most thorough method and is best for natural fibers like wool, cotton, or bamboo. It involves fully soaking the piece.
How it works: You soak your project in lukewarm water (with a bit of mild soap if needed), gently squeeze out the excess water (never wring it!), and pin it to a mat. It takes the longest to dry, but it gives the most permanent and precise results.
2. Steam Blocking (The Fast Track)
Steam blocking is a lifesaver for acrylic yarns or blends that don’t respond well to soaking. It’s much faster than wet blocking.
The Golden Rule: NEVER let the iron actually touch the yarn. If you’re using acrylic, you will literally melt the fibers, leaving a permanent flat spot or a hole. You want the steam to do the work, not the heat of the metal plate.
3. Spray Blocking (The Middle Ground)
If your project is mostly fine and just needs a little nudge, spray blocking is the way to go. You simply mist the project with a spray bottle of water until it’s damp, pin it, and let it dry.
Your Blocking Toolkit: What You’ll Need
You don’t need a professional studio to block your work, but a few specific tools make the process way easier:
- Blocking Mats: These are high-density foam mats that allow you to poke pins through them without ruining your table. If you don’t have these, a few thick towels laid out on a carpeted floor can work in a pinch.
- T-Pins: These are stainless steel pins with a T-shaped head that makes them easy to grip. They hold the fabric firmly in place.
- Spray Bottle: Filled with clean, room-temperature water.
- Measuring Tape: To make sure your project is symmetrical and the right size.
- Steamer or Iron: (Only for steam blocking!)
Step-by-Step: How to Block Your Crochet
Regardless of the method you choose, the general workflow is pretty similar. Here is how to do it right:
Step 1: Prep Your Piece
Before you start, decide on your final dimensions. If you’re making a square, how many inches should it be? If it’s a garment, check your pattern’s size chart. It helps to lightly mark these dimensions on your blocking mat with a washable marker or by using your measuring tape.
Step 2: Add Moisture
Depending on your method, either soak the piece in a basin (wet blocking), mist it thoroughly (spray blocking), or hover your steamer over the fabric (steam blocking). The yarn should be damp and pliable, but not dripping wet to the point of being heavy.
Step 3: Pin It Down
Lay your project on the mats. Start with the center and work your way out to the edges. Gently pull the fabric to the desired measurements and secure it with a T-pin. Don’t yank the yarn—you want to guide it, not stretch it out of shape. If you pull too hard, your project might end up looking distorted.
Step 4: Let It Set
Now comes the hardest part: waiting. For wet blocking, leave the project alone until it is 100% dry. For steam blocking, let it cool down completely before moving it. If you remove the pins while the yarn is still damp, the piece will shrink right back to its wonky original shape.
Step 5: The Big Reveal
Carefully pull out your pins and lift your project. You’ll likely notice an immediate difference in the drape and shape of the fabric. Give it a little shake, and you’re done!
Common Blocking Mistakes (and How to Avoid Them)
Even seasoned crocheters mess up blocking occasionally. Here are a few things to watch out for:
- Over-stretching: It’s tempting to try and make a project bigger than it actually is. Be careful not to pull the stitches so far that they lose their structure.
- The “Acrylic Melt”: As mentioned before, keep that iron away from your acrylic yarn! If you’re nervous, hold the iron 2-3 inches away from the fabric.
- Blocking Before Weaving Ends: This is a bit of a debate in the crochet community. Some people block first, then weave in ends so the ends “set” in the blocked position. Others weave first. My tip? If you have long tails, weave them in loosely before blocking so they don’t create weird lumps.
- Using Too Much Soap: If you’re wet blocking, use a very small amount of wool-wash or mild detergent. Too much soap can leave a residue or make the yarn feel sticky.
FAQs: Everything Else You’re Wondering
Do I have to block every single project?
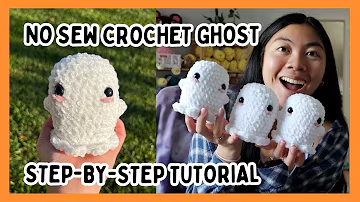
Nope! Amigurumi (stuffed toys) usually doesn’t need blocking because the stuffing provides the shape. Some very heavy, chunky blankets might not need it either. But for anything lacey, any garment, or any project where shape matters, it’s highly recommended.
Can I block cotton yarn?
Absolutely! Cotton actually loves wet blocking. Just be aware that cotton can be heavier when wet, so make sure your pins are secure so the piece doesn’t sag.
How long does it actually take to dry?
It depends on the yarn and the humidity in your house. A light lace shawl might dry in a few hours, while a thick wool sweater could take a day or two. Be patient!
Wrapping Up: Give Your Projects the Love They Deserve
Blocking might seem like an extra chore, but it is truly the finishing touch that elevates your work. It’s the moment where all your hard work finally “clicks” into place and looks exactly the way you imagined it would.
So, the next time you finish a project and think, “Something’s not quite right,” don’t rip it out! Reach for the spray bottle or the soaking basin. Give your crochet the magic touch of blocking, and watch your projects transform from “almost there” to “absolutely perfect.” Happy hooking!