How to Crochet a Cute Mini Pig: Easy Amigurumi Pattern for Beginners
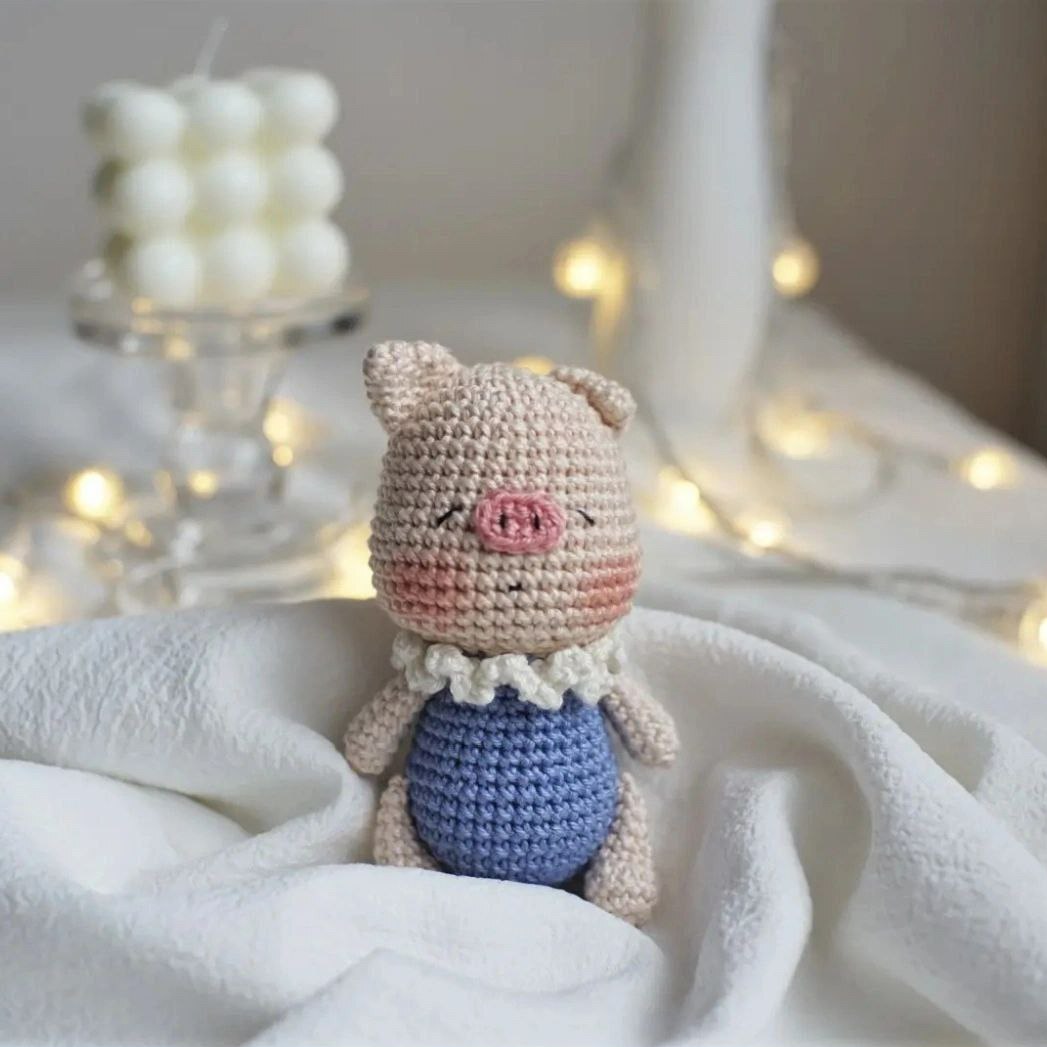
There is nothing quite as charming as a small, handmade companion to brighten up your desk or to give as a heartfelt gift. Amigurumi—the Japanese art of knitting or crocheting small, stuffed yarn creatures—is a wonderful way to practice your skills while creating something truly adorable. In this tutorial, we will walk you through the process of creating a tiny, dressed-up piglet that stands approximately 4.3 inches tall.
Whether you are a seasoned pro or someone who just learned how to hold a crochet hook, this project is designed to be accessible. We will use a combination of basic stitches and simple shaping to create a plump little pig wearing a sweet blue outfit and a delicate white collar. Let’s dive into the magic of yarn and hooks!
Materials & Abbreviations
Before we start stitching, gather your supplies. To achieve the look in the photos, you will want colors that contrast softly, such as a creamy off-white and a bright pastel blue.
Supplies Needed
- Yarn: Medium weight (4) yarn in the following colors:
- Blue (for the outfit)
- Cream (for the body and head)
- Pink (for the snout and ears)
- White (for the frilly collar)
- Crochet Hook: A size 3.25mm (D) or 3.5mm (E) hook (use a slightly smaller hook than recommended on your yarn label to ensure the stuffing doesn’t peek through).
- Stuffing: Polyester fiberfill or a similar craft stuffing.
- Tools: A yarn needle for sewing, a stitch marker to keep track of your rounds, and a pair of sharp scissors.
US Crochet Terms & Abbreviations
This pattern uses standard US terminology. If you are used to UK terms, please keep these conversions in mind:
- MR: Magic Ring (also known as a magic circle)
- st: Stitch
- sc: Single crochet
- inc: Increase (two single crochets in the same stitch)
- dec: Decrease (crochet two stitches together into one)
- ch: Chain
- sl st: Slip stitch
- FLO: Front Loop Only
- BLO: Back Loop Only
Step-by-Step Instructions
The Body (Bottom and Outfit)
We start with the bottom of the pig, which doubles as its little blue dress or jumpsuit. Use the blue yarn for this section.
Round 1: Create a Magic Ring and work 7 sc into the ring. Join with a sl st. [7 sts]
Round 2: Work an inc in each stitch around. [14 sts]
Round 3: (1 sc, inc) repeat around. [21 sts]
Round 4: (2 sc, inc) repeat around. [28 sts]
Rounds 5-8: Work one sc in each stitch around. [28 sts]
Round 9: (2 sc, dec) repeat around. [21 sts]
Round 10: (1 sc, dec) repeat around. [14 sts]
Begin stuffing the body firmly with fiberfill.
Round 11: Change yarn to cream. Work in BLO (Back Loop Only) for this round to create a sharp edge for the outfit. Sc in each stitch around. [14 sts]
The Head and Face
The head is worked as a separate piece and then sewn to the body. Switch to the cream yarn.
Round 1: 6 sc in MR. [6 sts]
Round 2: Inc in each stitch around. [12 sts]
Round 3: (1 sc, inc) repeat around. [18 sts]
Round 4: (2 sc, inc) repeat around. [24 sts]
Rounds 5-9: Sc in each stitch around. [24 sts]
Round 10: (2 sc, dec) repeat around. [18 sts]
Round 11: (1 sc, dec) repeat around. [12 sts]
Stuff the head firmly.
Round 12: Dec 6 times. Close the hole and weave in the ends.
The Snout and Ears
The Snout: Using pink yarn, make a Magic Ring and work 6 sc into it. Join with a sl st. Fasten off, leaving a long tail for sewing.
The Ears: Using pink yarn, ch 3. In the second chain from the hook, work 1 sc. In the last chain, work 3 sc. Turn and work back along the other side of the chain. Repeat for the second ear. Fasten off.
The Arms and Legs
Using cream yarn, create four small limbs. For each limb:
Round 1: 6 sc in MR. [6 sts]
Rounds 2-4: Sc in each stitch around. [6 sts]
Fasten off, leaving a tail for sewing. These do not need much stuffing; a small pinch of fiberfill is enough.
The Frilly Collar
Using white yarn, we will create a decorative ruffle that sits between the head and the body.
Join white yarn to the top edge of the blue outfit (Round 11). Ch 1, then work 3 dc (double crochet) into every single stitch around. This will create a gathered, ruffly effect. Sl st to the first stitch and fasten off.
Finishing Your Piglet
Now comes the assembly! This is where your piglet truly comes to life. Use your yarn needle and a matching thread color for these steps:
- Attach the Head: Sew the head securely to the top of the body, just above the white collar.
- Place the Snout: Sew the pink snout to the center of the face. Use a darker pink thread to embroider two small vertical lines on the snout for nostrils.
- Position the Ears: Sew the ears to the top of the head, slightly angled outward for a cute look.
- Attach Limbs: Sew the arms to the sides of the body and the legs to the bottom. Make sure the legs are positioned so the pig can sit upright.
- Eyes: You can use 6mm safety eyes or embroider two simple French knots with black yarn for a softer expression.
Tips for Success
To ensure your amigurumi looks professional and polished, keep these tips in mind:
Use the Invisible Decrease
Standard decreases can sometimes leave small gaps or “bumps” in the fabric. To avoid this, use the invisible decrease: insert your hook into the front loop of the first stitch, then the front loop of the second stitch, and complete the sc. This keeps the surface smooth.
Tight Stitches are Key
Because we are stuffing the toy, any large gaps between stitches will allow the fiberfill to leak out. Keep your tension tight. If you notice gaps, try dropping down a hook size (for example, from a 3.5mm to a 3.0mm).
Strategic Stuffing
Stuff your pieces in small increments. It is much easier to add more stuffing than it is to remove it. Ensure you pack the stuffing firmly into the corners of the head and body to maintain the round, plump shape.
Weave in Your Ends
Don’t just knot your yarn and cut it short! Use your yarn needle to weave the ends back through the stitches of the body. This prevents the yarn from unraveling over time and ensures a seamless finish.