Hop Into Cuteness: Create Your Own Adorable Crochet Bunny!
“`html
Adorable Crochet Bunny Amigurumi Pattern: Step-by-Step Guide
Create your own cute and cuddly crochet bunny with this detailed, easy-to-follow pattern. This project is perfect for beginners and intermediate crocheters looking to make a charming handmade gift or a new addition to their plushie collection.
Materials Needed
- Crochet Hook: 2.0 mm
- Safety Eyes: 8 mm
- Yarn (Sport Weight):
- Main Color: Pink (approx. 30g)
- Accent Color 1: Cream/Milk (approx. 6g)
- Accent Color 2: White (approx. 1g)
- Accent Color 3: Light Pink (approx. 1g)
- Embroidery Thread: Thin black thread for eyebrows and eyelids
- Other Essentials: Stitch marker, scissors, sewing pins, yarn needle, and fiberfill stuffing
Abbreviations (US Terms)
- MR: Magic Ring
- sc: Single crochet
- inc: Increase (2 sc in one stitch)
- dec: Decrease (sc 2 together)
- ch: Chain
- sl st: Slip stitch
- Popcorn: 4 double crochets worked into one stitch, joined at the top
- (…) x6: Repeat instructions inside parentheses 6 times
Pattern Instructions
The Ears (Make 2)
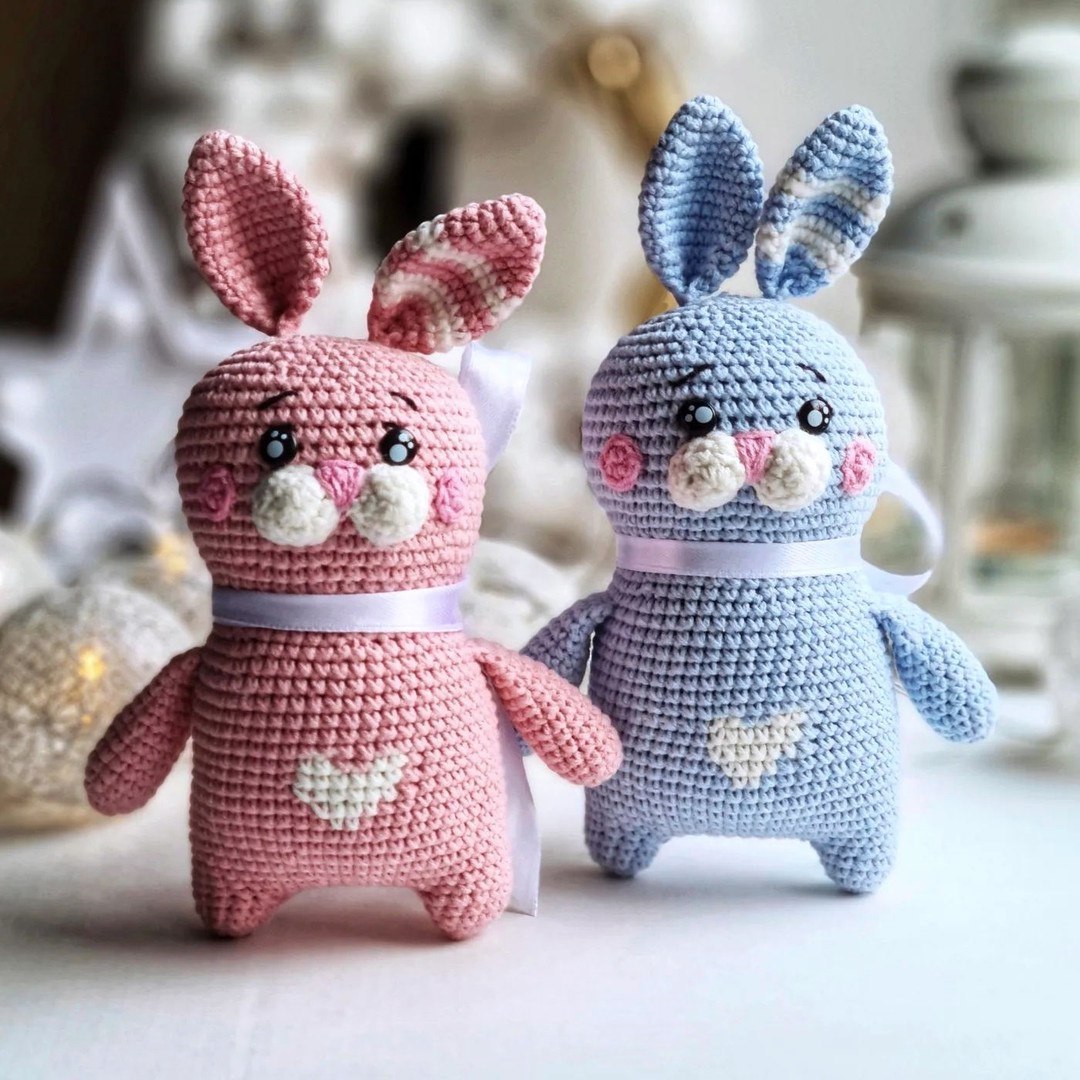
Note: One ear is multicolored/striped and the other is solid pink. Do not stuff the ears.
For the Striped Ear:
- R1: 6 sc in MR (6)
- R2: (1 sc, inc) x3 (9)
- R3: (2 sc, inc) x3 (12)
- R4: (3 sc, inc) x3 (15)
- R5: (4 sc, inc) x3 (18)
- R6: (5 sc, inc) x3 (21)
- Change color to Cream.
- R7-8: sc in each st (21) – 2 rounds
- Change color to Pink.
- R9-10: sc in each st (21) – 2 rounds
- Change color to Cream.
- R11-12: sc in each st (21) – 2 rounds
- Change color to Pink.
- R13: (5 sc, dec) x3 (18)
- R14: (1 sc, dec) x6 (12). Shift the stitches by 3 sc to keep the shape rounded.
- R15: Fold the piece in half and sc through both sides for 6 stitches.
- R16: Fold in half and work: ch 1, 3 sc through both sides.
Cut the yarn, leaving a short tail. For the second ear, follow the same steps but use solid Pink throughout.
The Arms (Make 2)
Use Pink yarn. Stuff only the bottom 1/3 of the arm.
- R1: 6 sc in MR (6)
- R2: inc x6 (12)
- R3-14: sc in each st (12) – 12 rounds
- R15: Fold in half and sc through both sides for 6 stitches.
Cut yarn and leave a short tail.
The Muzzle (Make 2)
Use Cream yarn.
- R1: 6 sc in MR (6)
- R2: inc x6 (12)
- R3: sc in each st (12), sl st.
Cut yarn, leaving a long tail for sewing.
The Cheeks (Make 2)
Use Light Pink yarn.
- R1: 6 sc in MR (6), sl st.
Cut yarn, leaving a long tail for sewing.
The Legs, Body, and Head
Use Pink yarn.
The Legs:
- R1: 6 sc in MR (6)
- R2: inc x6 (12)
- R3-4: sc in each st (12) – 2 rounds, sl st.
Cut yarn for the first leg. Do not cut yarn for the second leg; continue to the body.
The Body:
- R5: ch 10, join to the first leg with a sc (this is the first st of the leg), 11 sc around the leg, 10 sc along the chain, 12 sc around the second leg, 10 sc along the chain (44)
- Place a stitch marker.
- R6: sc in each st (44)
- R7: 12 sc, (inc, 2 sc) x4, 20 sc (48)
- R8-12: sc in each st (48) – 5 rounds
- R13 (Tummy Heart and Tail): 18 sc, change to Cream for 2 sc (bottom of heart), change back to Pink for 23 sc, work 1 Popcorn stitch (tail), 4 sc (48)
- R14: 17 sc, change to Cream for 4 sc, change to Pink for 27 sc (48)
- R15: 16 sc, change to Cream for 6 sc, change to Pink for 26 sc (48)
- R16: 16 sc, change to Cream for 6 sc, change to Pink for 26 sc (48)
- R17: 16 sc, change to Cream for 2 sc, change to Pink for 2 sc, change to Cream for 2 sc, change to Pink for 26 sc (48)
- Cut the Cream yarn.
- R18-23: sc in each st (48) – 6 rounds
- R24: Crochet the arms into the sides of the body while working 48 sc (48)
- R25: sc in each st (48)
- R26: (6 sc, dec) x6 (42)
- R27: sc in each st (42)
- R28: (5 sc, dec) x6 (36)
- R29: sc in each st (36)
Stuff the body firmly.
The Head:
- R30: (5 sc, inc) x6 (42)
- R31: (6 sc, inc) x6 (48)
- R32: (7 sc, inc) x6 (54)
- R33-41: sc in each st (54) – 9 rounds
- Insert safety eyes between rounds 38 and 39, approximately 6-7 stitches apart.
- R42: (7 sc, dec) x6 (48)
- R43: (6 sc, dec) x6 (42)
- R44: sc in each st (42)
- R45: (5 sc, dec) x6 (36)
- R46: (4 sc, dec) x6 (30)
- R47: (3 sc, dec) x6 (24)
Stuff the head firmly.
- R48: Crochet the ears into the sides of the head while working (2 sc, dec) x6 (18)
- R49: (1 sc, dec) x6 (12)
- R50: dec x6 (6), sl st.
Cut the yarn, weave it through the final stitches to close the hole, and hide the end inside the head.
Assembly and Finishing Touches
- Sew the ears securely to the head.
- Sew the two muzzle pieces onto the face, leaving 1-2 rounds of space between them. Stuff the muzzle as you sew.
- Stitch the two muzzle pieces together in the center with a few small stitches.
- Embroider a small nose using Light Pink yarn.
- Sew the cheeks 1-2 rounds away from the muzzle.
- Embroider the whites of the eyes using White yarn.
- Embroider the upper eyelids and eyebrows using the thin black embroidery thread.
Your adorable crochet bunny is now complete!
“`