Knit This Stunningly Textured Mosaic Garter Ridges Hat (Beginner-Friendly!)
“`html
How to Knit a Mosaic Garter Ridges Hat: Easy Step-by-Step Pattern
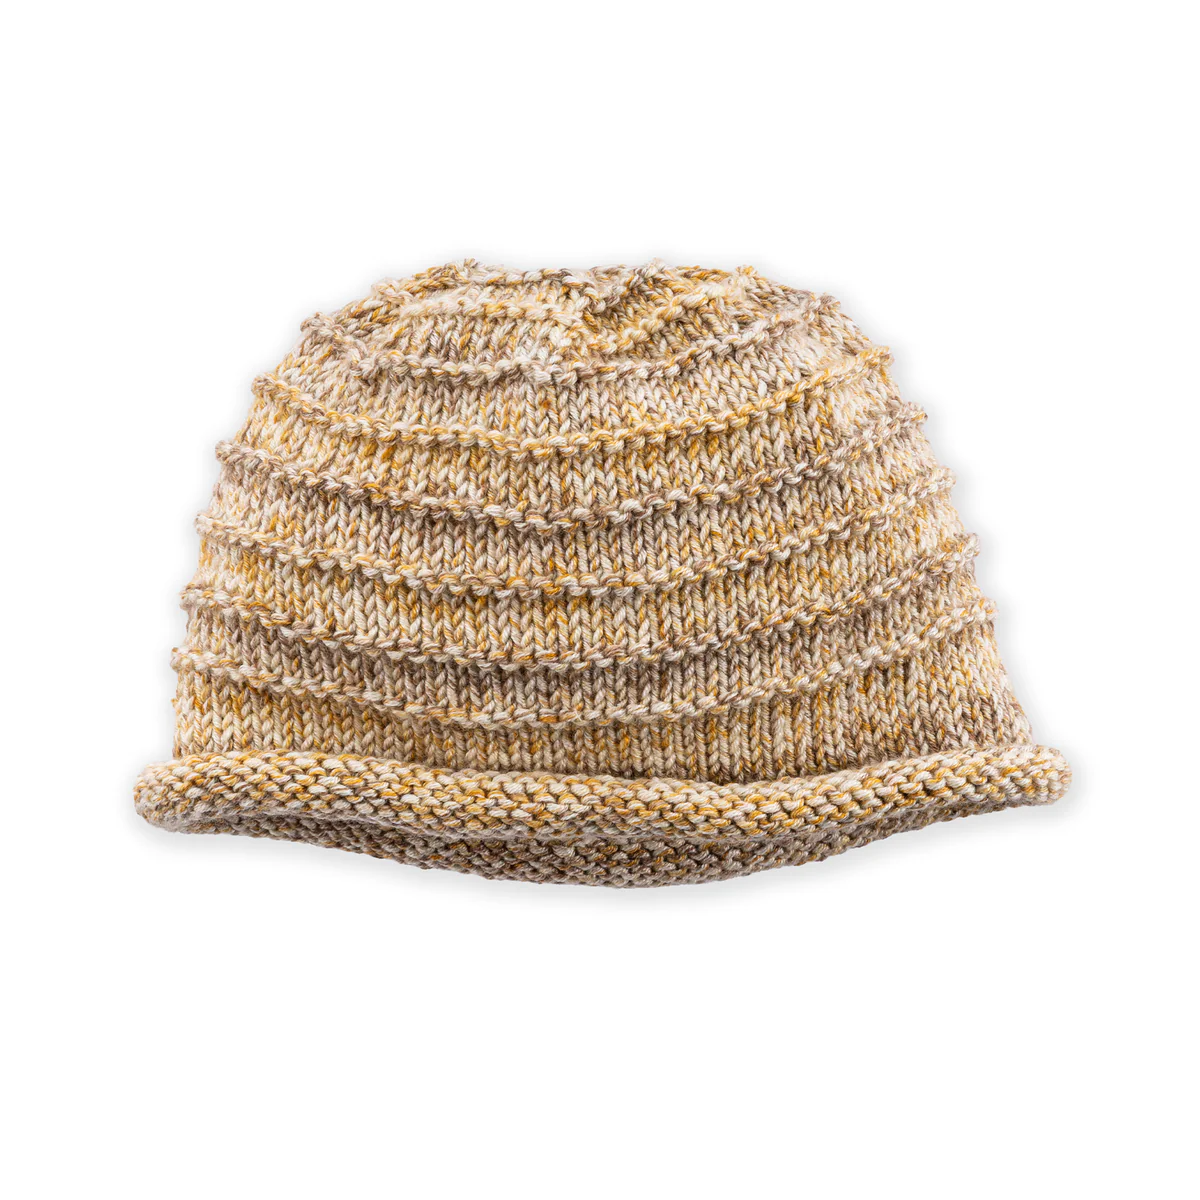
Add a cozy, textured touch to your wardrobe with this Mosaic Garter Ridges Knit Hat. This project is perfect for beginners or those looking for a quick, satisfying knit. The ridged texture provides a modern look while remaining simple to execute.
Project Overview
This pattern is designed for an easy skill level and creates a warm, bulky hat suitable for children and adults.
Materials Needed
- Yarn: Bulky weight yarn. You will need approximately 1 ball (roughly 123–135 yards).
- Needles:
- U.S. 8 (5 mm) circular knitting needles (16″ long).
- Set of 4 U.S. 8 (5 mm) double-pointed needles (DPNs).
- Notions:
- Stitch marker.
- Yarn needle.
Sizing and Gauge
Sizes: This pattern provides instructions for both Child and Adult sizes.
Gauge: 17 stitches and 20 rows = 4″ [10 cm] in stocking stitch.
Abbreviations Guide
- Alt: Alternate(ing)
- Beg: Beginning
- Cont: Continue(ity)
- K2tog: Knit next 2 stitches together
- P2tog: Purl next 2 stitches together
- Pat: Pattern
- PM: Place marker
- Rem: Remaining(s)
- Rep: Repeat
- Rnd(s): Round(s)
- St(s): Stitch(es)
- Work2tog: K2tog or P2tog following the pattern row
Step-by-Step Knitting Instructions
Note: Instructions are written for the Child size. Adult size adjustments are shown in parentheses ( ).
The Hat Body
Using your circular needles, cast on 80 (88) stitches. Join to work in the round and place a marker (PM) to indicate the beginning of the round.
- Knit in rounds for 3″ [7.5 cm].
- Next round: Purl.
- Next 4 rounds: Knit.
- The Ridged Pattern: Repeat the last 5 rounds (1 purl round, 4 knit rounds) until the piece measures 6″ (7″) [15 (18) cm] from the cast-on edge, measured flat.
Pro Tip: Switch to double-pointed needles when the circumference of the hat becomes too small to fit comfortably on the circular needle.
Shaping the Crown
Continue working in the Ridged Pattern while decreasing as follows:
- 1st round: [Work 8 (9) stitches in pattern, Work2tog] 8 times. 72 (80) stitches remain.
- 2nd and all alternate rounds: Work even in Ridged Pattern.
- 3rd round: [Work 7 (8) stitches in pattern, Work2tog] 8 times. 64 (72) stitches remain.
- 5th round: [Work 6 (7) stitches in pattern, Work2tog] 8 times. 56 (64) stitches remain.
- 7th round: [Work 5 (6) stitches in pattern, Work2tog] 8 times. 48 (56) stitches remain.
- 9th round: [Work 4 (5) stitches in pattern, Work2tog] 8 times. 40 (48) stitches remain.
- 11th round: [Work 3 (4) stitches in pattern, Work2tog] 8 times. 32 (40) stitches remain.
- 13th round: [Work 2 (3) stitches in pattern, Work2tog] 8 times. 24 (32) stitches remain.
- 15th round: [Work 1 (2) stitch(es) in pattern, Work2tog] 8 times. 16 (24) stitches remain.
Finishing Touches
Break the yarn, leaving a long tail. Use your yarn needle to thread the end through the remaining stitches. Pull the yarn tightly to close the top of the hat and fasten it securely on the inside. Weave in any remaining ends for a clean finish.
“`