Adorable Mini Plush Puppy Crochet Pattern: Free Step-by-Step Tutorial
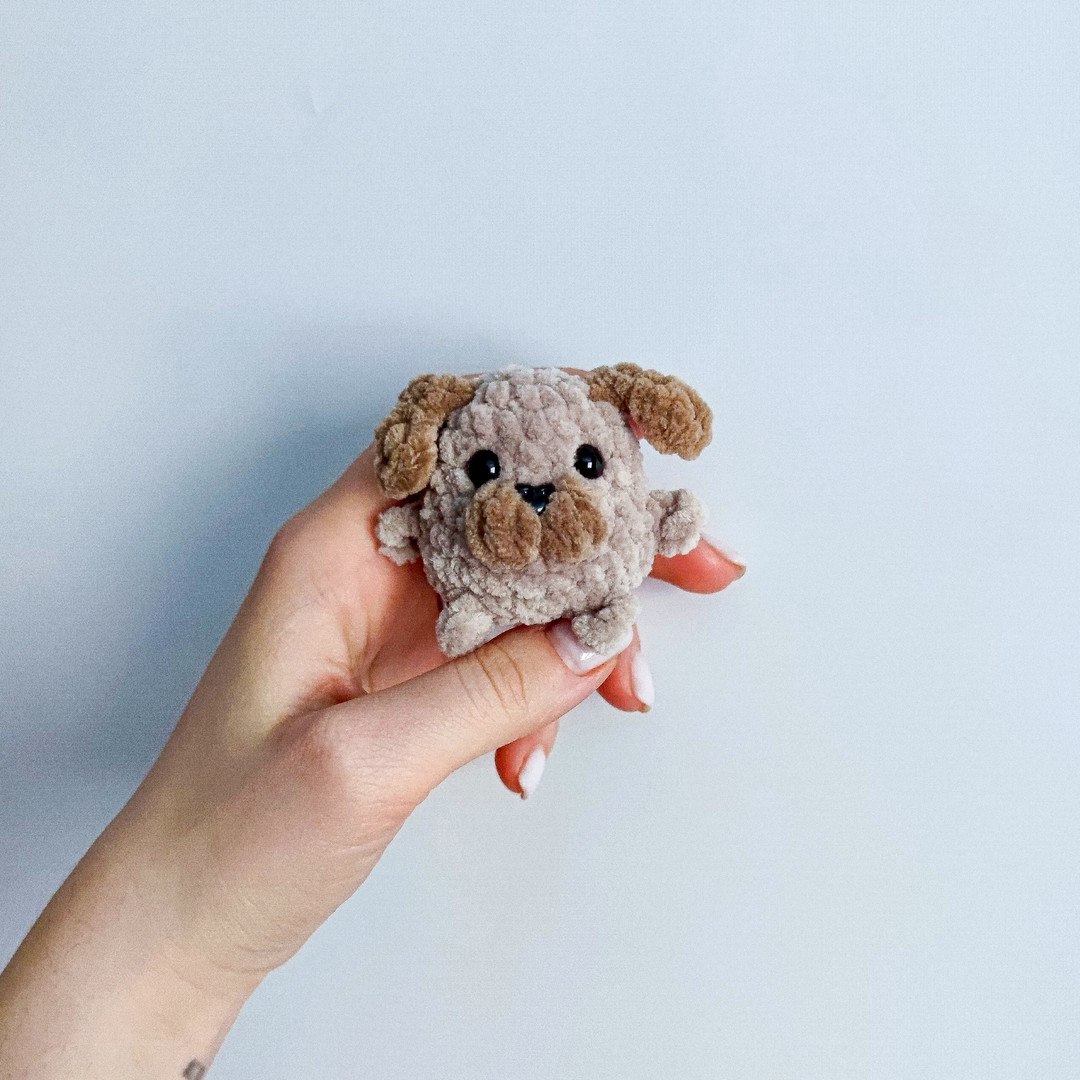
Looking for a quick, cozy, and absolutely precious project? This mini plush puppy is the perfect addition to your amigurumi collection. Whether you are looking for a cute gift, a desk companion, or a way to use up some scraps of chenille yarn, this little pup is a joy to make. Because we are using plush yarn, the project works up incredibly fast, and the result is a squishy, huggable toy that feels like a professional boutique find.
This pattern is designed to be beginner-friendly. We will be working from the top down, meaning we start with the head and move toward the bottom, integrating the paws and tail as we go. If you have never worked with “velvet” or “plush” yarn before, don’t worry! We have included some specific tips to help you navigate the fluffiness and keep your stitches neat.
Materials & Abbreviations
To get started, gather the following supplies. If you don’t have the exact brand mentioned, any “super bulky” plush or chenille yarn will work perfectly.
Supplies Needed
- Plush Yarn: Approximately 50-70 yards of super bulky plush yarn in a light tan or beige color for the body, and a small amount of dark brown for the nose. (Recommended weight: 120m/100g or similar chunky chenille).
- Crochet Hook: 4.0 mm (G/6) hook.
- Safety Eyes: 8 mm plastic safety eyes.
- Stuffing: Polyester fiberfill or scrap yarn.
- Tools: Yarn needle, scissors, and a stitch marker.
US Crochet Terms
This pattern uses standard US terminology. If you are used to UK terms, please adjust accordingly.
- sc: Single crochet
- inc: Increase (2 sc in one stitch)
- dec: Decrease (sc 2 stitches together)
- ch: Chain
- sl st: Slip stitch
- hdc: Half double crochet
- dc: Double crochet
- Puff St: Puff stitch (worked here as 4 dc wrapped into one stitch)
- (…) x6: Repeat the instructions inside the parentheses 6 times.
Step-by-Step Instructions
The Head and Body
The puppy is worked in continuous rounds. Do not join the rounds with a slip stitch unless specifically instructed. We highly recommend using a stitch marker to keep track of the beginning of each round.
Round 1: Start with a magic ring and work 6 sc into the ring. (6 stitches)
Round 2: Work an increase in every stitch around. (12 stitches)
Round 3: (1 sc, 1 inc) repeat 6 times. (18 stitches)
Rounds 4-5: Work 1 sc in each stitch around for two rounds. (18 stitches)
Adding the Nose and Paws
Now we will add the puppy’s facial features and its little limbs. This part requires a few color changes and special stitches.
Round 6: Work 7 sc. Switch to dark brown yarn and work 2 puff stitches (each puff is made of 4 dc pulled up into the same stitch). Switch back to the main body color and work 9 sc. (18 stitches)
Round 7: This round is where we create the front paws!
Work 2 sc, 1 inc, 1 sc.
Front Paw: Chain 4, then work a slip stitch back into the base of the chain.
Continue with: 1 sc, 1 inc, (2 sc, 1 inc) x2, 1 sc.
Front Paw: Chain 4, then work a slip stitch back into the base of the chain.
Finish the round with: 1 sc, 1 inc, 2 sc, 1 inc. (24 stitches)
Round 8: Work 1 sc in each stitch around. (24 stitches)
Round 9: Now we add the back paws and the tail.
Work 9 sc.
Back Paw: Chain 4, sl st back into the base.
Work 5 sc.
Back Paw: Chain 4, sl st back into the base.
Work 10 sc.
Tail: Chain 5, work 4 sl st back down the chain, then sl st into the base of the tail. (24 stitches)
Closing the Body
Round 10: Work a decrease in every stitch around. (12 stitches)
Round 11: Work a decrease in every stitch around. (6 stitches)
Finishing Your Puppy
Now it is time to bring your puppy to life! Before you close the opening, place your 8 mm safety eyes between rounds 4 and 5, centered on either side of the dark brown nose area.
Stuffing: Firmly stuff the head and body with polyester fiberfill. Make sure to push some stuffing into the lower area so the puppy sits upright and plump.
Closing: Cut your yarn, leaving a long tail. Using your yarn needle, weave the tail through the remaining 6 stitches of round 11 and pull tight to close the hole. Secure with a knot and weave the end into the body.
The Ears
The ears are worked directly onto the head. Attach your yarn to the side of the head, near the top.
- Chain 4.
- Working back along the chain: work 3 dc into the first chain stitch, 2 hdc into the next stitch, and 1 sc into the final stitch.
- Slip stitch into the base of the ear or the adjacent stitch on the head to secure it.
Repeat this process on the opposite side of the head for the second ear, ensuring they are symmetrical.
Tips for Success
Working with Plush Yarn
Plush yarn can be slippery and hides your stitches. To avoid getting lost, use a contrasting color of scrap yarn as a stitch marker. If you find it difficult to see where to insert your hook, try feeling for the “V” of the stitch with your fingers rather than relying solely on your eyes.
Tension Control
Avoid pulling your stitches too tight. If the tension is too tight, the plush yarn may “split,” revealing the white core of the thread. Keep your tension relaxed to maintain that fluffy, cloud-like look.
Customizing Your Pup
While this pattern is for a classic tan puppy, you can make a whole litter of dogs! Try using white yarn for a Maltese, grey for a Schnauzer, or even a bright fantasy color for a “rainbow pup.” You can also add a small ribbon around the neck for an extra touch of cuteness.