How to Crochet a Cactus Ring Holder: An Easy Amigurumi Jewelry Stand Pattern
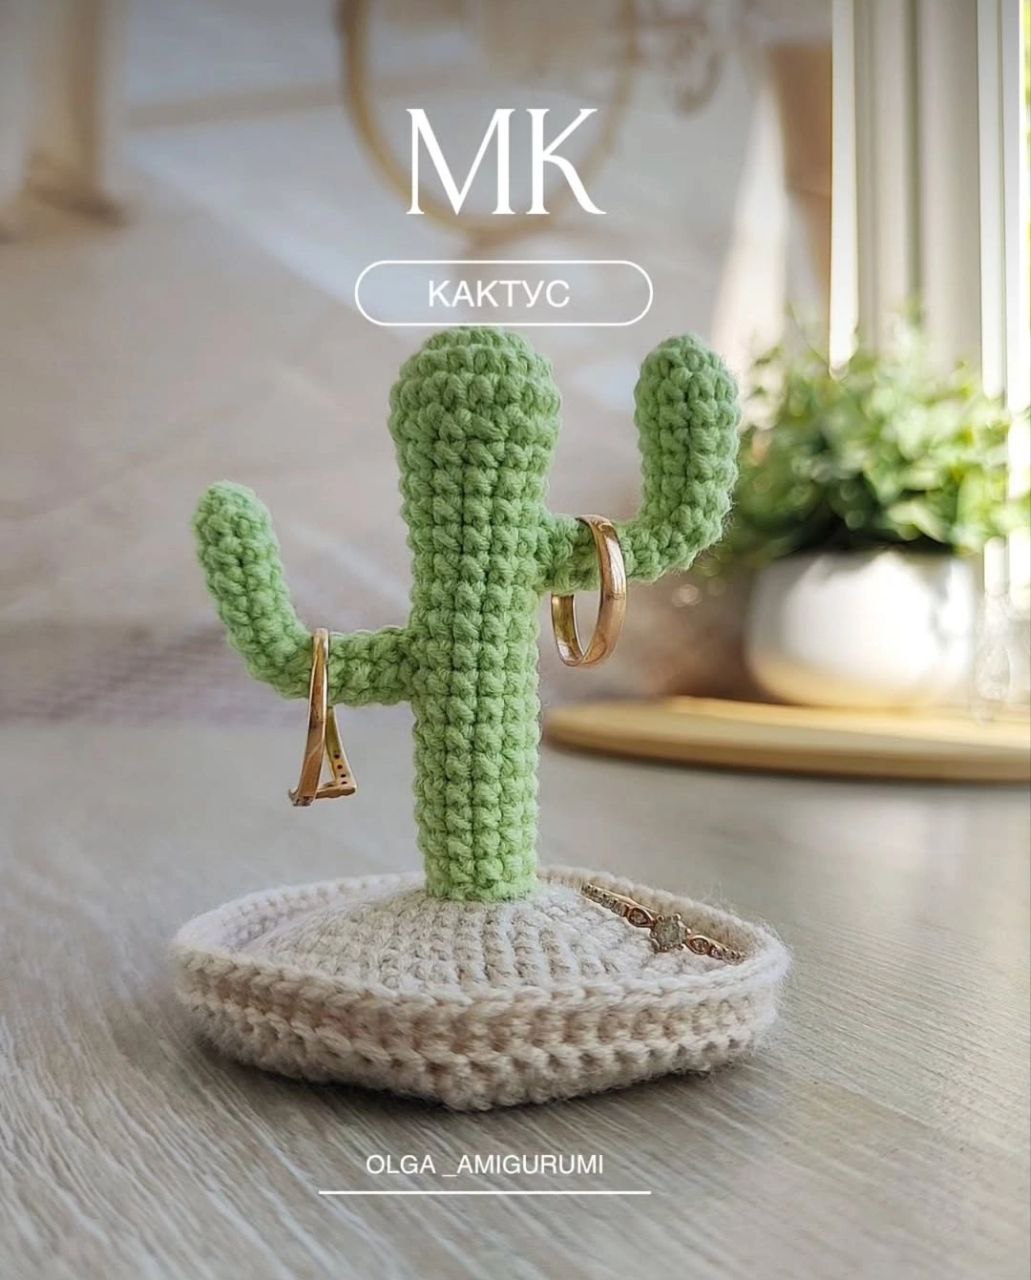
Looking for a creative way to organize your jewelry while adding a touch of desert charm to your vanity? This crochet cactus ring holder is the perfect project for you! Not only is it a functional piece of home decor, but it is also a fantastic project for beginners looking to practice their amigurumi skills. This little cactus is sturdy enough to hold your favorite rings and earrings, making it a thoughtful handmade gift for friends or a cute treat for yourself.
In this tutorial, we will walk you through creating a weighted base (the “pot”) and three different cactus sections that assemble into a whimsical, multi-armed succulent. Grab your hooks and yarn, and let’s get started!
Materials & Abbreviations
To ensure your cactus stands upright and holds your jewelry securely, I recommend using a cotton yarn. Cotton provides a tighter stitch and more structure than acrylic, which prevents the cactus from leaning over time.
Materials Needed
- Yarn: Medium weight (4) cotton yarn in Green (for the cactus) and Beige or Tan (for the base).
- Crochet Hook: 3.25mm (D) or 3.5mm (E) hook. Using a slightly smaller hook than the yarn suggests will keep the stitches tight so the stuffing doesn’t peek through.
- Stuffing: Polyester fiberfill (poly-fill). For extra stability, you can place a small bag of poly-pellets or clean pebbles at the bottom of the base.
- Tools: Yarn needle, scissors, and a stitch marker.
Abbreviations (US Terms)
- MR: Magic Ring
- Sc: Single Crochet
- Inc: Increase (2 sc in the same stitch)
- Dec: Decrease (sc 2 stitches together)
- BLO: Back Loop Only
- St(s): Stitch(es)
- Rnd: Round
Step-by-Step Instructions
The Base (The Pot)
The base consists of two identical circular discs that are joined together to create a sturdy foundation. We will use the BLO technique to create a natural “edge” for the pot.
Using Beige Yarn:
- Rnd 1: 6 sc in MR. (6 sts)
- Rnd 2: Working in BLO, inc in each st around. (12 sts)
- Rnd 3: (1 sc, inc) repeat 6 times. (18 sts)
- Rnd 4: (2 sc, inc) repeat 6 times. (24 sts)
- Rnd 5: (3 sc, inc) repeat 6 times. (30 sts)
- Rnd 6: (4 sc, inc) repeat 6 times. (36 sts)
- Rnd 7: (5 sc, inc) repeat 6 times. (42 sts)
- Rnd 8: (6 sc, inc) repeat 6 times. (48 sts)
- Rnd 9: (7 sc, inc) repeat 6 times. (54 sts)
- Rnd 10: (8 sc, inc) repeat 6 times. (60 sts)
Assembly of the Base:
Fasten off the first disc. Now, crochet a second disc exactly the same as the first, but do not fasten off after Round 10.
Place the two discs on top of each other with the right sides facing outward. To join them, sc through both layers of the discs starting from Round 10. Once you have joined the two pieces together, finish the edge by working one final round of sc in the BLO. This creates a clean, professional rim for your pot. Fasten off and weave in your ends.
The Main Cactus Trunk
This is the central pillar of your ring holder. Ensure you stuff this section firmly so it can support the weight of the arms and your rings.
Using Green Yarn:
- Rnd 1: 6 sc in MR. (6 sts)
- Rnd 2: Inc in each st around. (12 sts)
- Rnd 3: (1 sc, inc) repeat 6 times. (18 sts)
- Rnd 4: Sc in each st around. (18 sts)
- Rnd 5: (1 sc, dec) repeat 6 times. (12 sts)
- Rnd 6-18: Sc in each st around. (12 sts)
Fasten off, leaving a long tail for sewing.
The Thin Arm
The first arm is a simple, slender cylinder that is perfect for holding a thin band.
Using Green Yarn:
- Rnd 1: 6 sc in MR. (6 sts)
- Rnd 2-10: Sc in each st around. (6 sts)
Fasten off, leaving a long tail for sewing.
The Thick Arm
The second arm is slightly wider and more rounded, adding visual interest to the design.
Using Green Yarn:
- Rnd 1: 6 sc in MR. (6 sts)
- Rnd 2: (1 sc, inc) repeat 3 times. (9 sts)
- Rnd 3-7: Sc in each st around. (9 sts)
- Rnd 8: (1 sc, dec) repeat 3 times. (6 sts)
- Rnd 9-13: Sc in each st around. (6 sts)
Fasten off, leaving a long tail for sewing.
Finishing & Assembly
Now that all your pieces are complete, it is time to put your cactus together!
Attaching the Trunk to the Base
First, stuff the main trunk firmly with fiberfill. Position the trunk in the center of your beige base. Using your yarn needle and the tail from the trunk, sew the bottom of the trunk securely to the base. For the most stable connection, sew into the BLO stitches (the “inner” loop) created during the base assembly.
Attaching the Arms
Stuff both arms lightly with fiberfill. Pin them to the main trunk at your desired heights—usually one slightly higher than the other for a more natural look. Sew them firmly to the trunk using a whip stitch or a hidden stitch. Double-check that the arms are secure, as they will be holding the weight of your jewelry.
Tips for a Perfect Cactus
Ensuring Stability: If you find that your cactus is top-heavy, try adding a small weight to the base. A flat river stone or a small pouch of plastic pellets placed inside the base before you sew the trunk on will keep it from tipping over.
Tension Control: If you see holes in your work where the stuffing is showing, try switching to a smaller crochet hook. Amigurumi requires a very tight tension to maintain its shape.
Customization: Want to make your cactus a set? You can create multiple holders in different sizes or colors! You could even add a small crochet flower to the top of the main trunk for an extra pop of color using a scrap of pink or yellow yarn.
Your crochet cactus ring holder is now complete! Enjoy your new, handmade organization piece, or gift it to a fellow jewelry lover.