DIY Crochet Amigurumi Bear Pattern: An Easy Tutorial for Beginners
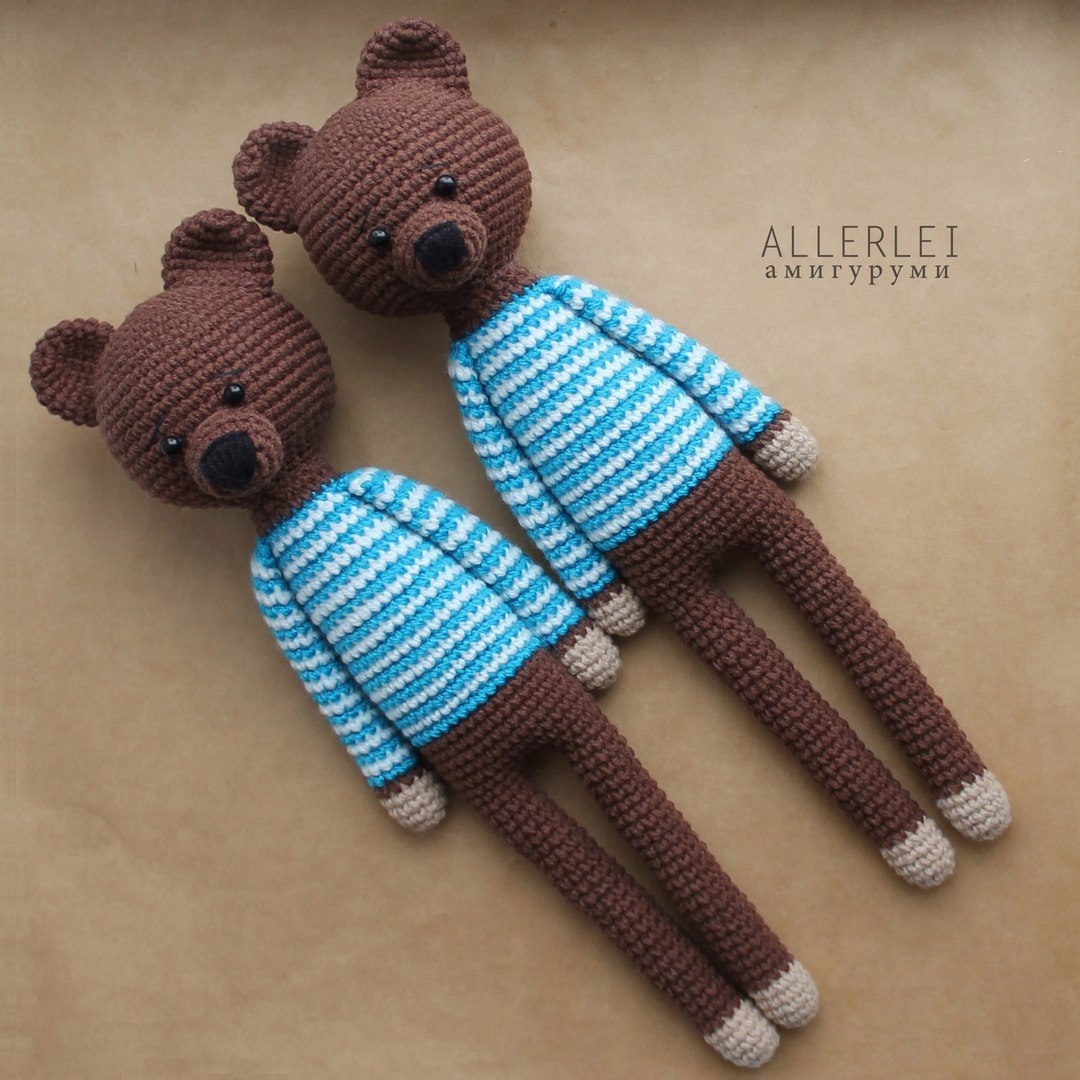
Are you looking for your next adorable crochet project? There is nothing quite as charming as a handmade amigurumi animal. This cute, long-limbed crochet bear is the perfect project for anyone looking to practice their amigurumi skills. With its sweet expression and cozy striped sweater, this little bear makes a wonderful nursery decoration, a thoughtful gift for a child, or a whimsical addition to your own shelf collection.
This pattern is designed to be beginner-friendly. While it uses standard amigurumi techniques like the magic ring and increases/decreases, the shapes are straightforward. By the time you finish, you’ll have a cuddly companion measuring approximately 12 to 14 inches tall!
Materials and Abbreviations
Before you pick up your hook, let’s make sure you have everything you need. Using a consistent tension and a slightly smaller hook than recommended on your yarn label will help keep your stitches tight, which is essential for amigurumi so that the stuffing doesn’t peek through.
What You Will Need
- Cotton Yarn: Approximately 50g (about 125m) of medium-weight cotton yarn. You will need three colors:
- Brown (for the main body, limbs, and head)
- Beige (for the paws and striped sweater effect)
- Black (a small amount for the muzzle and nose)
- Crochet Hook: 2.0mm to 2.25mm hook.
- Stuffing: Poly-fill or synthetic fiberfill.
- Tools: A large yarn needle (for sewing), scissors, and stitch markers.
Abbreviations (US Terms)
Please ensure you are using US crochet terminology for this pattern:
- MR: Magic Ring
- Sc: Single Crochet
- Inc: Increase (2 single crochets in the same stitch)
- Dec: Decrease (Single crochet two stitches together)
- Ch: Chain
- Sl st: Slip stitch
- St(s): Stitch(es)
Step-by-Step Instructions
Back Legs (Worked as one joined piece)
We will start by making the legs. Note that the legs are joined together to create the bottom of the body.
Leg 1 (Beige):
- Row 1: 6 sc in a Magic Ring (6)
- Row 2: 12 sc (Inc in every stitch) (12)
- Rows 3-6: 12 sc in Beige (12)
- Rows 7-43: Switch to Brown, 12 sc per row (12)
Leg 2 (Beige):
Repeat the same steps as Leg 1, but do not fasten off after Row 43.
Joining the Legs:
After finishing the last single crochet of the second leg, do not fasten off. We will now join the legs together to create the base of the torso.
- Chain 4.
- Join with a slip stitch to the first stitch of the first leg.
- Continue working in a continuous circle around both legs and the 4 chains you just made. You should have a total of 34 stitches around the entire circumference.
Body
The body features a tapered shape and a charming striped pattern to mimic a sweater. To achieve the stripes seen in the photo, you will alternate between brown and beige rows.
- Rows 1-8: 34 sc in Brown (34)
- Rows 9-31: Work in alternating rows of Beige and Brown to create stripes.
- Rows 9-16: 34 sc per row.
- Row 17: 32 sc (Decrease 2 stitches evenly) (32)
- Rows 18-19: 32 sc (32)
- Row 20: 30 sc (Decrease 2 stitches evenly) (30)
- Rows 21-22: 30 sc (30)
- Row 23: 28 sc (Decrease 2 stitches evenly) (28)
- Rows 24-25: 28 sc (28)
- Row 26: 26 sc (Decrease 2 stitches evenly) (26)
- Rows 27-28: 26 sc (26)
- Row 29: 24 sc (Decrease 2 stitches evenly) (24)
- Rows 30-31: 24 sc (24)
Note: Stuff the body firmly as you work your way up.
Front Legs
Make two identical front legs.
- Row 1: 6 sc in a Magic Ring (Beige) (6)
- Row 2: 12 sc (Inc in every stitch) (12)
- Rows 3-5: 12 sc in Beige (12)
- Rows 6-35: Switch to Brown, 12 sc per row (12)
Head
The head is worked in a single piece to create a rounded shape.
- Row 1: 6 sc in a Magic Ring (Brown) (6)
- Row 2: 12 sc (Inc in every stitch) (12)
- Row 3: 18 sc (Inc in every 2nd stitch) (18)
- Row 4: 24 sc (Inc in every 3rd stitch) (24)
- Row 5: 30 sc (Inc in every 5th stitch) (30)
- Row 6: 36 sc (Inc in every 6th stitch) (36)
- Row 7: 42 sc (Inc in every 7th stitch) (42)
- Row 8: 48 sc (Inc in every 8th stitch) (48)
- Row 9: 54 sc (Inc in every 9th stitch) (54)
- Rows 10-18: 54 sc (54)
- Row 19: 48 sc (Decrease 6 stitches evenly) (48)
- Row 20: 42 sc (Decrease 6 stitches evenly) (42)
- Row 21: 36 sc (Decrease 6 stitches evenly) (36)
- Row 22: 30 sc (Decrease 6 stitches evenly) (30)
- Row 23: 24 sc (Decrease 6 stitches evenly) (24)
- Row 24: 24 sc (24)
Stuff the head firmly before closing.
Ears (Make 2)
The ears are small and simple, perfect for adding that final touch of cuteness.
- Row 1: 6 sc in a Magic Ring (Brown) (6)
- Row 2: 12 sc (Inc in every stitch) (12)
- Row 3: 18 sc (Inc in every 2nd stitch) (18)
- Rows 4-5: 18 sc (18)
Finishing
Now comes the fun part—bringing your bear to life! Assembly is key to ensuring your bear looks proportional and professional.
Assembly Steps
- Stuffing: Ensure all parts (legs, body, head) are stuffed firmly with poly-fill. Do not stuff the ears.
- Ears: To sew the ears on easily, pinch the bottom edge of the ear circle so it becomes a flat slit. This makes it much easier to sew onto the top of the head.
- Front Legs: Attach the front legs to the body. Aim for a placement approximately around Row 28 of the body to give the bear a natural sitting or hanging posture.
- Face: Using your black yarn and a yarn needle, embroider two small eyes and a nose/muzzle on the head. You can customize the expression—small dots for eyes make him look very sweet!
- Final Join: Sew the ears onto the top of the head, then sew the head onto the body.
Tips for Success
To make your crochet bear look its absolute best, keep these pro-tips in mind:
Work Tight Stitches
Amigurumi is all about density. If your stitches are too loose, the white stuffing will show through, especially in the head and body. If you find your tension is loose, try dropping down a hook size.
Use Stitch Markers
When working in the round, it is incredibly easy to lose track of which stitch is your first stitch. Always use a stitch marker at the beginning of every round to avoid mistakes in your stitch counts.
Master the Invisible Decrease
While this pattern uses standard decreases, if you want an even cleaner look, try using the “invisible decrease” technique. Instead of inserting your hook into the top loops of two stitches, insert it into the front loops only. This prevents large gaps in your work.
Customization Ideas
Don’t be afraid to get creative! You can change the colors of the stripes for a different “sweater” look, or use different colored yarn for the paws. You could even add a little crochet bowtie or a small scarf to make him even more unique.
Happy crocheting!