Adorable Amigurumi Baby Doll Crochet Pattern: A Step-by-Step Tutorial
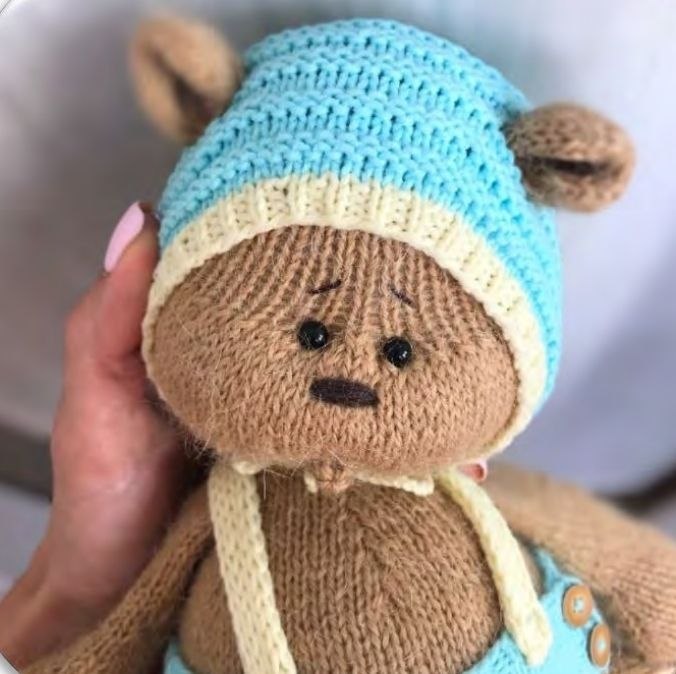
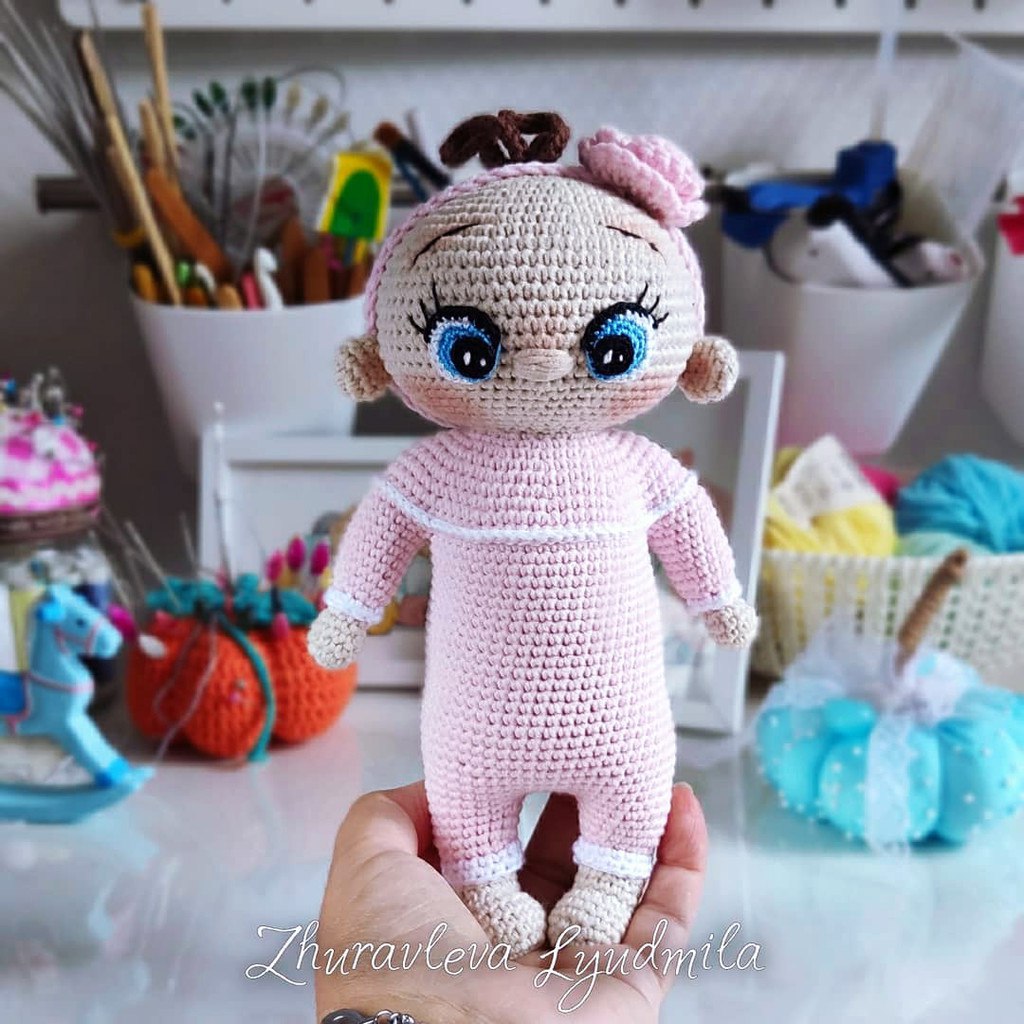
Are you looking for a heartwarming crochet project that will melt anyone’s heart? This adorable amigurumi baby doll is the perfect project for your next crafting session! Whether you are making a special gift for a baby shower, a nursery decoration, or simply want to expand your amigurumi collection, this little doll is sure to become a favorite. This tutorial is designed to be beginner-friendly, walking you through every stitch to create a lifelike, cuddly little character.
In this guide, we will transform simple yarn and a crochet hook into a beautiful doll complete with a cute romper, tiny accessories, and even rosy cheeks! Grab your favorite hook and let’s get started on this journey of creativity.
Materials and Abbreviations
To ensure your doll turns out looking exactly like the tutorial, it is important to use the right materials and understand the terminology used in this pattern. This pattern uses US crochet terms.
Materials Needed
- Yarn: Medium weight (worsted) yarn in the following colors:
- Skin tone (for head, arms, and legs)
- Beige (for the head base)
- Pink (for the romper/body)
- Brown (for the hair)
- White (for the romper trim)
- Crochet Hook: A size appropriate for your yarn (usually 3.25mm to 4.0mm).
- Stuffing: Polyester fiberfill for the head, body, arms, and legs.
- Eyes: You can use safety eyes or embroider them with black thread.
- Button: One small decorative button for the romper.
- Emroidery Thread: Black thread for eyelashes and eyebrows.
- Face Details: A disappearing ink marker and dry pastel for blushing.
- Other: Tapestry needle, scissors, and stitch markers.
Abbreviations (US Terms)
- MR: Magic Ring
- Ch: Chain
- Sc: Single Crochet
- Inc: Increase (2 sc in one stitch)
- Dec: Decrease (sc 2 together)
- Sl st: Slip Stitch
- Dc: Double Crochet
- Tr: Treble Crochet
- BLO: Back Loop Only
- St(s): Stitch(es)
- BLO: Back Loop Only
Step-by-Step Instructions
The Head
We begin with the head using beige yarn. This part creates the foundation of your doll’s personality.
- 6 sc in MR (6)
- 6 inc (12)
- (1 sc, inc) repeat 6 times (18)
- (2 sc, inc) repeat 6 times (24)
- 1 sc, (inc, 3 sc) repeat 5 times, inc, 2 sc (30)
- (4 sc, inc) repeat 6 times (36)
- 2 sc, (inc, 5 sc) repeat 5 times, inc, 3 sc (42)
- (6 sc, inc) repeat 6 times (48)
- 3 sc, (inc, 7 sc) repeat 5 times, inc, 4 sc (54)
- (8 sc, inc) repeat 6 times (60)
- 4 sc, (inc, 9 sc) repeat 5 times, inc, 5 sc (66)
- (10 sc, inc) repeat 6 times (72)
- Rounds 13–20: Sc in each stitch around (72)
- (10 sc, dec) repeat 6 times (66)
- 4 sc, (dec, 9 sc) repeat 5 times, dec, 5 sc (60)
- (8 sc, dec) repeat 6 times (54)
- 3 sc, (dec, 7 sc) repeat 5 times, dec, 4 sc (48)
- (6 sc, dec) repeat 6 times (42)
- 2 sc, (dec, 5 sc) repeat 5 times, dec, 3 sc (36)
- (4 sc, dec) repeat 6 times (30)
- 1 sc, (dec, 3 sc) repeat 5 times, dec, 2 sc (24)
Stop and stuff the head firmly with fiberfill before proceeding to the next section.
The Body (Pink Romper)
Switch to pink yarn to create the adorable one-piece romper.
- 1 sc, (inc, 3 sc) repeat 5 times, inc, 2 sc (30)
- (4 sc, inc) repeat 6 times (36)
- 2 sc, (inc, 5 sc) repeat 5 times, inc, 3 sc (42)
- (6 sc, inc) repeat 6 times (48)
- 3 sc, (inc, 7 sc) repeat 5 times, inc, 4 sc (54)
- (8 sc, inc) repeat 6 times (60)
- 4 sc, (inc, 9 sc) repeat 5 times, inc, 5 sc (66)
- (10 sc, inc) repeat 6 times (72)
- 5 sc, (inc, 11 sc) repeat 5 times, inc, 6 sc (78)
- 78 sc in BLO (78)
- 12 sc, skip 14 sts, 26 sc, skip 14 sts, 12 sc (50)
- Rounds 40–64: Sc in each stitch around (50)
- Skip 30 sts, work 20 sc around (This forms the right leg opening)
- Rounds 65–66: Sc in each stitch around (20)
- (3 sc, dec) repeat 4 times (16)
- 16 sc in BLO. Fasten off, leaving a long tail for sewing.
For the Left Leg Opening: Repeat the same logic. Skip 5 stitches from the right side, start with 1 sc, join to the left side, skip 5 stitches on the left, and work 20 sc around. Then, follow the decrease pattern (3 sc, dec) 4 times, and finish with 16 sc in BLO.
The Legs and Feet
Use skin tone yarn for the legs. You will make two identical legs.
Right Leg
- Ch 5. In 2nd ch from hook: 3 sc, 2 sc, 3 sc in the last ch. Working on the other side of the chain: 2 sc (10)
- 3 inc, 2 sc, 3 inc, 2 sc (16)
- Rounds 3–5: Sc in each stitch (16)
- 4 sc, dec, 7 sc, 3 sl st (15)
- 3 sl st, 9 sc, 3 sl st (15)
- 3 sl st, 7 sc, 1 sc, turn (forming the heel). Ch 1, 5 sc, sl st, ch 1, turn. 6 sc along the heel, then continue working around the foot, 4 sc (15)
- 12 sc, dec, 1 sc (14)
- Rounds 10: Sc in each stitch (14). Fasten off.
Left Leg
- Ch 5. In 2nd ch from hook: 3 sc, 2 sc, 3 sc in the last ch. Working on the other side: 2 sc (10)
- 3 inc, 2 sc, 3 inc, 2 sc (16)
- Rounds 3–5: Sc in each stitch (16)
- 2 sc, dec, 1 sc, 6 dc, 5 sc (15)
- 4 sc, 6 dc, 5 sc (15)
- 2 sc, sl st, ch 1, turn, 5 sc, sl st, turn, ch 1, 3 sc (15)
- 9 sc, dec, 4 sc (14)
- Rounds 10: Sc in each stitch + 5 sc (14). Fasten off.
The Arms
Use skin tone yarn. Make two arms.
- 16 sc in MR (16)
- Rounds 2–8: Sc in each stitch (16)
- (2 sc, dec) repeat 4 times (12)
- 12 sc in BLO. Fasten off, leaving a tail for sewing.
The Hair and Accessories
Hair Strands
Use brown yarn to create three simple strands.
- Ch 11. From the 2nd ch from hook, work 10 sc along the back of the chain.
- Repeat the same for two more strands.
The Bow
You can make a large bow using a pattern diagram or a small, cute bow for the hair. For a small bow, work 1 dc and 4 tr on each side of a center loop.
Finishing and Assembly
Now comes the most rewarding part: bringing your doll to life!
- Stuffing: Stuff the legs and arms firmly. Carefully stuff the body through the leg openings.
- Sewing: Sew the arms and legs onto the body. Use a tapestry needle to sew the gap between the legs closed.
- The Romper Detail: Using white yarn, work a round of single crochet around the leg openings (where you worked in BLO) to create a pretty white trim.
- Button: Sew your decorative button onto the front of the romper.
- Face: Sew the hair strands and the bow to the top of the head. Sew the ears and nose onto the face.
- Eyes: Use a disappearing ink marker to lightly sketch the eye placement. Carefully embroider the eyes and eyelashes using black thread (aim for stitches about 5–7 mm long). Don’t forget to add small eyebrows!
- The Perfect Blush: To give your doll those sweet, rosy cheeks, wrap a damp cloth around your finger, rub it against a piece of dry pastel (the color of your choice), and gently dab it onto the doll’s cheeks. Use circular motions to blend it out for a natural look.
Expert Tips for Success
- Tension is Key: Try to keep your tension consistent, especially when working in the rounds, to avoid gaps that might show the stuffing.
- Use Stitch Markers: Amigurumi is worked in continuous spirals. Always use a stitch marker to keep track of your starting point.
- Safety First: If you are making this for a very small infant, avoid using plastic safety eyes. Instead, choose to embroider the eyes with secure, tight stitches to ensure they are safe.
- Don’t Rush the Face: The face is what gives your doll its soul! Take your time with the embroidery and the blushing process.