Adorable Plush Santa Claus Crochet Pattern: A Step-by-Step Amigurumi Tutorial
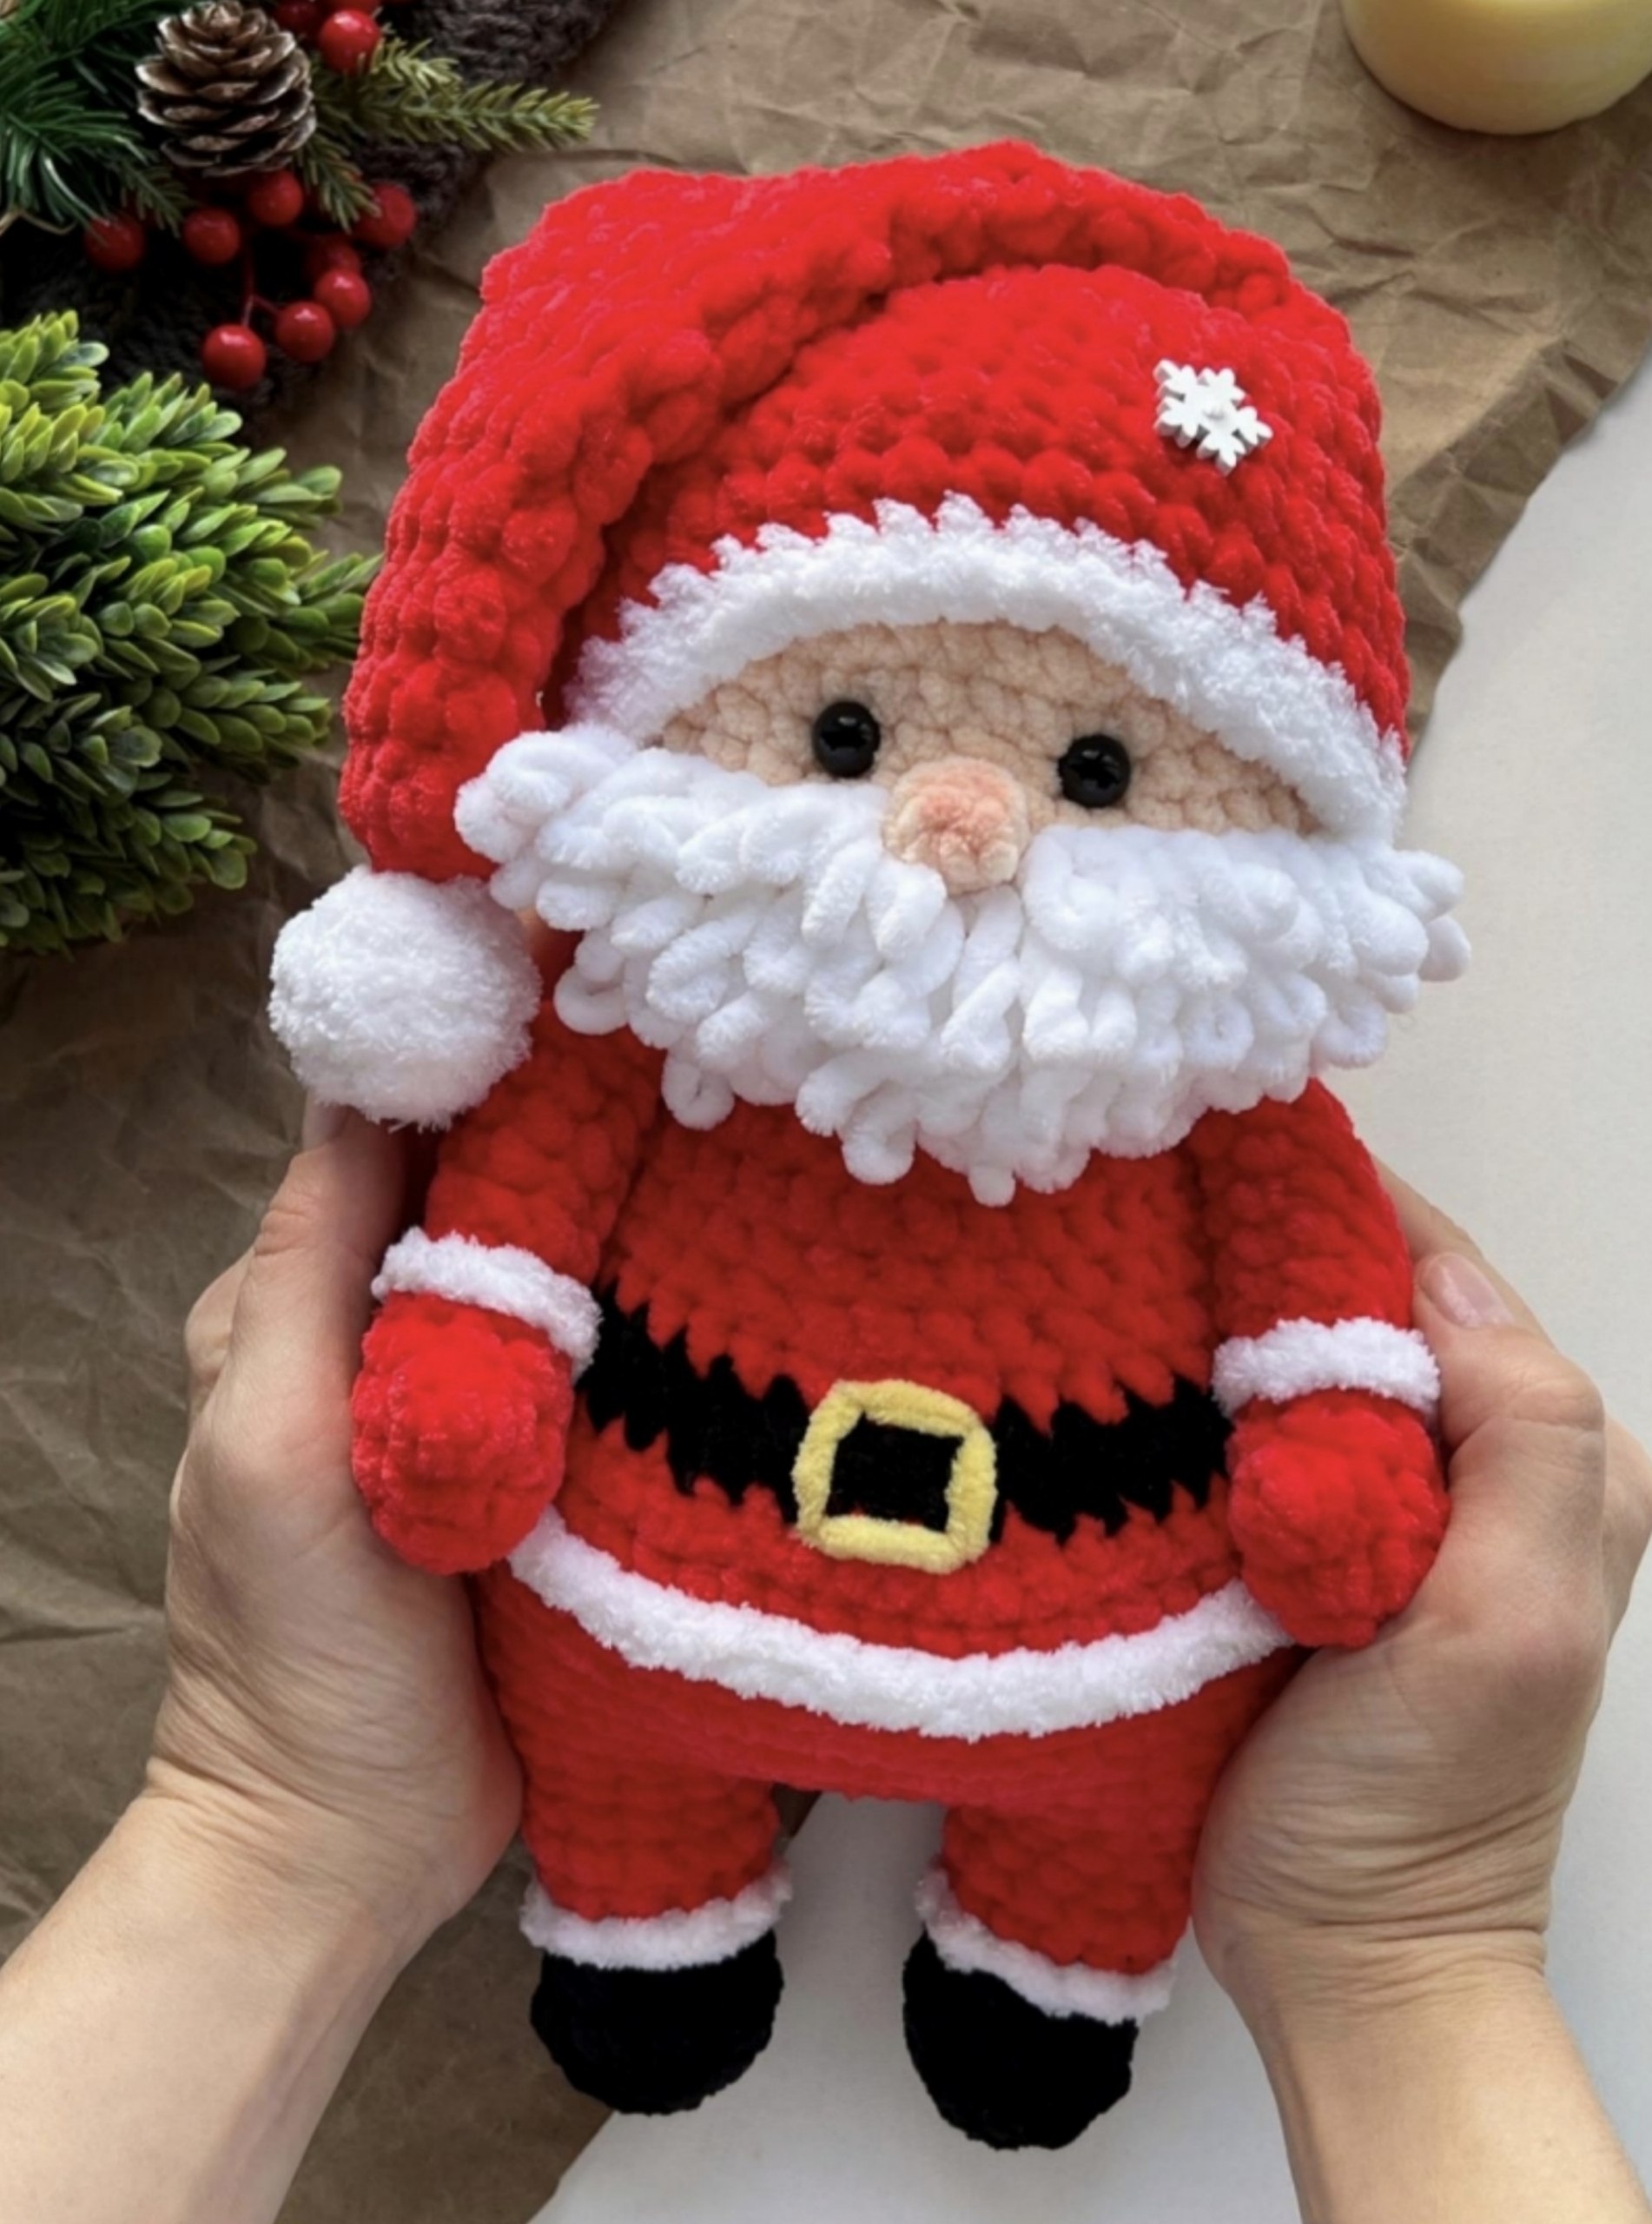
Get ready to bring some holiday magic into your home with this incredibly cute, plush Santa Claus amigurumi! This little guy is soft, squishy, and makes the perfect Christmas decoration or a heartwarming handmade gift for loved ones. Whether you are looking to decorate your mantle or create a cozy companion for a child, this Santa is sure to spread festive cheer.
This pattern is designed using velvet or chenille-style plush yarn, which gives Santa that extra-huggable feel and helps hide any small gaps in your stitches. If you are a beginner, don’t be intimidated—this tutorial is written to guide you through every single stitch, from his tiny boots to his iconic floppy hat!
Materials and Abbreviations
Materials Needed
To complete this project, you will need the following supplies. While the pattern mentions specific brands, any high-quality plush/chenille yarn in these colors will work beautifully.
- Plush Yarn (Velvet/Chenille style):
- Skin/Beige: For the head.
- Red: For the outfit and hat (you will need at least one full skein).
- Black: For the boots and the belt.
- White: For the beard, hat trim, pom-pom, and coat trim.
- Yellow: For the small belt buckle embroidery.
- Crochet Hook: 4mm (approx. size G/6).
- Stuffing: Approximately 7 oz (200g) of polyester fiberfill.
- Safety Eyes: 10mm black safety eyes.
- Extras: A large-eye tapestry needle for assembly, a stitch marker to keep track of your rounds, and embroidery thread (optional, for facial details).
Abbreviations (US Terms)
Please ensure you are using US terminology to follow this pattern accurately:
- MR: Magic Ring
- ch: Chain
- sc: Single crochet
- hdc: Half double crochet
- dc: Double crochet
- sl st: Slip stitch
- inc: Increase (2 sc in one stitch)
- dec: Decrease (sc 2 together)
- BLO: Back loops only
- ST(s): Stitch(es)
Step-by-Step Instructions
The Arms (Make 2)
We will start with the arms using red yarn. These are worked in a continuous spiral.
Round 1: Create a Magic Ring and work 5 sc into it. (5)
Round 2: Inc in each stitch around. (10)
Round 3: 5 sc, then work a bobble stitch (3 unfinished dc worked into the same stitch, pulled tight), 4 sc. (10)
Round 4: 10 sc. (10)
Round 5: 5 sc, dec, 3 sc. (9)
Round 6: 9 sc working in BLO (Back Loops Only). (9)
Note: We will come back to Round 6 later to add the white trim using white yarn (using 2 strands of thinner white yarn or one strand of plush white yarn) by working 9 sc around the half-loops.
Rounds 8-14: 9 sc. (9)
Finishing the Arms: Stuff the arm lightly (about 2/3 full). Fold the opening in half and sc 4 through both sides to close it completely.
The Legs and Connecting Them
We will start with the legs using black yarn. We will work the right leg first, then the left, and then join them.
The Right Leg
Round 1: Ch 4.
Round 2: Starting from the second ch from the hook: inc, 1 sc, 3 sc in the last ch, and 2 sc on the other side of the chain. (8)
Round 3: 2 inc, 1 sc, 3 inc, 1 sc, 1 inc. (14)
Round 4: 14 sc. (14)
Round 5: 3 sc, 4 dec, 3 sc. (10)
Round 6: 10 sc. (10)
Transition to Red: Join red yarn.
Round 7: Working in BLO, (2 sc, inc) x 3, 1 sc. (13)
Rounds 8-9: 13 sc. (13)
Note: Like the arms, add white trim to the half-loops of Round 7 using white yarn.
The Left Leg
Work the left leg exactly like the right leg, but when you reach the end of the final round, work an additional 11 sc. This extra length ensures you end up on the inside of the thigh so you can join the legs easily.
Joining the Legs
Round 10: Work 13 sc along the right leg, ch 5, 13 sc along the left leg, and 5 sc along the other side of the chain. (36)
Round 11: inc, 3 sc, inc, 3 sc, inc, 3 sc, 7 inc, 3 sc, inc, 3 sc, inc, 3 sc, 6 inc. (54)
Rounds 12-16: 54 sc. (54)
Important: Stuff the legs firmly with fiberfill. If you see a gap between the legs, use a tapestry needle to sew it shut before moving on.
The Torso (Body)
Using red yarn, we will now create the main body.
Rounds 17-16: After finishing the legs, work 23 sc to reach the back of the body. Place a stitch marker here.
Round 17: Working in BLO, (7 sc, dec) x 6. (48)
Round 18: 48 sc. (48)
Note: Add the white trim to the half-loops of Round 17 using white yarn.
Transition to Black:
Round 19: (6 sc, dec) x 6. (42)
Round 20: (5 sc, dec) x 6. (36)
Transition back to Red:
Round 21: 36 sc. (36)
Round 22: (4 sc, dec) x 6. (30)
Rounds 23-24: 30 sc. (30)
Round 25: (3 sc, dec) x 6. (24)
Rounds 26-27: 24 sc. (24)
Finishing the Body: Stuff the torso firmly. Be sure to shape the “belly” and “bottom” to give him a cute, rounded look.
Attaching the Arms
Round 28: 7 sc, join the first arm (4 sc), 8 sc, join the second arm (4 sc), 1 sc. (24)
Round 29: (2 sc, dec) x 6. (18)
The Head
Switch to skin/beige yarn. The red yarn from the body can be cut.
Round 30: Inc in each stitch around. (36)
Round 31: (5 sc, inc) x 6. (42)
Round 32: (6 sc, inc) x 6. (48)
Rounds 33-35: 48 sc. (48)
Round 36: (6 sc, dec) x 6. (42)
Rounds 37-38: 42 sc. (42)
Eye Placement: Insert your 10mm safety eyes between Rounds 36 and 37, approximately 5 stitches apart.
Round 42: (4 sc, dec) x 6. (30)
Round 43: (3 sc, dec) x 6. (24)
Round 44: (2 sc, dec) x 6. (18)
Round 45: (1 sc, dec) x 6. (12)
Round 46: 6 dec. (6)
Fasten off and close the remaining hole with your needle.
Finishing
Facial Shaping and Features
To give Santa his adorable expression, we will use a technique called “eye pulling” to create eye sockets.
- Thread a needle with skin-colored yarn.
- Insert the needle under the neck area, pull through, and exit at the bottom corner of the right eye.
- Re-insert into the bottom corner of the right eye and exit near your starting point (one stitch away).
- Move to the left eye and repeat the process, pulling the yarn slightly to create a gentle indentation for the eyes.
- Tie off securely and hide the yarn ends inside the head.
The Nose
Using skin-colored yarn, create a Magic Ring and work 4 sc into it. Finish with a slip stitch. Sew the nose onto the face between the eyes, positioned around Rounds 34-36.
The Santa Hat and Pom-Pom
The hat can be customized to your preferred size. This pattern uses a base of 42 chains.
Hat Instructions (Red Yarn):
Rounds 1-3: Ch 42 and join in a circle. Starting each round with a ch-2 (which counts as your first stitch), work 41 hdc. (42)
Round 4: Decrease 3 times evenly around. (39)
Round 5: Decrease 5 times evenly around. (34)
Round 6: Decrease 5 times evenly around. (29)
Round 7: Decrease 3 times evenly around. (26)
Round 8: Decrease 4 times evenly around. (22)
Round 9: Decrease 2 times evenly around. (20)
Round 10: Decrease 2 times evenly around. (18)
Round 11: Decrease 2 times evenly around. (16)
Round 12: Decrease 2 times evenly around. (14)
Round 13: Decrease 2 times evenly around. (12)
Round 14: Decrease 2 times evenly around. (10)
Rounds 15-19: Ch-2, 9 hdc. (10)
Finishing the Hat: Fasten off and close the opening. Using white yarn, work 2 rounds of sc around the edge of the hat for the trim.
The Pom-Pom (White Yarn):
Round 1: MR, 6 sc. (6)
Round 2: Inc in each stitch. (12)
Rounds 3-4: 12 sc. (12)
Round 5: 6 dec. (6)
Stuff the pom-pom and sew it to the top of the hat.
The Beard and Belt
The Beard: Use the “loop stitch” technique with white yarn to create a fluffy, textured beard. This creates long, pulled-out loops that mimic real hair.
The Belt: Using yellow yarn, embroider a small rectangle on the black belt section to represent the buckle.
Tips
- Tension is Key: When working with plush yarn, try to keep your tension consistent. If you crochet too loosely, the stuffing might show through.
- Stuffing Technique: When stuffing the head and body, push the stuffing into the corners and crevices to ensure a smooth, round shape without lumps.
- Safety First: If this Santa is intended for a very small child, consider embroidering the eyes instead of using plastic safety eyes to prevent any choking hazards.
- Customization: Feel free to change the colors! A blue suit or a green hat can make for a wonderful alternative character.