Crochet Mini Bunny Pattern: An Easy Amigurumi Tutorial for Beginners
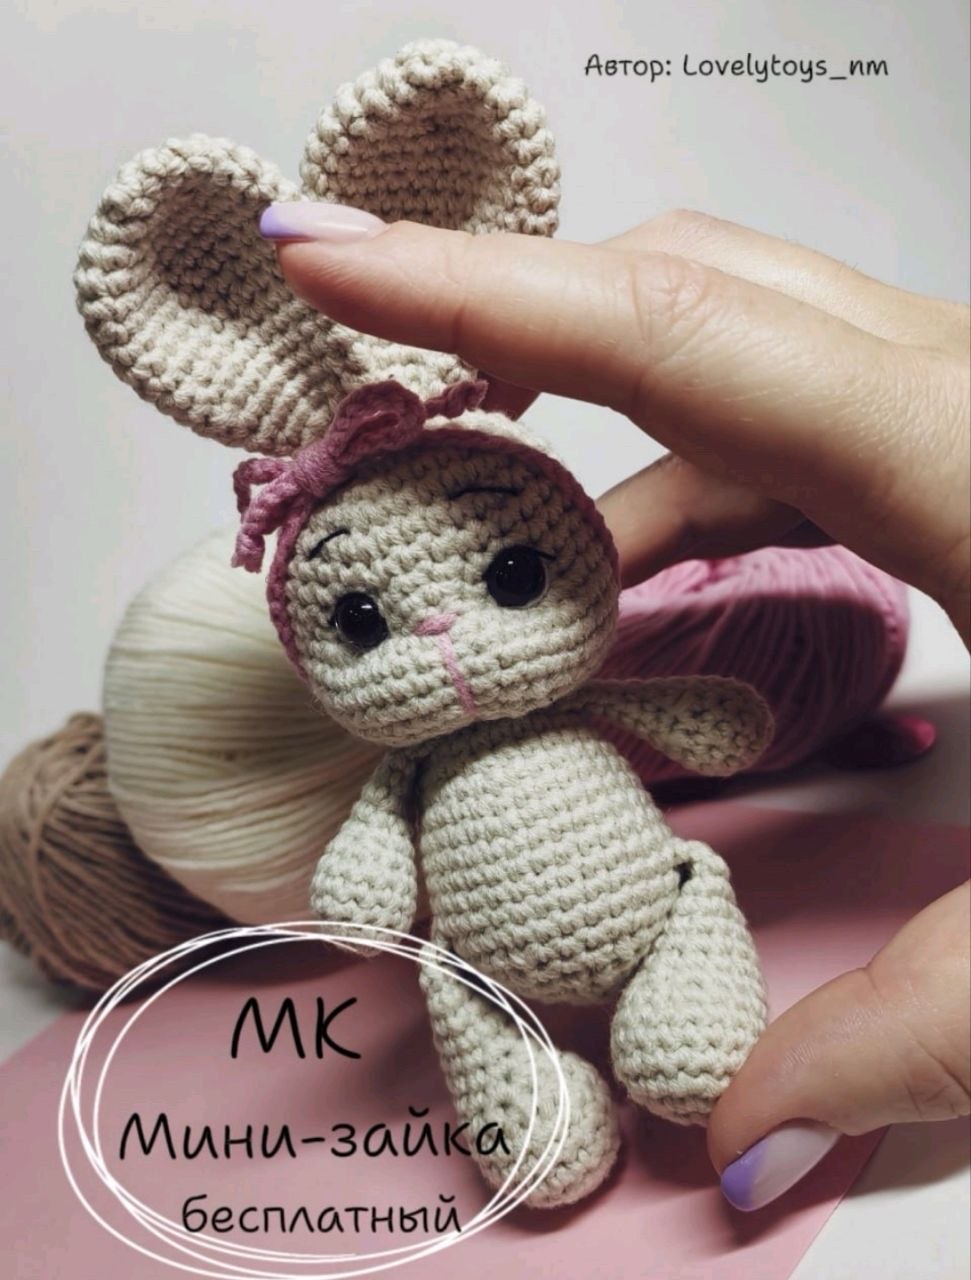
Are you looking for a quick, adorable, and beginner-friendly crochet project? This Mini Bunny is the perfect addition to your amigurumi collection! Small enough to sit on a desk or be tucked into a nursery, this little bunny measures approximately 6 inches tall, making it an ideal gift for baby showers, birthdays, or even a “just because” treat for a fellow crafter.
This tutorial is designed to be straightforward, guiding you through the process of creating a cute, expressive character using basic stitches. Whether you are a seasoned pro or just picking up a crochet hook for the first time, this pattern will help you master the art of making small, detailed plushies.
Materials & Abbreviations
Before you begin, gather all your supplies. Because this is a small project, you won’t need much yarn, but having the right hook size is crucial to ensuring your stuffing doesn’t peek through the stitches.
Materials Needed
- Yarn: A cotton/acrylic blend (such as YarnArt Jeans) is recommended. You will need approximately 1/3 of a standard ball in a neutral color (like cream, beige, or light grey).
- Accent Yarn: A small amount of pink yarn for the nose and bow, and a small amount of black yarn for the eyelashes and eyebrows.
- Crochet Hook: 2 mm.
- Safety Eyes: 6 mm black safety eyes.
- Stuffing: Fiberfill or polyester stuffing.
- Tools: Scissors and a blunt-ended tapestry needle for sewing and embroidery.
Abbreviations (US Terms)
Please note that this pattern uses standard US crochet terminology:
- MR: Magic Ring
- sc: Single crochet
- ch: Chain
- sl st: Slip stitch
- inc: Increase (2 sc in the same stitch)
- dec: Decrease (sc two stitches together)
Step-by-Step Instructions
The Head
Start with your main neutral color. Work in continuous spirals unless otherwise noted.
- MR, 6 sc (6)
- 6 inc (12)
- (1 sc, inc) x 6 (18)
- (2 sc, inc) x 6 (24)
- (3 sc, inc) x 6 (30)
- (4 sc, inc) x 6 (36)
- Rounds 7–11: 36 sc (5 rounds)
- 15 sc, [3 sc in the next stitch, 1 inc, 5 sc, 1 inc, 3 sc in the next stitch], 12 sc (42)
- Rounds 13–15: 42 sc (3 rounds)
- (5 sc, dec) x 6 (36)
- (4 sc, dec) x 6 (30)
- (3 sc, dec) x 6 (24)
- (2 sc, dec) x 6 (18)
Important: Before closing the head, stuff it firmly with fiberfill. Insert the 6 mm safety eyes between rounds 10 and 11, placed just above the increases. Ensure there are 4–5 single crochet stitches between the eyes.
The Body
Continue working with your main color to create the body.
- Rounds 20–21: 18 sc (2 rounds)
- (3 sc, inc) x 6 (24)
- 24 sc (24)
- (7 sc, inc) x 3 (27)
- (8 sc, inc) x 3 (30)
- 30 sc (30)
- (9 sc, inc) x 3 (33)
- Rounds 28–32: 33 sc (5 rounds)
- (9 sc, dec) x 3 (30)
- (3 sc, dec) x 6 (24)
- (2 sc, dec) x 6 (18)
Stuff the body well. Continue for the final closing rounds:
- (1 sc, dec) x 6 (12)
- 6 dec (6)
Fasten off, pull the tail through to close the hole, and hide the yarn end inside the body.
The Arms
Use the main color for both arms.
- MR, 6 sc, sl st to join (6)
- 6 inc (12)
- Rounds 3–5: 12 sc (3 rounds)
- 4 sc, 2 dec, 4 sc (10)
Stuff the palm area lightly. Continue for rounds 7–11: 10 sc (5 rounds). To finish, crochet 2 more sc, fold the arm in half, and crochet through both sides of the opening with 5 sc. Leave a long tail for sewing.
The Legs
Use the main color.
- MR, 6 sc, sl st to join (6)
- 6 inc (12)
- (1 sc, inc) x 6 (18)
- Rounds 4–6: 18 sc (3 rounds)
- 6 sc, 3 dec, 6 sc (15)
- 6 sc, 1 dec, 7 sc (14)
Stuff the foot area. Continue for rounds 9–13: 14 sc (5 rounds). For round 14: (1 dec, 5 sc) x 2 (12). To finish, crochet 3 more sc, fold the leg in half, and crochet through both sides with 6 sc. Leave a long tail for sewing.
The Ears
Use the main color.
- MR, 6 sc, sl st to join (6)
- 6 inc (12)
- (1 sc, inc) x 6 (18)
- (2 sc, inc) x 6 (24)
- Rounds 5–9: 24 sc (5 rounds)
- (10 sc, dec) x 2 (22)
- 22 sc (22)
- (9 sc, dec) x 2 (20)
- (8 sc, dec) x 2 (18)
- (7 sc, dec) x 2 (16)
- (6 sc, dec) x 2 (14)
- (5 sc, dec) x 2 (12)
- 12 sc (12)
Fold the ears in half and secure the opening with a few single crochet stitches. Leave a long tail for sewing.
Accessories: Tail & Bow
- Tail: Create a small, fluffy pompom using your neutral yarn.
- Bow: Using your pink accent yarn, make a chain of 100. Secure the ends, fold the chain to create a bow shape, and use a piece of yarn to wrap around the center to pinch it into a bow. Tie a knot and secure.
Finishing
Assembly is where your bunny truly comes to life! Follow these steps carefully to ensure a professional look.
Face Sculpting & Embroidery
To give the bunny its cute expression, use your tapestry needle and thread to “sculpt” the muzzle. Pull the thread slightly inward at the area between and just below the eyes to create a small snout. Using your pink yarn, embroider a small nose. Finally, use your black yarn to embroider delicate eyelashes and tiny eyebrows above the eyes.
Attaching the Limbs
- Arms: Sew the arms as close to the head as possible. Position them symmetrically relative to the nose, about 5–6 sc apart.
- Legs: Sew the legs to the bottom of the body, roughly around round 36. Leave about 12 sc of space between the legs.
- Ears: Sew the ears onto the top of the head, near the magic ring area.
- Tail: Sew the pompom tail to the back of the body.
- Bow: Attach the pink bow to the top of the head between the ears.
Tips for Success
Tension Matters: When working with amigurumi, keep your tension tight. This prevents the white stuffing from showing through the holes in your stitches.
The Magic Ring: If you are a beginner, practice the Magic Ring technique several times. It is the foundation of almost all amigurumi shapes!
Stuffing Strategy: When stuffing the head and body, try to distribute the fiberfill evenly so the toy doesn’t feel lumpy. Use your crochet hook to push stuffing into tight corners.
Eye Placement: If your eyes look crooked, don’t worry! You can always unhook them and reposition them slightly before you finish the sculpting process.