How to Crochet an Adorable Fluffy Ram: A Detailed Amigurumi Tutorial
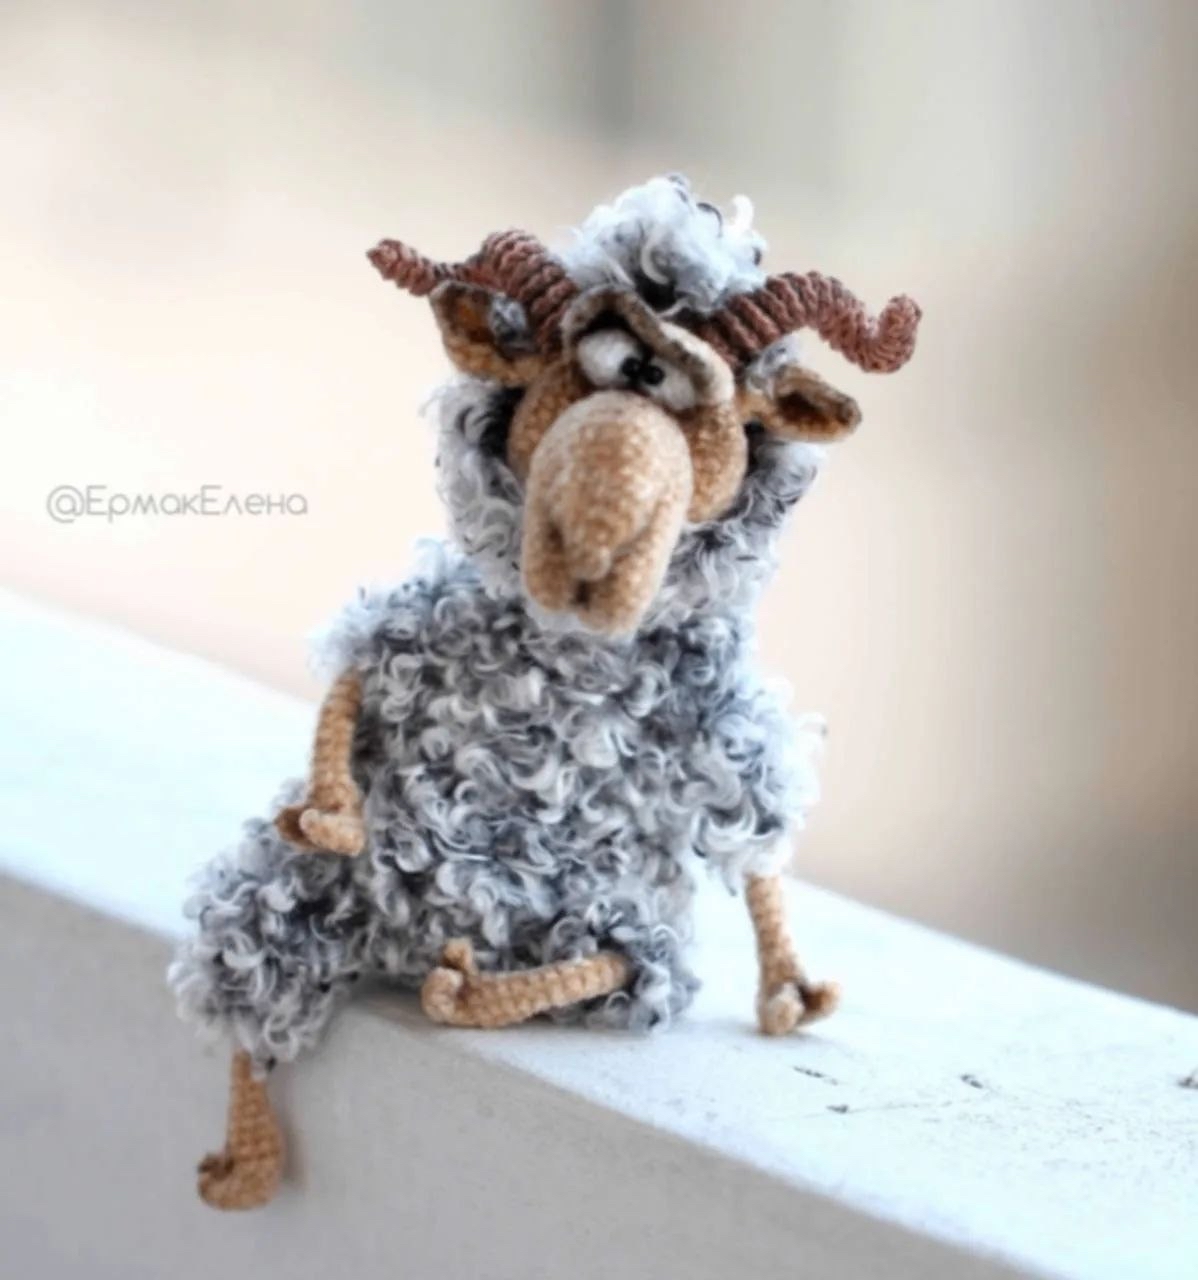
There is nothing quite as charming as a textured, wide-eyed amigurumi animal to brighten up a nursery or a collector’s shelf. This adorable fluffy ram project is the perfect blend of cozy texture and personality. Whether you want a standing ram for a shelf or a cute sitting version, this pattern provides a wonderful challenge for intermediate crocheters looking to master specialized techniques like wire framing and the “fluff overlay” method.
This tutorial will guide you through creating a high-quality, posable sheep with incredibly realistic wool. By the end, you will have a little friend that stands about 6 inches tall!
Materials & Abbreviations
To achieve the professional look seen in the photos, you will need specific types of yarn and tools. The secret to the texture is combining a smooth “base” yarn with a very fuzzy “accent” yarn.
Required Materials
- Main Smooth Yarn: Approximately 15-20 grams of a smooth, medium-weight yarn (about 470 yards per 100g / 3.5 oz).
- Fluffy Accent Yarn: Approximately 20 grams of a highly textured, “eyelash” or “faux fur” style yarn. You can use this in a single strand or double it up for extra volume.
- Horn Yarn: A fine, mercerized cotton yarn in a light brown shade (about 50 grams).
- Crochet Hooks: 1.5 mm (for main work), 1.0 mm (for horns), and 1.75 mm (if using thicker fluffy yarn).
- Stuffing: High-quality polyester fiberfill (poly-fill).
- Wire Frame: Rigid craft wire. You will need approximately 51 inches of 0.04-inch diameter wire (or about 98 inches if using a thinner 0.02-inch wire doubled up).
- Weights: 15-20 grams of metal granules or fishing weights to help the ram stay upright.
- Finishing Touches: Electrical tape or medical tape (to wrap wire), a sewing needle, strong thread, white yarn or small beads for eyes, and dry pastels or acrylic paints for facial shading.
US Crochet Abbreviations
- MR: Magic Ring
- ch: Chain
- sc: Single crochet
- inc: Increase (2 sc in one stitch)
- dec: Decrease (2 sc together)
- hdc: Half double crochet
- dc: Double crochet
- tr: Treble crochet
- sl st: Slip stitch
- BLO: Back loops only
- FLO: Front loops only
- sc3tog: 3 single crochets together (decrease)
- sc3tog-dec: 3 sc worked into one stitch to create a cluster
Step-by-Step Instructions
Pro-Tip: Most of this project is worked in a continuous spiral. Always use a stitch marker to mark the beginning of your rounds to avoid losing your place!
The Nose
We start with the nose to build the face structure.
- Round 1: 5 sc in MR.
- Round 2: 5 sc.
- Round 3: 5 inc = 10 sc.
- Round 4: (1 inc, 1 sc) x 5 = 15 sc.
- Round 5: 15 sc.
- Fasten off, leaving a tail for sewing.
The Mouth
For a more expressive face, you can optionally insert a small piece of wire (about 12 inches) into the mouth during the final round to allow the jaw to move.
- Round 1: 6 sc in MR, 1 ch, turn.
- Round 2: inc, 1 sc, 2 inc, 1 sc, inc, 1 ch, turn.
- Round 3: 5 sc along the base, 10 sc along the front part = 15 sc.
- Round 4 (Optional Wire): If using wire, prep a 12-inch piece, fold it in half, and crochet the next 10 sc around the wire. 5 sc, then 10 sc with wire = 15 sc. Fasten off.
The Ears (Make 2)
Leave a long tail (about 6 inches) at the start for sewing.
- Round 1: Ch 8. Starting from the 2nd ch from hook: sl st, 1 sc, 1 hdc, 1 dc, 1 tr, 1 hdc, 4 sc in the last ch (this forms the base), hdc, 1 tr, 1 dc, 1 hdc, 1 sc, sl st.
- Round 2: Using the starting tail, work sl st around the entire edge of the ear to create a clean border.
- Round 3: 1 ch, (1 inc, 1 sc) x 2, 1 ch, 1 inc, 1 ch, 6 sc around. Fasten off.
The Horns (Make 2)
These are worked in rows (not spirals) using the BLO technique for texture.
- Round 1: Ch 8, join with sl st into the first ch to form a ring.
- Round 2: 8 sc around the ring.
- Round 3: 30 sc in BLO.
- Round 4: 1 dec in BLO, 30 sc, 1 dec in BLO (adjust stitch counts if your yarn is thicker).
- Continue increasing/decreasing to create a tapered shape.
- Wire Core: Insert a wire piece into the horn, leaving about 3 inches sticking out of the bottom to attach to the head later.
The Head and Neck
This is the largest component. You will be integrating the nose and mouth into the rounds of the head.
- Round 1: 6 ch, join in ring. From 2nd ch: inc, 3 sc, 4 inc, 3 sc, inc = 14 sc.
- Round 2: (inc, 1 sc) x 4, 6 sc = 18 sc.
- Round 3: 1 sc, (inc, 2 sc) x 4, 5 sc = 22 sc.
- Rounds 4-7: 22 sc.
- Round 8 (Integrate Nose): 7 sc, 4 sc worked into the nose piece, 11 sc = 22 sc + 1 ch.
- Round 9 (Integrate Mouth): 6 sc, 3 sc3tog, 2 sc, inc, 2 sc, 3 sc3tog, 7 sc, 5 sc worked into the mouth piece = 26 sc.
- Rounds 10-11: 10 sc, inc, 10 sc, 5 sc in BLO = 27 sc.
- Rounds 12-13: 28 sc.
- Round 14: (2 dec, 3 sc) x 2, 3 sc3tog, 3 sc, (dec, 2 sc) x 2, 3 sc = 22 sc.
- Rounds 15-16: (1 dec, 2 sc) x 2, 2 sc3tog, 2 sc, (dec, 1 sc) x 2, 3 sc = 16 sc.
- Round 17: 5 sc, 3 sc3tog, 8 sc = 14 sc.
- Round 18: 1 sc, (3 sc3tog) x 2, 5 sc, (3 sc3tog) x 2, 4 sc = 22 sc.
- Rounds 19-20: (1 sc, 4 inc) x 3, 2 sc = 30 sc.
- Round 21: 15 sc, 8 sc in BLO (for the brow ridge), 15 sc = 38 sc.
- Rounds 22-24: Continue with increases to expand the head.
- Final Rounds: Decrease until the head closes.
The Body and Legs
For the body, work in a large spiral. If you are making the “Sitting” version, you will follow a different set of decreases to create a wider base.
Legs: The legs are worked as small tubes. Ensure you insert a wire frame into each leg. The front legs should be slightly longer than the back legs to provide better stability for the standing version.
Finishing
The Fluff Overlay Technique
This is the most important step for that realistic sheep look! Instead of crocheting with the fluffy yarn, you will “lay it in.”
- Crochet your rounds using the smooth base yarn.
- As you work each stitch, lay the strand of fluffy yarn along the top of the previous row.
- Insert your hook underneath both the fluffy strand and the base stitch.
- Complete the stitch normally. This “threads” the fluff through the body, creating a seamless, dense coat of wool.
Assembly and Detailing
- Eyes: Place your white eye pieces (or beads) in the center of the face. For a funny, expressive look, place them slightly closer together. Secure them with a few stitches.
- Horns & Ears: Sew the horns onto the top of the head, about 1 inch away from the center. Sew the ears just below the horns.
- Shading: Use a dry brush and a bit of brown or pink pastel to shade the nose, the edges of the mouth, and around the eyes. This adds incredible depth.
- Wire Management: Once the arms, legs, and head are attached, gather all the wire ends in the center of the body. Wrap them tightly with electrical tape and tuck them deep into the stuffing to prevent them from poking through.
Tips for Success
- Tension Matters: When working with the “overlay” fluff method, keep your tension even. If you pull too hard, the fluff will look sparse.
- Stability: If your ram feels “top-heavy,” add more metal granules/weights to the bottom area of the body.
- Work in Daylight: When doing the final shading with pastels, always work in bright, natural light so you can see the subtle color transitions.
- Wire Safety: Always use pliers to bend and secure your wires. A sharp wire end can easily ruin your hard work by poking through the crochet fabric.