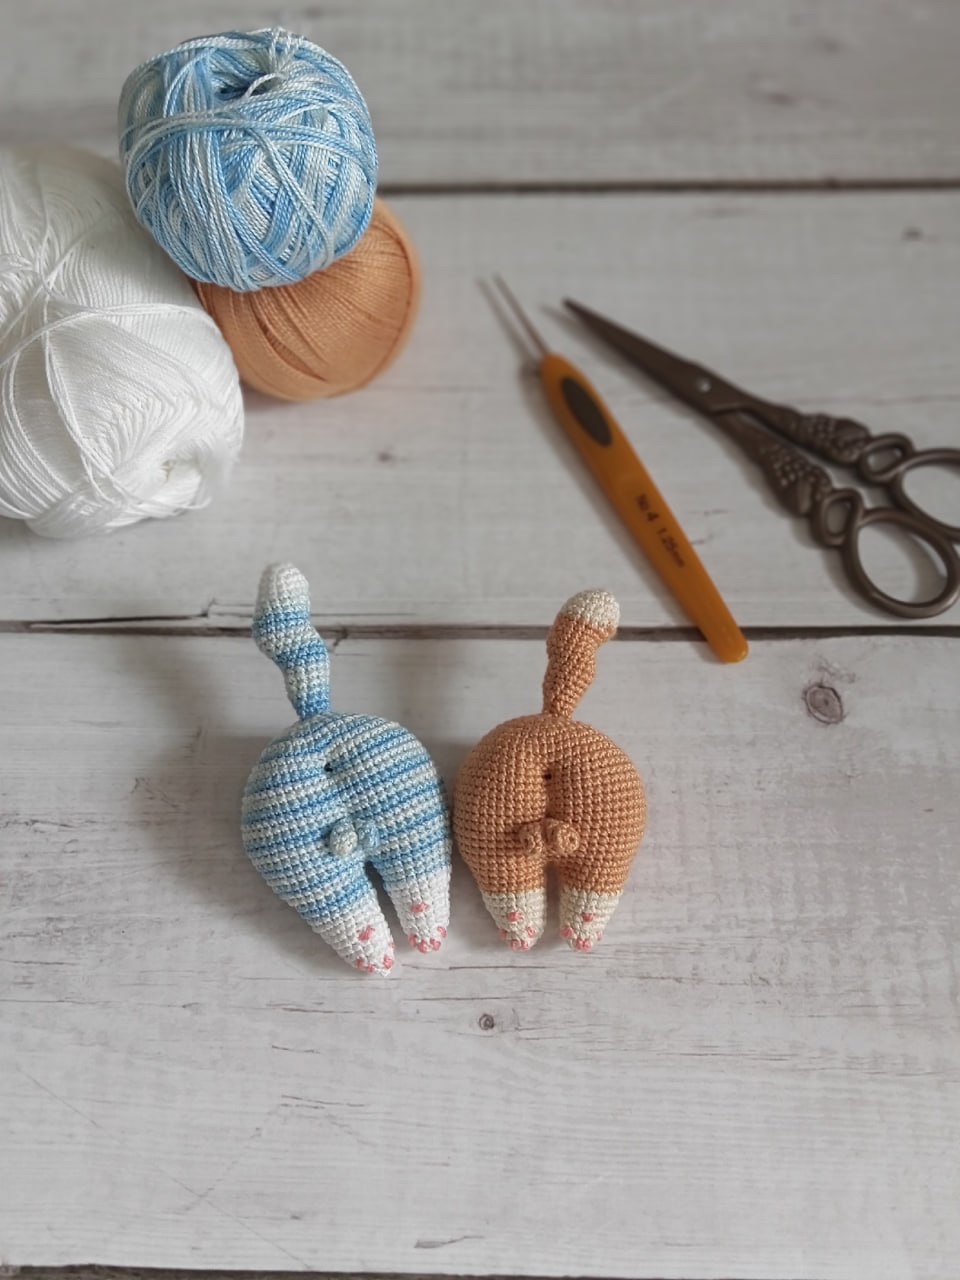
Funny Crochet Cat Butt Brooch Pattern: A Cute and Cheeky Amigurumi Tutorial
If you are looking for a crochet project that is guaranteed to get a laugh, you have come to the right place! This cheeky crochet cat butt brooch is the perfect blend of whimsical, funny, and incredibly cute. Whether you want to make a hilarious accessory for your denim jacket, a standout keychain for your bag, or a unique gift for a friend with a sense of humor, this pattern is a total winner.
This project is perfect for intermediate beginners. It uses standard amigurumi techniques like working in the round and making small color changes, but it isn’t so difficult that it will leave you feeling overwhelmed. Once finished, you’ll have a high-quality, textured little charm that adds a pop of personality wherever you go!
Materials & Abbreviations
Before we dive into the stitches, let’s make sure you have everything you need on your crochet hook. To achieve the tight, clean stitches seen in the photos, I recommend using a slightly smaller hook than the yarn label suggests.
What You Will Need:
- Yarn: Medium weight cotton yarn (Weight 3 or 4). You will need your main color (e.g., tan or orange) and a contrasting color for the feet and tail (e.g., white or light grey).
- Crochet Hook: A 2.5mm (C) crochet hook works best for amigurumi to ensure your stuffing doesn’t show through.
- Stuffing: Polyester fiberfill (poly-fill).
- Notions: A tapestry needle for sewing, scissors, and a brooch pin or keychain ring.
- Optional: Two tiny craft bells and pink embroidery floss for the paw pads.
Abbreviations (US Terms):
- sc: single crochet
- inc: increase (2 single crochets in the same stitch)
- dec: decrease (invisible decrease preferred)
- sl st: slip stitch
- st(s): stitch(es)
- * : repeat the sequence within the asterisks the number of times indicated
Step-by-Step Instructions
Making the Body (The “Butt”)
The body is worked in a continuous spiral. We will start small and gradually increase to create the rounded shape.
Round 1: 6 sc in magic ring (6)
Round 2: 6 inc (12)
Round 3: (1 sc, 1 inc) * 6 (18)
Round 4: 1 sc, (1 inc, 2 sc) * 5, 1 inc, 1 sc (24)
Round 5: (1 inc, 3 sc) * 6 (30)
Round 6: 2 sc, (1 inc, 4 sc) * 5, 1 inc, 2 sc (36)
Round 7: (1 inc, 5 sc) * 6 (42)
Round 8: 3 sc, (1 inc, 6 sc) * 5, 1 inc, 3 sc (48)
Round 9: 1 sc, 1 inc, 20 sc, 1 inc, 1 sc, 1 inc, 22 sc, 1 inc (52)
Round 10: 1 sc, 1 inc, 22 sc, 1 inc, 27 sc (54)
Round 11: 1 sc, 1 inc, 24 sc, 1 inc, 2 sc, 1 inc, 22 sc, 1 inc, 1 sc (58)
Now we will work several rounds even to create the depth of the body:
Rounds 12-17: 58 sc (6 rounds total)
Now it is time to decrease to close the shape:
Round 18: 29 sc, 1 dec, 25 sc, 1 dec (56)
Round 19: 28 sc, 1 dec, 24 sc, 1 dec (54)
Round 20: 54 sc (54)
Round 21: 28 sc, 1 dec, 23 sc, 1 dec (52)
Round 22: 52 sc (52)
Round 23: 27 sc, 1 dec, 21 sc, 1 dec (50)
Note: Continue decreasing in a similar pattern until the piece is narrow enough to close, or follow the tapering logic to finish the base.
Crafting the Legs
You will make two legs. They feature a color change to create the little white “paws.”
The First Leg
Start with your main color. To create the oval shape, count 12 stitches back from where you began your body and place a stitch marker. You will work an oval by crocheting across the front and then around the back.
Work 13 sc on the front side, then 12 sc around the back (25 total).
Round 1: 1 sc, 1 dec, 19 sc, 1 dec (23)
Round 2: 1 sc, 1 dec, 19 sc (22)
Round 3: 1 dec, 19 sc (21)
Round 4: 10 sc, change to white yarn, 7 sc, 1 dec, 1 sc (20)
Round 5: 20 sc (20)
Round 6: 17 sc, 1 dec (19)
Round 7: 1 sc, 1 dec, 15 sc (17)
Round 8: 17 sc (17)
Round 9: 1 dec, 15 sc (16)
Round 10: 1 dec, 14 sc (15)
Round 11: 1 sc, 1 dec, 10 sc, 1 dec (13)
Round 12: 11 sc, 1 dec (12)
Round 13: 12 sc (12)
Round 14: 2 dec (6) or until closed.
Stuff the leg firmly before sewing it to the body.
The Second Leg
Attach your main color to the center of the back side of the body with 1 sc. Move to the front side and work in a continuous round.
Round 1: 24 sc + 1 sc in the first stitch where you joined (25)
Round 2: 11 sc, 1 dec, 2 sc, 1 dec, 8 sc (23)
Round 3: 11 sc, 1 dec, 10 sc (22)
Round 4: 11 sc, 1 dec, 9 sc (21). Change to white yarn.
Round 5: 10 sc, 1 dec, 9 sc (20)
Round 6: 20 sc (20)
Round 7: 10 sc, 1 dec, 8 sc (19)
Round 8: 10 sc, 1 dec, 7 sc (18)
Stuff the leg firmly and proceed to the final shaping rounds (decreasing until closed), similar to the first leg.
The Tail
The tail is worked in a spiral and features a fun color change.
With White Yarn:
Round 1: 6 sc in magic ring (6)
Round 2: 6 inc (12)
Round 3: 1 sc, 1 inc, 1 sc, 1 inc, 3 sc, 1 inc, 3 sc, 1 inc, 28 sc (40)
With Main Color:
Continue following the pattern of increasing and decreasing to create a tapered, slightly curved tail shape. For a simple version, you can work several rounds of even sc and then decrease at the very tip. Leave a long tail for sewing.
Tiny Bells
If you want to add extra charm, make two small bells:
Round 1: 6 sc in magic ring (6)
Round 2: (1 sc, 1 inc) * 3 (9)
Round 3: (1 dec, 1 sc) * 3 (6)
Do not stuff these. Fasten off and use the ends to join them together, then sew them onto the body.
Finishing & Assembly
Now for the most important part: bringing your cheeky creation to life!
1. Stuffing
Make sure you stuff both the body and the legs very firmly. For amigurumi, you want a tight shape so the stitches don’t stretch out and reveal the stuffing inside.
2. Sewing it Together
Using your tapestry needle, sew the legs and the tail onto the body. Position the legs at the bottom and the tail at the top. You can decide if you want the tail to stick straight up or curve slightly to the side for more character!
3. Adding the Brooch Pin
Sew a safety pin or a brooch pin to the back of the body. If you are making a keychain, simply loop a metal ring through the stitches at the top of the body.
4. The “Dimple” Trick (Optional)
For a more realistic (and hilarious) look, some makers like to create small indentations. You can do this by inserting a needle with a piece of thread through the body, pulling it slightly tight, and knotting it on the inside. This creates a “dimpled” look under the bells or on the body.
5. Final Details
Embroider small pink paw pads on the bottom of the white feet using embroidery floss. Finally, weave in all your ends securely inside the body.
Tips for Success
- Tension is Key: Keep your stitches tight! If your tension is too loose, the stuffing will peek through the holes, which ruins the clean look of the amigurumi.
- Invisible Decreases: When working on the body and legs, use the “invisible decrease” method (inserting the hook into the front loops only of the next two stitches). This prevents large gaps in your work.
- Color Changes: To get a clean color change, pull the new color through the last loop of the previous stitch during your final single crochet.
- Don’t Forget the Stuffing: It is much harder to stuff a piece once you have sewn it shut. Stuff it as much as possible while the opening is still large!