Adorable Crochet Orange Tabby Cat Pattern: Step-by-Step Tutorial
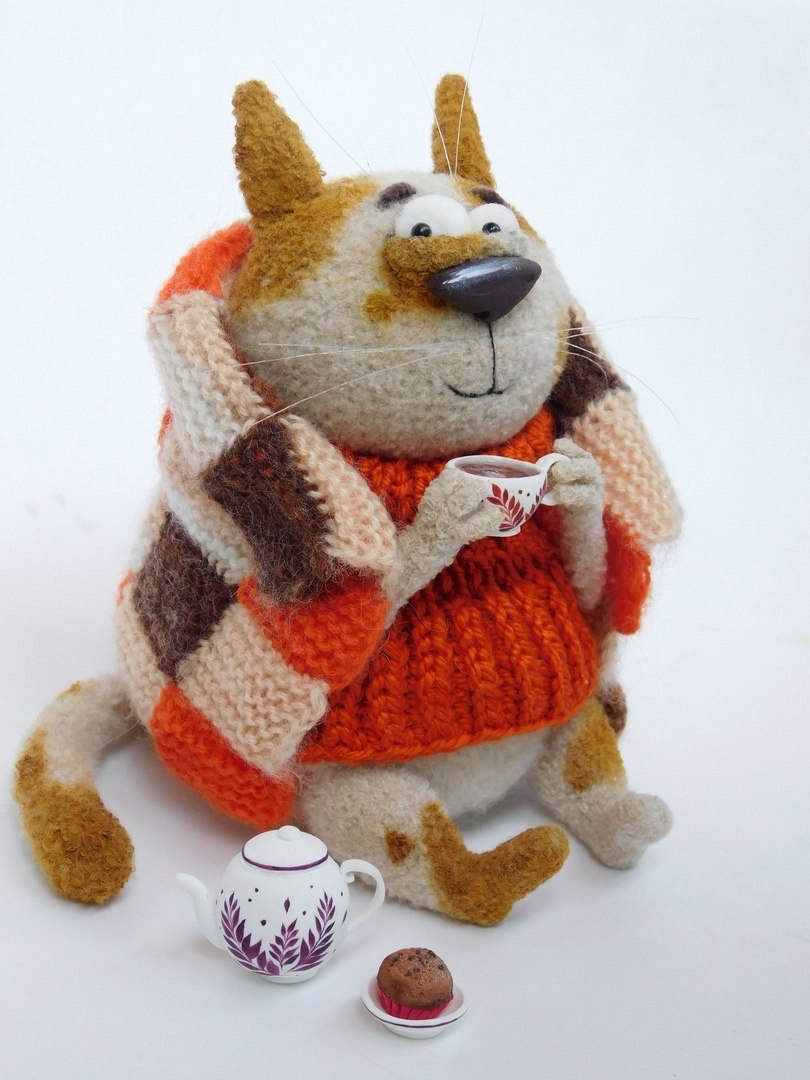
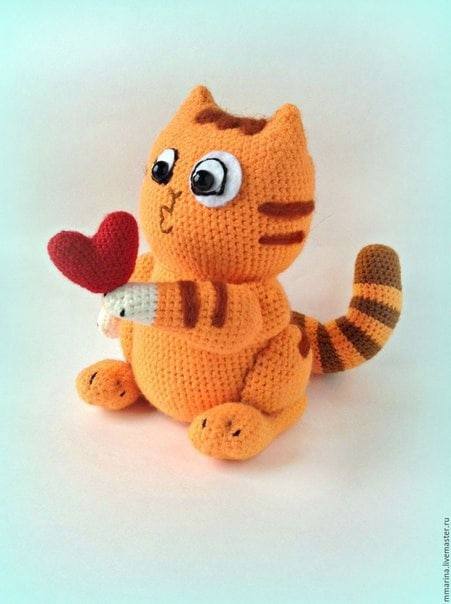
There is nothing quite as charming as a chubby, wide-eyed kitty to brighten up your home or to give as a heartfelt gift. In this tutorial, we are going to create a sweet, stylized orange tabby cat. This amigurumi project features a unique, rounded shape and an expressive face that gives it a “sticker-like” personality. Whether you are an experienced crocheter or a beginner looking for a rewarding project, this pattern is designed to be accessible and fun.
This cat is worked primarily in continuous spirals, which means you won’t have to worry about unsightly seams along the body. We will focus on creating a plump silhouette and adding those iconic ginger stripes to bring our feline friend to life. Let’s grab our hooks and yarn and get started!
Materials & Abbreviations
To ensure your cat turns out as cute as possible, we recommend using a tight tension to prevent the stuffing from showing through. Here is everything you will need for this project:
Materials
- Yarn: Sport or DK weight acrylic or wool blend.
- Orange: Approximately 200-300 yards (50-70g).
- Brown: Small amount for stripes and tail.
- White: Small amount for the paws.
- Crochet Hook: 1.75mm to 1.9mm (depending on your tension).
- Stuffing: High-quality polyester fiberfill.
- Eyes:
- White felt for the eye patches.
- 7-8mm black safety eyes or half-beads.
- Fabric glue or a hot glue gun.
- Structure: A 16-inch piece of floral wire for the tail and a small piece of medical tape to cover the wire ends.
- Notions: Yarn needle, scissors, and optional pastel chalk for the chin.
Abbreviations (US Terms)
- MR: Magic Ring
- sc: Single crochet
- inc: Increase (2 sc in one stitch)
- dec: Decrease (sc 2 together)
- hdc: Half double crochet
- dc: Double crochet
- sl st: Slip stitch
- BLO: Back loop only
- st(s): Stitch(es)
Step-by-Step Instructions
Remember, all parts are worked in a continuous spiral. Use a stitch marker in the first stitch of every round to keep your place.
The Head and Body
The head and body are worked as one single piece in orange yarn. This creates the seamless, plump look of the cat.
- Round 1: 6 sc in MR (6)
- Round 2: 6 inc (12)
- Round 3: (inc, 1 sc) x 6 (18)
- Round 4: (inc, 2 sc) x 6 (24)
- Round 5: (inc, 3 sc) x 6 (30)
- Round 6: (inc, 4 sc) x 6 (36)
- Round 7: (inc, 5 sc) x 6 (42)
- Round 8: (inc, 6 sc) x 6 (48)
- Round 9: (inc, 7 sc) x 6 (54)
- Round 10: (inc, 8 sc) x 6 (60)
- Round 11: (inc, 9 sc) x 6 (66)
- Round 12: 66 sc in BLO (66)
- Rounds 13-27: 66 sc (15 rounds total)
- Round 28: (9 sc, dec) x 6 (60)
- Round 29: (8 sc, dec) x 6 (54)
- Round 30: (7 sc, dec) x 6 (48)
- Round 31: 6 inc, (6 sc, inc) x 6 (60)
- Round 32: (inc, 9 sc) x 6 (66)
- Rounds 33-41: 66 sc (9 rounds total)
- Round 42: (dec, 9 sc) x 6 (60)
- Rounds 43-49: 60 sc (7 rounds total)
- Round 50: (8 sc, dec) x 6 (54)
- Rounds 51-52: 54 sc
- Round 53: (7 sc, dec) x 6 (48)
- Round 54: 48 sc
- Round 55: (6 sc, dec) x 6 (42)
Creating the Ears
To create the ears, we will work into the final round to form peaks. First, crochet about 3 offset stitches to align the center of the ear. Then follow this sequence:
- Round 56: 2 dc, 2 hdc, 13 sc, 2 hdc, 4 dc, 2 hdc, 13 sc, 2 hdc, 2 dc. Finish with a sl st.
Fasten off and weave in the ends. Stuff the head and body firmly, though the ears should be stuffed lightly so they keep their shape without bulging. Gently pinch the head to flatten the top slightly and sew a small seam if necessary to define the head from the body.
Front Paws (Make 2)
Start with white yarn:
- Round 1: 5 sc in MR (5)
- Round 2: 5 inc (10)
- Round 3: (inc, 1 sc) x 5 (15)
- Rounds 4-7: 15 sc
Switch to orange yarn:
- Round 8: (4 sc, inc) x 3 (18)
- Rounds 9-13: 18 sc
- Round 14: 6 inc, 12 sc (24) — this creates the bend in the paw.
- Rounds 15-21: 24 sc
- Round 22: (2 sc, dec) x 6 (18)
- Round 23: (1 sc, dec) x 6 (12)
- Round 24: 6 dec (6)
Stuff the paw (leave the shoulder area lightly stuffed) and sew the hole closed.
Back Legs (Make 2 sets of Thighs and Feet)
Thighs (Orange):
- Round 1: 6 sc in MR (6)
- Round 2: 6 inc (12)
- Round 3: (inc, 1 sc) x 6 (18)
- Round 4: (inc, 2 sc) x 6 (24)
- Round 5: (inc, 3 sc) x 6 (30)
- Round 6: (inc, 4 sc) x 6 (36)
- Rounds 7-13: 36 sc
- Round 14: (4 sc, dec) x 6 (30)
- Round 15: (3 sc, dec) x 6 (24)
Fasten off, leaving a long tail for sewing.
Feet (Orange):
- Round 1: 6 sc in MR (6)
- Round 2: 6 inc (12)
- Round 3: (inc, 1 sc) x 6 (18)
- Round 4: (inc, 2 sc) x 6 (24)
- Rounds 5-8: 24 sc
- Round 9: 12 sc, 6 dec (18)
- Round 10: 12 sc, 3 dec (15)
- Rounds 11-22: 15 sc
Stuff the foot and decrease (sc2tog) until the hole is closed. Fasten off.
The Tail
Start with brown yarn:
- Round 1: 6 sc in MR (6)
- Round 2: 6 inc (12)
- Round 3: (inc, 1 sc) x 6 (18)
- Round 4: (inc, 2 sc) x 6 (24)
- Rounds 5-10: 24 sc (6 rounds)
Now, alternate colors every 3 rounds. Switch to orange for 3 rounds, then brown for 3 rounds. Continue until you have 5 brown stripes and 5 orange stripes. Finish with 6 rounds of orange yarn. Fasten off.
Finishing & Assembly
Assembling the Limbs
Start by marking the center lines of the body. Sew the thighs onto the sides of the body, positioning them as “pockets” with the opening facing down. The thighs should be shifted slightly toward the front of the cat. Once the thighs are secure, sew the feet to the bottom of the thighs and the body, ensuring the cat sits stably.
Adding the Tail
To make the tail poseable, take your floral wire and wrap the ends in medical tape for safety. Insert the wire into the tail and stuff the tail lightly around it (do not overstuff the base). Sew the tail to the center of the back, about 4 rounds above the BLO round of the body. You can add a few extra stitches to secure the tail against the body so it doesn’t wobble.
Facial Details
The face gives this cat its character! Cut two curved “drop” shapes from white felt for the whites of the eyes. Glue your 7-8mm safety eyes or beads onto the felt. For the left eye, glue the felt piece onto a larger white felt circle (approx. 0.8-0.9 inches) to create the “sleepy/quirky” look. Glue these to the head and secure the edges with a thin brown or black embroidery thread.
Embroider a small pink or brown nose and a simple curved smile. For a professional touch, use a white gel pen or acrylic paint to add a tiny “highlight” dot to the pupils, and a bit of pastel peach chalk to the chin.
The Tabby Stripes
Using brown yarn and a tapestry needle, embroider stripes onto the head, body, and legs. On the head, place one central stripe between the ears and two smaller stripes on the sides of the forehead. Use a “stem stitch” or a simple straight stitch to create the stripes. Ensure the stripes on the legs match the rhythm of the stripes on the tail.
Tips for Success
- Consistent Tension: Amigurumi requires tight stitches. If you see gaps where the stuffing is peeking through, try dropping down half a hook size.
- Stuffing Strategy: Stuff the body in small increments, massaging the fiberfill as you go to avoid lumps. This ensures the cat keeps its round, “squishy” shape.
- Customization: Feel free to change the colors! A grey tabby or a calico version would look just as wonderful using this same pattern.
- Stability: If your cat leans too much, you can cut a small circle of plastic (from a yogurt lid) and sew it into the bottom of the body before finishing the last rounds.