Free Crochet Mouse Keychain Pattern: Easy Step-by-Step Amigurumi Tutorial
Adorable Crochet Mouse Keychain Pattern: Easy Step-by-Step Amigurumi Tutorial
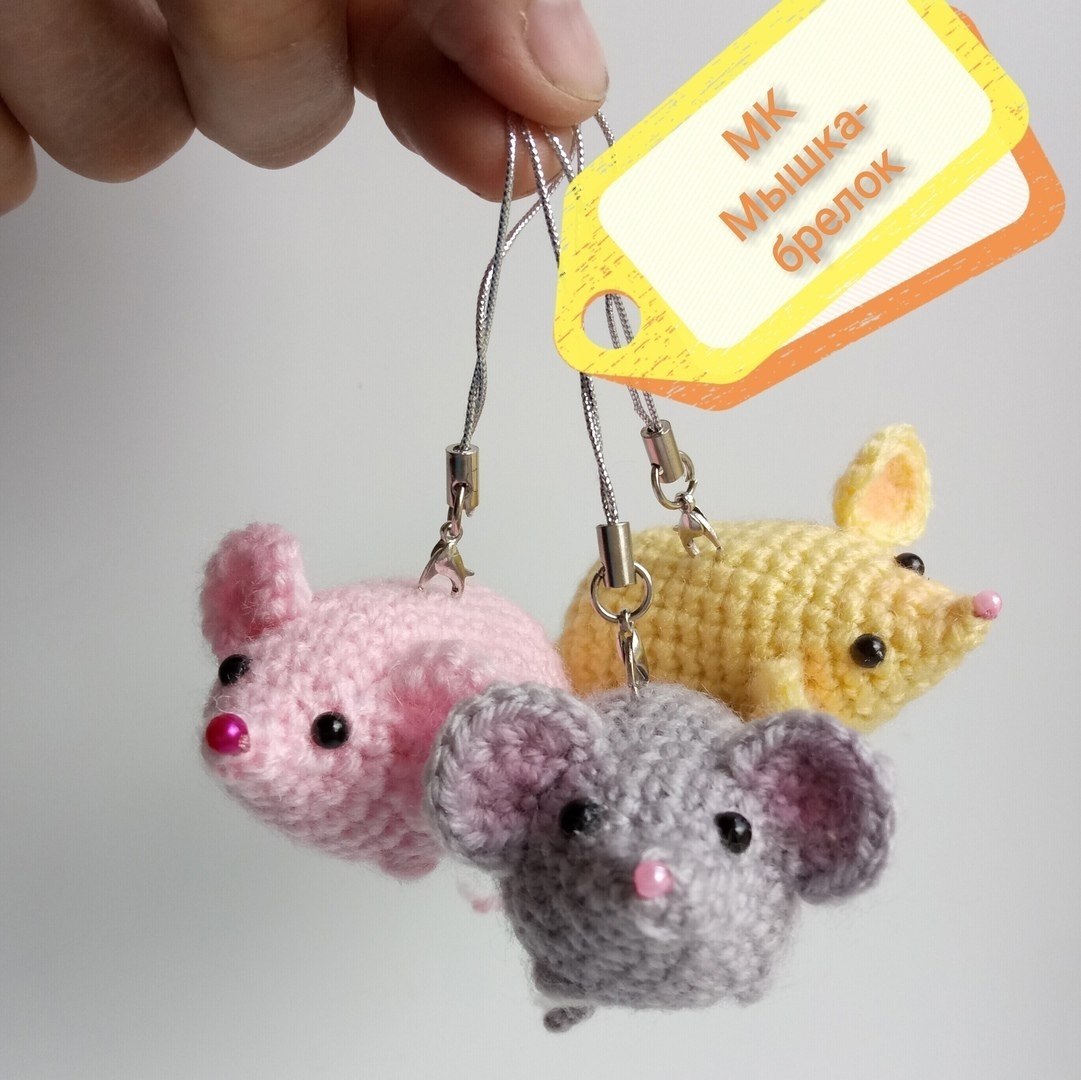
Looking for a quick, cute, and rewarding crochet project? This tiny crochet mouse keychain is the perfect way to use up your scrap yarn or create a batch of sweet handmade gifts for friends and family. Whether you are a seasoned amigurumi artist or a beginner looking for a small project to practice your skills, this little mouse is a delightful choice.
Measuring approximately 2.5 inches long (excluding the tail), this mouse is designed to be compact and portable. In this tutorial, we will guide you through the process of creating the body, the tiny ears, and the assembly to bring your little rodent friend to life. Let’s grab our hooks and get started!
Materials & Abbreviations
To ensure your mouse turns out perfectly, gather the following materials. While we suggest these specific sizes, you can use any yarn and hook combination that works well for amigurumi (tight stitches are key to prevent stuffing from showing).
Materials Needed:
- Yarn: Light-weight (DK or Sport) yarn in your choice of color. Light grey, cream, or soft pink work beautifully.
- Crochet Hook: 2.5mm (or the size recommended for your chosen yarn to achieve a tight fabric).
- Stuffing: High-quality polyester fiberfill.
- Eyes: Two small black beads or 4mm safety eyes.
- Nose: One tiny pink bead.
- Tools: Yarn needle, scissors, and a stitch marker.
- Optional: Soft pastels or fabric markers for adding a little blush to the cheeks and ears.
- Hardware: A lobster claw clasp or keychain ring.
Abbreviations (US Terms):
- MR: Magic Ring
- sc: Single crochet
- inc: Increase (two single crochet in the same stitch)
- dec: Decrease (sc two stitches together)
- ch: Chain
- st: Stitch
- Puff St: Puff stitch (Yarn over, insert hook into stitch, pull up a loop. Repeat this two more times in the same stitch until you have 4 loops on your hook. Yarn over and pull through all loops on the hook).
Note: This project is worked in a continuous spiral. Please use a stitch marker to keep track of the beginning of each round.
Step-by-Step Instructions
The Body and Head (Worked as one piece)
Before you begin the first round, leave a long yarn tail of about 10 to 12 inches. This tail will be used later to create the mouse’s long, curly tail!
- Round 1: 6 sc in MR (6)
- Round 2: inc in each st around (12)
- Round 3: (sc, inc) repeat 6 times (18)
- Round 4: (2 sc, inc) repeat 6 times (24)
- Round 5: (3 sc, inc) repeat 6 times (30). Using your yarn needle, pull the long tail you left at the start through to the outside of the work; we will come back to this for the tail later.
- Round 6: (3 sc, dec) repeat 6 times (24)
The Back Legs: In the next round, we will use puff stitches to create the tiny back feet.
- Round 7: 7 sc, 1 Puff St, ch 1, 4 sc, 1 Puff St, ch 1, 11 sc (26)
- Round 8: 7 sc, skip 1 st, work 5 sc into the next stitch, skip 1 st, 12 sc (24)
- Rounds 9-11: sc in each st around (24)
The Front Legs: Now we will create the small front paws.
- Round 12: 8 sc, 1 Puff St, ch 1, 4 sc, 1 Puff St, ch 1, 19 sc (26)
- Round 13: 8 sc, skip 1 st, work 5 sc into the next stitch, skip 1 st, 11 sc (24)
- Round 14: (4 sc, dec) repeat 4 times (20)
- Round 15: sc in each st around (20). Begin stuffing the body firmly with fiberfill.
- Round 16: (3 sc, dec) repeat 4 times (16)
- Round 17: (2 sc, dec) repeat 4 times (12)
- Round 18: (1 sc, dec) repeat 4 times (8)
- Round 19: sc in each st around (8)
- Round 20: dec 4 times (4)
Cut the yarn, leaving a small tail. Use your needle to weave the end through the remaining 4 stitches to close the nose tightly. Hide the end inside the body.
Creating the Tail: Find the long tail you pulled to the front in Round 5. Attach your yarn to that end and chain 15 to 18 stitches. Fasten off and weave in the end. You can curl the tail by rolling it between your fingers!
The Ears (Make 2)
- Round 1: 6 sc in MR, ch 1, turn (6)
- Round 2: inc in each st around (12)
Fasten off, leaving a long tail for sewing. Do not stuff the ears.
Finishing & Assembly
Now comes the magic part where our mouse gets its personality! Follow these steps for a professional finish:
Adding the Face
Position your black beads or safety eyes between Rounds 16 and 17. They should be spaced about 4 stitches apart. Once you are happy with the placement, sew or secure them firmly.
Sew the small pink bead to the very tip of the nose to create a cute little snout.
Attaching the Ears
Sew the ears symmetrically onto the head, aligning them around Round 14. Make sure they are angled slightly outward for a more realistic look.
The Final Touches
To give your mouse a “boutique” look, use a soft pink pastel or a fabric marker to lightly shade the inside of the ears and the cheeks. This adds depth and a touch of sweetness to the amigurumi.
Finally, attach the keychain hardware to the top of the mouse’s head or back. Gently shape the body by massaging the stuffing to create a slight slope from the rump down toward the nose.
Pro Tips for the Perfect Crochet Mouse
To make your crochet mouse look its best, keep these expert tips in mind:
- Tension is Key: Amigurumi requires a tight tension to prevent the stuffing from leaking through the stitches. If you see holes, try dropping down a hook size (e.g., from 2.5mm to 2.25mm).
- Perfecting the Puff Stitch: The puff stitch is what gives the legs their “pop.” Make sure you pull the loops through completely so the leg looks like a little ball rather than a flat stitch.
- Custom Colors: While grey is classic, these mice look adorable in pastel colors like mint, lemon, or lavender. You can even use variegated yarn for a “fancy” mouse look.
- Alternative Eyes: If you are making this for a very small child, replace the beads with black embroidery thread. Use a small satin stitch to create two tiny black eyes for safety.
- Shaping: Don’t be afraid to “sculpt” your mouse. After stuffing, you can gently push the stuffing toward the back to make the nose area pointier and more mouse-like.