Adorable Amigurumi Balloon Owl Crochet Pattern
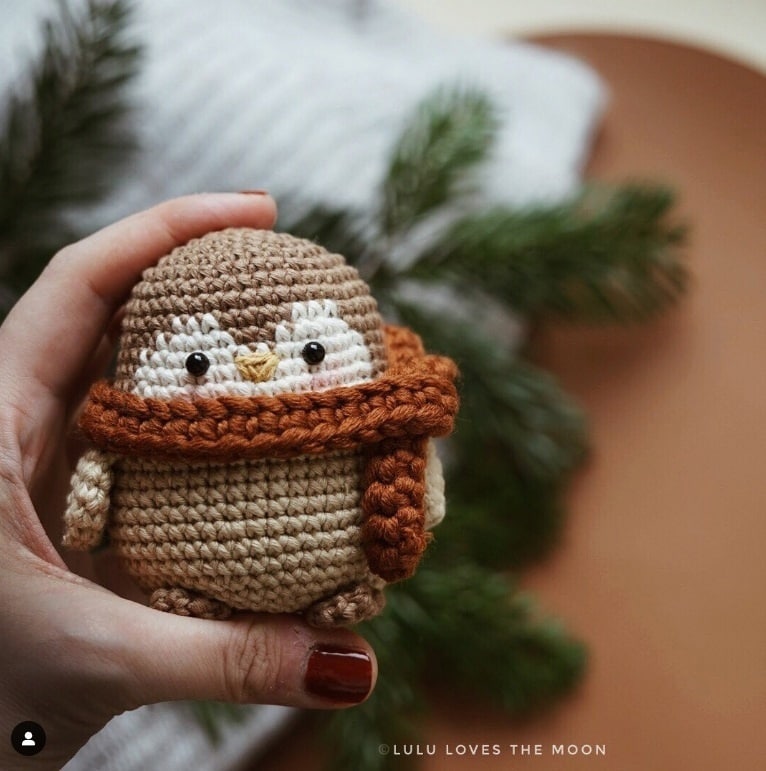
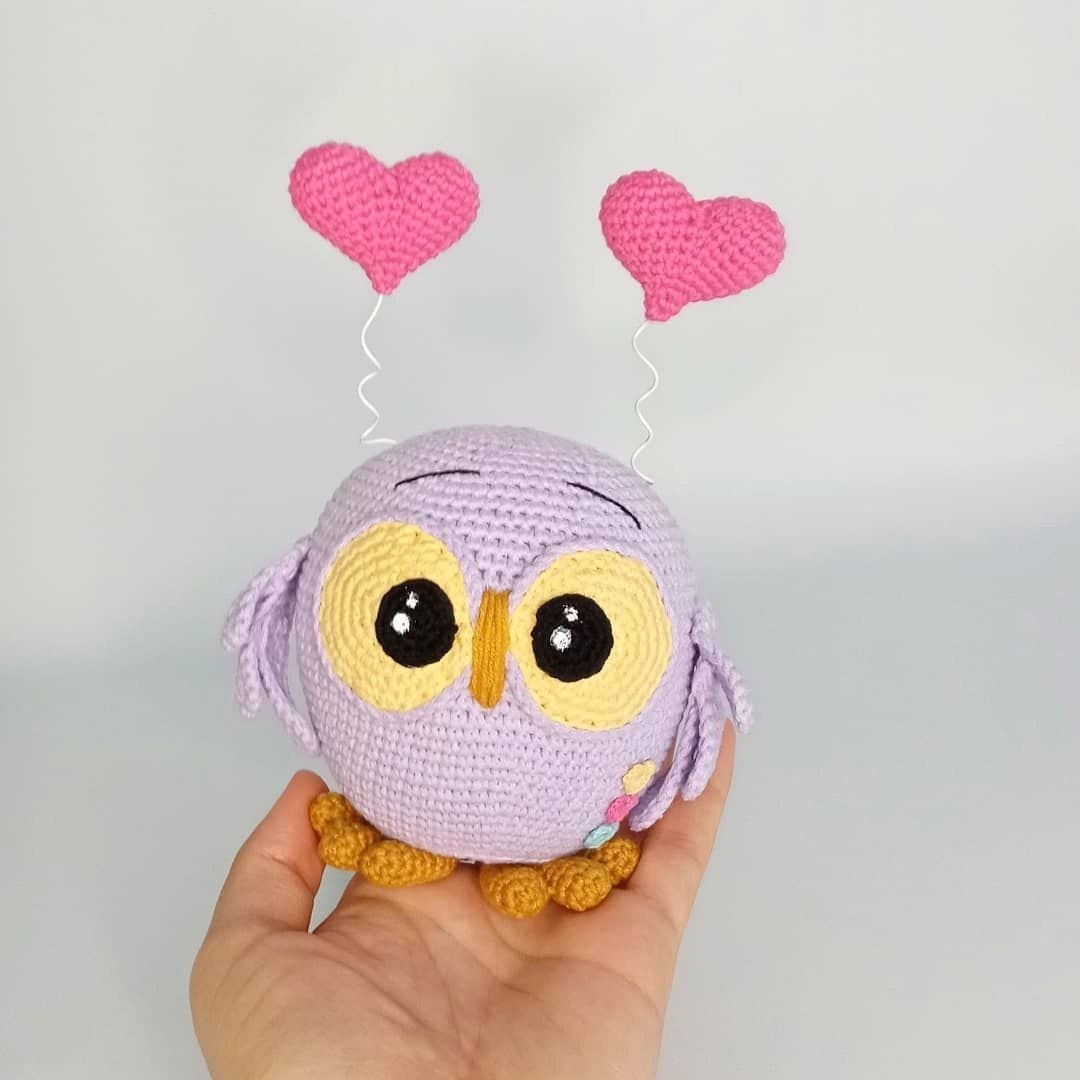
Welcome to this delightful crochet tutorial! Today, we are creating a whimsical, wide-eyed amigurumi owl that is sure to capture everyone’s heart. This project is perfect for those who love “kawaii” style toys and want to practice their skills with shaping and assembly. Whether you are making this as a gift for a loved one or as a cute addition to your own collection, this little owl is guaranteed to bring a smile to your face.
This project uses a combination of basic amigurumi techniques, including working in the round, increasing, decreasing, and layering pieces to create the wings. We will also use a few clever tricks, like a plastic base for stability and a bit of wire to give our owl some floating heart balloons!
Materials & Abbreviations
To get started, gather the following materials. We recommend using a tight tension to ensure the stuffing doesn’t peek through the stitches.
Materials Needed
- Yarn: Medium weight (4) acrylic or cotton yarn in Lavender (main color), Mustard Yellow (for feet, beak, and eyes), and Black (for pupils). You will need approximately 100-150 yards of the main color and smaller amounts of the accent colors.
- Crochet Hook: 2.0mm (or the size needed to achieve a tight fabric). A 1.5mm hook may be useful for the pupils.
- Stuffing: High-quality polyester fiberfill.
- Eyes/Details: A small plastic disc (approx. 2 inches in diameter) for the base, acrylic paint (white) for eye highlights, and thin floral or craft wire.
- Tools: Yarn needle, scissors, and stitch markers.
Abbreviations (US Terms)
- MR: Magic Ring
- Sc: Single crochet
- Inc: Increase (2 sc in one stitch)
- Dec: Decrease (sc 2 together)
- BLO: Back loop only
- Ch: Chain
- Sl st: Slip stitch
- St(s): Stitch(es)
Step-by-Step Instructions
The Body and Head
The body and head are worked as one continuous piece. Start with the Lavender yarn and your 2.0mm hook.
- Round 1: 6 sc in MR (6)
- Round 2: Inc in each st around (12)
- Round 3: (1 sc, inc) * 6 (18)
- Round 4: (2 sc, inc) * 6 (24)
- Round 5: (3 sc, inc) * 6 (30)
- Round 6: (4 sc, inc) * 6 (36)
- Round 7: (5 sc, inc) * 6 (42)
- Round 8: (6 sc, inc) * 6 (48)
Pro Tip: Now is the time to cut a plastic disc to fit the diameter of your work. Place it inside the circle to create a sturdy flat bottom for your owl.
- Round 9: Working in BLO, 48 sc (48)
- Round 10: (7 sc, inc) * 6 (54)
- Round 11: (8 sc, inc) * 6 (60)
- Rounds 12-13: Sc in each st around (60)
- Round 14: (9 sc, inc) * 6 (66)
- Round 15: Sc in each st around (66)
- Round 16: (10 sc, inc) * 6 (72)
- Round 17: Sc in each st around (72)
- Round 18: (11 sc, inc) * 6 (78)
- Rounds 19-34: Sc in each st around (78) for 16 total rounds.
- Round 35: (11 sc, dec) * 6 (72)
- Round 36: (10 sc, dec) * 6 (66)
Begin stuffing the body firmly with fiberfill. Continue stuffing as you work the remaining decreases.
- Round 37: (9 sc, dec) * 6 (60)
- Round 38: (8 sc, dec) * 6 (54)
- Round 39: (7 sc, dec) * 6 (48)
- Round 40: (6 sc, dec) * 6 (42)
- Round 41: (5 sc, dec) * 6 (36)
- Round 42: (4 sc, dec) * 6 (30)
- Round 43: (3 sc, dec) * 6 (24)
- Round 44: (2 sc, dec) * 6 (18)
- Round 45: (1 sc, dec) * 6 (12)
Fasten off and weave in the ends. If you are adding heart balloons, insert the wire between rounds 38 and 39 before closing the top entirely.
The Big Expressive Eyes
We will make two yellow eye circles and two black pupils.
Yellow Outer Eye (Make 2)
- Round 1: 6 sc in MR (6)
- Round 2: Inc in each st around (12)
- Round 3: (1 sc, inc) * 6 (18)
- Round 4: (2 sc, inc) * 6 (24)
- Round 5: (3 sc, inc) * 6 (30)
- Round 6: (4 sc, inc) * 6 (36)
Fasten off, leaving a long tail for sewing.
Black Pupils (Make 2)
Use black yarn and a 1.5mm or 2.0mm hook.
- Round 1: 6 sc in MR (6)
- Round 2: Inc in each st around (12)
- Round 3: (1 sc, inc) * 6 (18)
Fasten off, leaving a tail for sewing. Sew the pupils onto the center of the yellow circles.
The Feet
The feet are made by creating three small “toes” and then joining them together. Use Mustard Yellow yarn.
Toe 1: R1: 6 sc in MR (6), R2: (1 sc, inc) * 3 (9), R3-5: sc around. Fasten off.
Toe 2: R1: 6 sc in MR (6), R2: (1 sc, inc) * 3 (9), R3-6: sc around. Fasten off.
Toe 3: R1: 6 sc in MR (6), R2: (1 sc, inc) * 3 (9), R3-5: sc around. Do not fasten off.
Joining the Foot: Sl st to Toe 2, work 5 sc along Toe 2, sl st to Toe 1, and work around all three toes for a total of 30 sc. Now work the following:
- Round 7: (3 sc, dec) * 6 (24)
- Round 8: sc around (24)
- Round 9: (2 sc, dec) * 6 (18)
- Round 10: (1 sc, dec) * 6 (12)
- Rounds 11-13: sc around (12)
- Round 14: (1 sc, dec) * 4 (8)
- Round 15: 2 dec.
Fasten off and sew the feet to the bottom plastic disc.
The Layered Wings (Make 2)
The wings are made of three oval pieces of different sizes sewn together.
Piece 1: Ch 6. Work around: 4 sc, 3 sc in last st, 4 sc, ch 1, turn. R3: 4 sc, inc, 1 sc, inc, 4 sc. Fasten off.
Piece 2: Ch 7. Work around: 5 sc, 3 sc in last st, 5 sc, ch 1, turn. R3: 5 sc, inc, 1 sc, inc, 5 sc. Fasten off.
Piece 3: Ch 9. Work around: 7 sc, 3 sc in last st, 7 sc, ch 1, turn. R3: 7 sc, inc, 1 sc, inc, 7 sc. Do not fasten off.
Join Piece 2 to Piece 3 by working sc through both layers. Then, join Piece 1 to the top of the assembly. Work a few rounds of decreases to taper the top of the wing. Mirror the process for the second wing.
Finishing
Now comes the magic—the assembly and detailing!
- Eye Placement: Sew the eyes to the head between rounds 21 and 33, leaving about 1.5 to 2 stitches of space between them.
- Eye Details: For extra texture, crochet a thin chain (approx. 37 ch) and glue it around the outer edge of the yellow eye. Use a toothpick and white acrylic paint to add tiny “glimmer” dots to the black pupils.
- Face: Embroider a small triangular beak using mustard yarn between the eyes. You can also add simple curved lines for eyebrows using a contrasting thread.
- Wing Placement: Sew the wings to the sides of the body between rounds 29 and 30. Only sew the very top corner to allow the wings to drape naturally.
- Balloons: Wrap your craft wire around a knitting needle to create a spiral. Attach small crocheted hearts to the top of the wires, and secure the bottom of the wires inside the owl’s head.
Tips for Success
- Tight Stitches: Use a hook slightly smaller than the yarn suggests. This prevents the fiberfill from showing through the stitches, which is the hallmark of a professional-looking amigurumi.
- Stitch Markers: Since we are working in continuous spirals, always place a marker in the first stitch of every round so you don’t lose your place.
- Symmetry: When sewing the eyes and wings, use pins first to mark the position. This allows you to adjust the look of your owl’s expression before permanently sewing the pieces in place.
- Wire Safety: If this toy is for a small child, omit the wire and hearts, or ensure the wire is completely encased in yarn and securely knotted to prevent it from poking through.