Adorable Amigurumi Little Goat Crochet Pattern: A Step-by-Step Tutorial
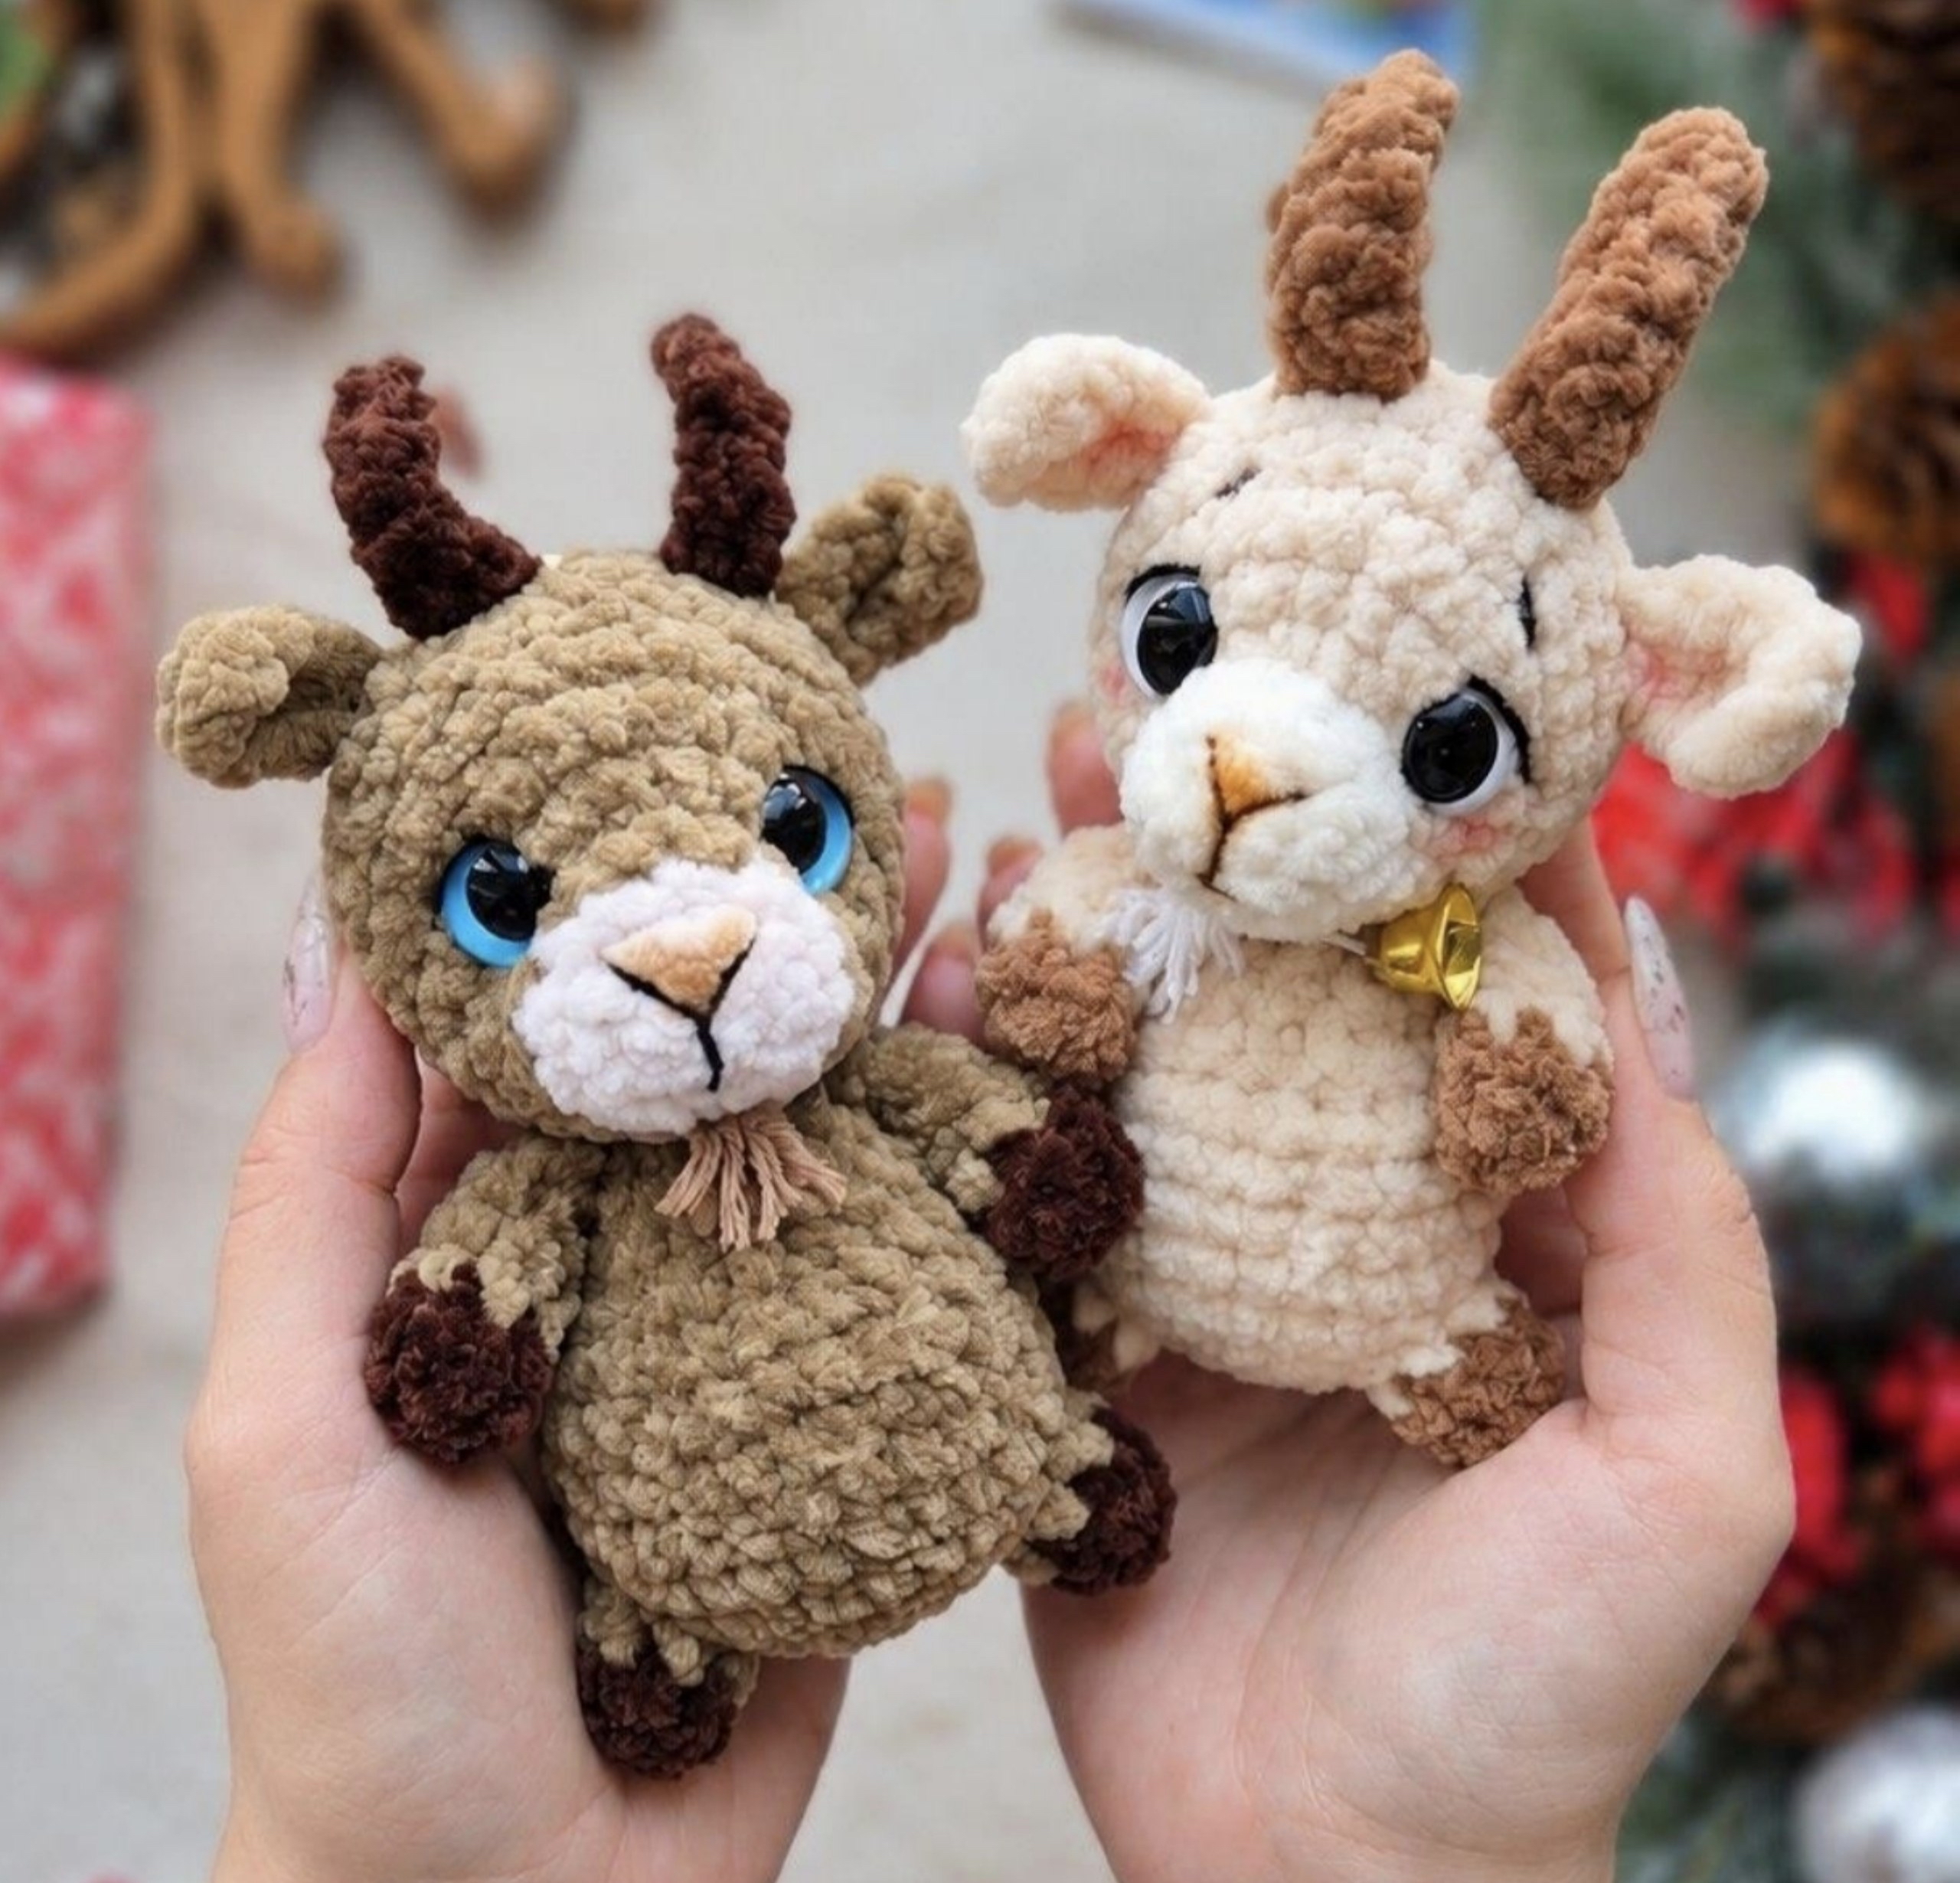
Are you looking for a sweet, quick project to whip up over a weekend? This adorable Amigurumi Little Goat is the perfect companion for your crochet collection. With its big, expressive eyes and tiny horns, this little character is high on cuteness but low on complexity. Whether you are making a nursery decoration, a keychain, or a gift for a friend, this pattern is designed to be a joyful and rewarding experience for intermediate crocheters.
This project is specifically designed to be worked with plush yarn, which gives the goat its signature soft, velvety texture. While the finished goat is quite small—standing approximately 5.5 inches tall—the details, from the shaped muzzle to the tiny beard, make it look like a professional boutique toy. Grab your favorite hook and let’s get started!
Materials and Abbreviations
Abbreviations
This pattern uses standard US crochet terminology. Please ensure you are familiar with these terms before beginning:
- MR: Magic Ring
- ch: Chain
- sc: Single Crochet
- inc: Increase (two single crochets in the same stitch)
- dec: Decrease (crochet two stitches together)
- sl st: Slip Stitch
- dc: Double Crochet
- st(s): Stitch(es)
Materials List
To achieve the look seen in the photos, you will need the following supplies:
- Plush/Velvet Yarn: You will need three colors. One for the main body, one for the snout/face, and one for the hooves. Look for a weight of approximately 120 meters (131 yards) per 100g (3.5 oz).
- Thin Embroidery Yarn: Use YarnArt Jeans or a similar fine thread in black or brown for the facial embroidery.
- Textured Yarn: A small amount of textured yarn or cotton for the little beard.
- Safety Eyes: 12mm glass cabochons or safety eyes.
- Adhesive: Fabric glue or a specialized craft glue like B-7000 to secure the eyes.
- Stuffing: High-quality polyester fiberfill (polyfill).
- Crochet Hook: A 3.75mm (US size E/4) hook is recommended to maintain a tight tension.
- Tools: Scissors, stitch markers, tapestry needles (long and short), sewing thread, and pins.
- Optional: Dry pastels (pink or peach) for adding a soft blush to the cheeks and ears.
Step-by-Step Instructions
The Legs (Make 2)
Start with the accent color used for the hooves.
- MR, 6 sc (6).
- 6 sc (6).
Change to the main body color. Do not stuff the legs. Leave a tail for sewing.
- 6 sc, inc (offset stitch), sl st (8).
Fasten off, leaving a tail, and pull the yarn through the last loop.
The Arms (Make 2)
Start with the accent color for the hooves.
- MR, 6 sc (6).
- 6 sc (6).
Change to the main body color. Do not stuff the arms.
- 6 sc (2 rows).
- dec, 4 sc (5).
- 5 sc (5).
Fold the piece in half and crochet 2 sc through both layers (both sides of the arm) to close it. Fasten off, leaving a tail for sewing.
The Body
Using the main body color.
- MR, 6 sc (6).
- 6 inc (12).
- (1 sc, inc) x 6 (18).
Note on attaching legs: In the next row, we will crochet the legs directly into the body. To keep the color change looking clean, perform the color switches on the inside of the body.
- (1 sc, inc) x 2, crochet 3 sc around the first leg (working through both sides of the leg), (inc, 1 sc) x 2, inc, crochet 3 sc around the second leg (working through both sides), inc, 1 sc, inc (25).
- 6 sc, crochet 1 sc, inc, 1 sc, 8 sc, crochet 1 sc, inc, 1 sc, 5 sc (27).
- Ch 6, then continue crocheting 27 sc around the entire body (27).
- 7-9. 27 sc (3 rows).
- 10. (4 sc, dec) x 4, 3 sc (23).
- 11. (3 sc, dec) x 4, 3 sc (19).
- 12. (2 sc, dec) x 4, 3 sc (15).
Attaching Arms:
- 3 sc, crochet 2 sc around the first arm (through both sides), 6 sc, crochet 2 sc around the second arm (through both sides), 2 sc (15).
- (1 sc, dec) x 5 (10), sl st (10).
Fasten off, leaving a long tail. Stuff the body firmly with fiberfill before closing.
The Head
Start with the accent color for the snout/face.
- MR, 6 sc (6).
- 6 inc (12).
- 12 sc (12).
Change to the main body color.
- 2 sc, inc, 1 sc, 4 inc, 1 sc, inc, 2 sc (18).
- 5 sc, 3 inc, 2 sc, 3 inc, 5 sc (24).
- (1 sc, inc) x 2, 7 sc, 2 inc, 7 sc, (inc, 1 sc) x 2 (30).
- 7-8. 30 sc (2 rows).
The Ears:
To make an ear, ch 3. Starting from the third chain from the hook, work: 3 dc, 1 sl st.
- 11 sc, ear, 9 sc, ear, 10 sc (30).
- 30 sc (30).
- (3 sc, dec) x 6 (24).
Pro-tip: As you work these rows, begin stuffing the head carefully. Aim to shape the snout first, then fill the top of the head.
- (2 sc, dec) x 6 (18).
- (1 sc, dec) x 6 (12).
- dec (6).
Fasten off and close the hole.
The Horns
Using the accent color (hoof color).
- Ch 7. From the second chain from the hook, work: 3 dc, 3 sc. Fasten off, leaving a long tail.
Using a needle, thread the tail through to the second horn location (approximately 2 sc away from the left ear). Repeat the horn construction: Ch 7, 3 dc, 3 sc. Secure both tails at the back of the head with a knot and hide them inside the stuffing.
Finishing
Muzzle Shaping and Facial Details
To create a realistic snout, use your thin embroidery yarn. Pin the area between rows 5 and 6 of the head. Use a needle to pull the stitches together using 2 sc per stitch to create a slight indentation for the nose area.
Eyes: Place the centers of your 12mm eyes approximately at row 5. Secure them firmly with glue.
Embroidery: Using the thin embroidery thread (split the thread in half for extra precision), embroider a small nose and delicate eyebrow/eyelash lines. It is helpful to use pins to mark the exact placement before you begin stitching.
Assembly and Decoration
Sew the head to the body using a strong sewing thread. To make assembly easier, you can use long pins or knitting needles to hold the head in place while you sew around the neck.
Final Touches:
- Beard: Attach a small tuft of textured yarn or cotton to the chin.
- Blush: Use a clean brush and a tiny amount of pink dry pastel to gently color the inside of the ears and the cheeks.
- Personalize: Feel free to add a tiny bell, a ribbon, or a small flower to make your goat unique!
Tips for Success
- Tension is Key: When working with plush yarn, keep your tension consistent to avoid gaps where the stuffing might show through.
- Lighting: Always work in a well-lit area or under a bright lamp to prevent eye strain, especially during the detailed embroidery phase.
- The “Offset” Stitch: When working the legs into the body, ensure you are catching both the front and back loops of the leg to create a sturdy attachment.
- Safety First: If this toy is intended for a small child, ensure all eyes and decorative parts are sewn on extremely securely, or consider using embroidered eyes instead of safety cabochons.