DIY Crochet Daruma Doll: Free Amigurumi Good Luck Charm Pattern
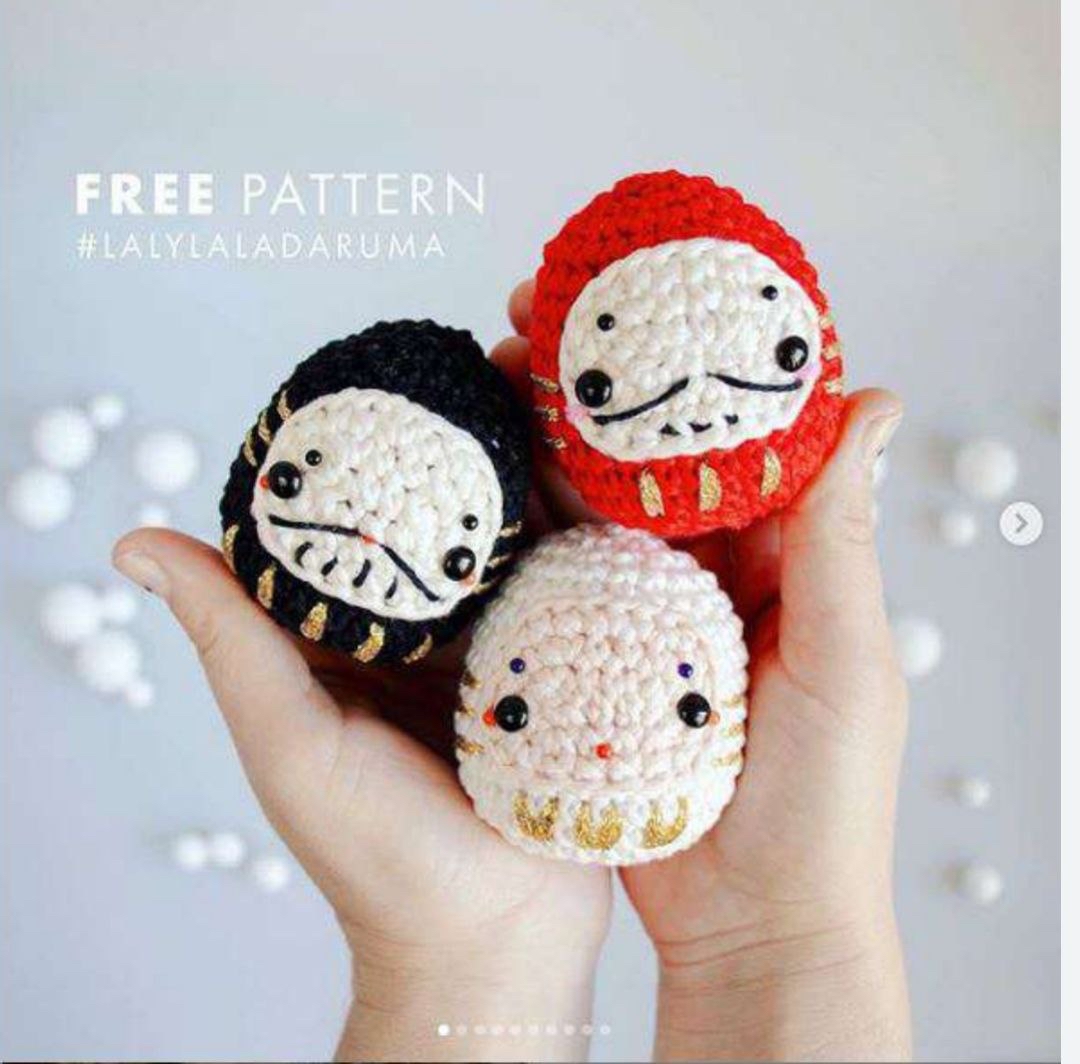
If you are looking for a quick, meaningful, and charming crochet project, this free crochet Daruma doll pattern is perfect for you! Measuring just around 3 inches tall, these cute little amigurumi talismans make fantastic desk companions, keychains, handmade gifts, or holiday ornaments. Rooted in Japanese culture, Daruma dolls are traditional symbols of perseverance, goal-setting, and good fortune.
Traditionally, Daruma dolls are painted without pupils in their eyes. When you set a goal or make a wish, you fill in one eye. Once your goal is accomplished or your wish comes true, you fill in the second eye as a symbol of gratitude and achievement. Whether you are crocheting one for yourself or crafting a thoughtful gift for a loved one, this beginner-friendly tutorial will walk you through creating your very own lucky crochet Daruma doll step-by-step.
Meaning of Daruma Color Codes
Before selecting your yarn colors, consider what intention or wish you want your crochet Daruma to represent. Different colors correspond to different wishes and blessings:
- Red: Good Luck, Fortune, and Victory
- Black: Protection from Bad Luck and Negative Energy
- Yellow: Security, Protection, and Peace of Mind
- White: Harmony, Balance, and Positive Relationships
- Purple: Health, Wellness, and Longevity
- Pink: Love, Romance, and Caring Relationships
- Green: Beauty, Vitality, and Personal Growth
- Gold: Wealth, Prosperity, and Financial Success
Materials & Supplies
This project uses standard worsted weight yarn, making it an excellent stash-buster! Here is everything you will need to complete one mini Daruma doll:
- Main Color Yarn: Approx. 35 yards of worsted weight yarn (#4 Medium) in Red, Black, Yellow, White, Purple, Pink, Green, or Gold.
- Contrast Color Yarn: Approx. 10 yards of worsted weight yarn in White, Off-White, or Light Powder Pink (for the face plate).
- Detail Threads: Thin embroidery floss or lace weight yarn in Black, Red/Orange, and Metallic Gold.
- Crochet Hook: US Size E-4 (3.5 mm) crochet hook (or size needed to obtain a tight gauge so stuffing does not peek through).
- Safety Eyes: One pair of 7 mm (approx. 0.28 inches) black safety eyes.
- Stuffing: Premium polyester fiberfill stuffing.
- Notions: Tapestry/yarn needle, stitch marker, sharp scissors, and optional 3 mm beads (black or orange) for extra facial accents.
Crochet Abbreviations (US Terms)
This pattern is written using standard American crochet terminology. Here are the abbreviations used throughout the tutorial:
- ch: chain stitch
- sc: single crochet stitch
- inc: increase (work 2 single crochet stitches into the same stitch)
- dec: decrease (crochet 2 single crochet stitches together using invisible decrease)
- sl st: slip stitch
- st(s): stitch(es)
- rnd(s): round(s)
- […] x: repeat the steps inside the brackets the specified number of times
Step-by-Step Instructions
Step 1: Crocheting the Main Body
The main body of the Daruma is crocheted in continuous spiral rounds from the top down. Use your main color yarn (e.g., Red).
Rnd 01: Create a magic loop. Work 7 sc into the ring. (7 sts)
Rnd 02: Work [inc] in each of the 7 stitches around. (14 sts)
Rnd 03: Work [sc 1, inc] 7 times. (21 sts)
Rnd 04: Sc 1, inc, then work [sc 2, inc] 6 times, ending with sc 1. (28 sts)
Rnds 05–12: Work sc 1 in each stitch around for 8 rounds. (28 sts per round)
Rnd 13: Sc 1, dec, then work [sc 2, dec] 6 times, ending with sc 1. (21 sts)
Rnd 14: Work sc 1 in each stitch around. (21 sts)
Rnd 15: Work [dec, sc 1] 7 times. (14 sts)
Pause here to firmly stuff the body with fiberfill. Shape the body into a nice, rounded, egg-like form as you stuff.
Rnd 16: Work [dec] 7 times. (7 sts)
Cut yarn leaving a 6-inch tail. Top off with a tiny bit more stuffing if needed. Using a yarn needle, weave the tail through the front loops of the remaining 7 stitches, pull tightly to close the hole seamlessly, and weave in your tail end.
Step 2: Crocheting the Oval Face Plate
The face plate is worked in oval rounds around both sides of a foundation chain. Use your white or off-white contrast yarn.
Foundation Chain: Ch 5.
Rnd 01: Start in the 2nd chain stitch from hook. Work 3 sc into that single chain stitch. Work sc 1 into each of the next 2 chains. Work 3 sc into the final chain stitch. Rotate your work to crochet along the underside of the foundation chain: work sc 1 into each of the remaining 2 chains. (10 sts total around the oval)
Rnd 02: Work [inc] 3 times, sc 2, work [inc] 3 times, sc 2. (16 sts)
Rnd 03: Work [inc, sc 1] 3 times, sc 2, work [sc 1, inc] 4 times. (23 sts)
Rnd 04: Sc 3, sl st 1 into the next stitch. Leave the remaining stitches of the round unworked to preserve the rounded bottom face shape.
Fasten off, leaving a long tail (approx. 12 to 15 inches) for sewing the face to the body. Join invisibly to the next stitch for a clean edge.
Assembly & Facial Embroidery
Putting together your Daruma doll is where its unique personality comes to life!
- Attach the Safety Eyes: Insert the 7 mm safety eyes into the white face piece between rounds 2 and 3, placing them roughly 5 to 6 stitches apart. Secure the safety backs tightly on the reverse side. If the plastic shanks poke out too far, carefully trim them down close to the backing washers so the face lays flat against the body.
- Attach the Face Plate: Center the oval face piece on the upper front portion of the body (around rounds 3 to 10 of the body). Pin it securely into place. Using your yarn needle and the long white yarn tail, sew the face plate to the body using neat whip stitches. Weave in the remaining tail inside the body.
- Embroider Gold Accents: Thread your tapestry needle with metallic gold thread or thin gold yarn. Embroider 3 short vertical lines side-by-side along the bottom front of the body (just underneath the face plate). Next, embroider 3 short horizontal stripes on the left side of the body and 3 short horizontal stripes on the right side of the body.
- Add Facial Details: Using black embroidery thread or thin yarn, embroider traditional facial features:
- Embroider curved or angled eyebrows above the eyes.
- Embroider a mustache, mouth, or beard details below the eyes.
- Optional: Use small 3 mm black beads for detailed eyebrows or tiny orange/red beads/yarn stitches under the eyes for blush cheeks!
Tips for Crochet Amigurumi Success
- Use Invisible Decreases: When working decreases on amigurumi, insert your hook into the front loops only of the next two stitches, yarn over, pull through two loops, yarn over, and pull through both loops. This keeps your stitches tight and bump-free.
- Adjust Hook Size for Yarn: If you notice stuffing showing through your single crochet stitches, drop down half a hook size (e.g., to a 3.0 mm hook) to make your stitches tighter.
- Custom Sizes: Want a bigger Daruma? Simply double your strands of yarn and switch to a larger US H-8 (5.0 mm) hook, paired with 10 mm or 12 mm safety eyes!
Your adorable handmade crochet Daruma doll is complete! Set your new goal, visualize your success, and enjoy bringing a touch of handmade luck into your home.