Crochet Sheep Baby Rattle Pattern: A Sweet Amigurumi Tutorial
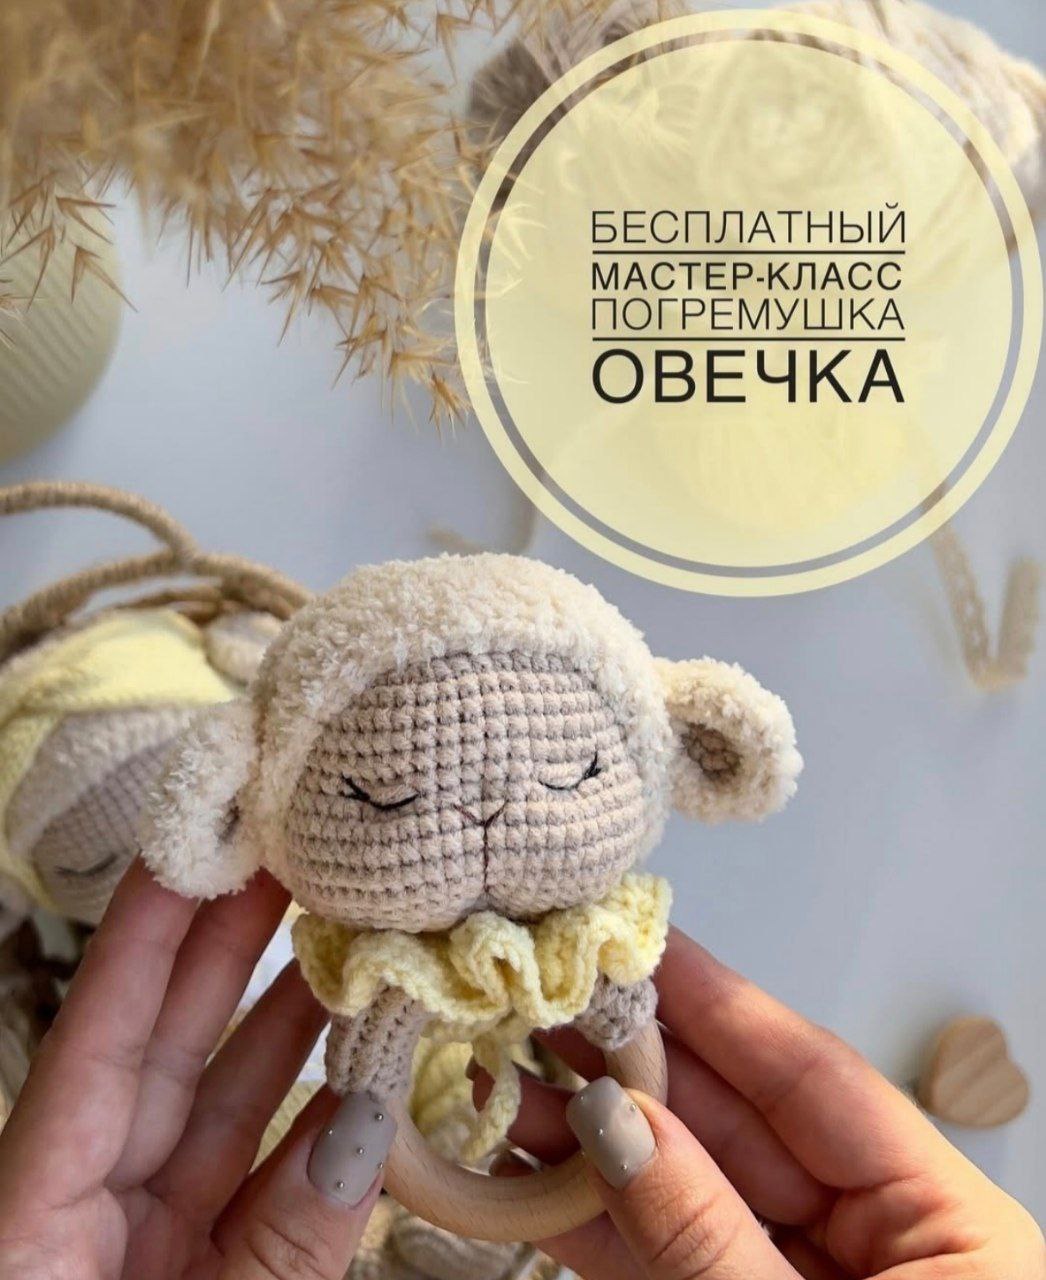
Creating a handmade toy for a new arrival is one of the most thoughtful gifts you can give. This adorable crochet sheep baby rattle combines two different textures—smooth cotton and fluffy plush yarn—to provide a wonderful sensory experience for infants. Whether you are preparing for a baby shower or making a keepsake for your own little one, this project is a delight to work on.
This pattern is designed to be beginner-friendly, using basic amigurumi techniques. The result is a soft, cuddly sheep attached to a safe wooden ring, making it the perfect teething companion and visual stimulant. In this guide, we will walk you through every stitch to ensure your little lamb turns out perfectly.
Materials & Abbreviations
To get started, gather the following materials. We recommend using high-quality, baby-safe yarns and a secure rattle insert.
Materials Needed
- Plush Yarn: A cream or off-white chenille/plush yarn (such as Alize Softy or similar) for the “wool” parts.
- Cotton Blend Yarn: A matching cream cotton or cotton-acrylic blend (such as YarnArt Jeans) for the face and inner ears.
- Crochet Hook: A size appropriate for your yarn (typically a 2.5mm to 3.5mm hook for amigurumi to keep stitches tight).
- Wooden Ring: An unfinished, baby-safe wooden teething ring (approximately 2 to 2.5 inches in diameter).
- Rattle Insert: A small, plastic baby-safe rattle.
- Stuffing: High-quality polyester fiberfill.
- Embroidery Thread: Black thread for the nose and eyelashes.
- Tools: Yarn needle, stitch markers, and scissors.
Abbreviations (US Terms)
- MR: Magic Ring
- sc: Single Crochet
- inc: Increase (two sc in one stitch)
- dec: Decrease (sc two stitches together)
- sl st: Slip Stitch
- st: Stitch
- ( ) * X: Repeat the instructions inside the parentheses X times
Step-by-Step Instructions
The Head (Main Structure)
The head is worked in continuous rounds. Use your cotton blend yarn for this section.
- Round 1: 6 sc in MR (6)
- Round 2: inc in every st (12)
- Round 3: (1 sc, inc) * 6 (18)
- Round 4: (2 sc, inc) * 6 (24)
- Round 5: (3 sc, inc) * 6 (30)
- Round 6: (4 sc, inc) * 6 (36)
- Round 7: (5 sc, inc) * 6 (42)
- Round 8: (6 sc, inc) * 6 (48)
- Rounds 9-13: sc in each st around (48) — 5 rounds total
- Round 14: 13 sc, (1 sc, inc) * 4, [place marker thread here], 6 sc, [place marker thread here], (1 sc, inc) * 4, 13 sc (56). The marker threads will help you place the eye indentations later.
- Rounds 15-17: sc in each st around (56) — 3 rounds total
- Round 18: 13 sc, (1 sc, dec) * 4, 6 sc, (1 sc, dec) * 4, 13 sc (48)
- Round 19: (6 sc, dec) * 6 (42)
- Round 20: (5 sc, dec) * 6 (36)
- Round 21: (4 sc, dec) * 6 (30)
- Round 22: (3 sc, dec) * 6 (24). Stop here to insert your rattle and stuff the head firmly with fiberfill.
- Round 23: (2 sc, dec) * 6 (18)
Fasten off and weave in the ends.
The Head Cover (The Wool)
Now we create the fluffy “cap” that goes over the head. Switch to your plush/chenille yarn.
- Round 1: 6 sc in MR (6)
- Round 2: inc in every st (12)
- Round 3: (1 sc, inc) * 6 (18)
- Round 4: (2 sc, inc) * 6 (24)
- Round 5: (3 sc, inc) * 6 (30)
- Round 6: (4 sc, inc) * 6 (36)
- Round 7: (5 sc, inc) * 6 (42)
- Round 8: (6 sc, inc) * 6 (48)
- Rounds 9-14: sc in each st around (48) — 6 rounds total
Fitting Note: As you work the final rounds, try the cover on the head. It should cover the back of the head down to approximately Round 21 or 22, and cover the front down to Round 8 or 9. Depending on your tension, you may need to add or subtract one or two rounds to get the perfect fit.
The Ears
Each ear consists of two layers: a cotton inner ear and a plush outer ear. Make two of each.
Part 1 (Cotton Yarn):
- Round 1: 6 sc in MR (6)
- Round 2: inc in every st (12)
- Round 3: (1 sc, inc) * 6 (18). Fasten off and weave in the end.
Part 2 (Plush Yarn):
- Follow the exact same steps as Part 1. However, do not fasten off after Round 3.
Assembly: Place the cotton circle on top of the plush circle. Working through both layers, sc around the edge to join them together. Leave a long tail for sewing the ears to the head.
The Ring Sleeve
This creates the cozy fabric cover for the wooden ring.
- Chain 23.
- Work in rows of sc. Do not use a turning chain at the start of the rows to ensure a tight, seamless fit.
- Continue working until the piece is wide enough to wrap snugly around your wooden ring. For a standard ring, this is usually about 7 rows.
- Fasten off and sew the edges together to form a tube that slides over the ring.
Finishing & Detailing
To give the sheep a professional, “boutique” look, we will use a technique called sculpting (or indentation) to create a 3D face.
Facial Sculpting
- Mouth: Thread a needle and insert it into the back of the head. Bring the needle out through the center between Rounds 19 and 20. Take a small stitch through one column of stitches and pull the needle back through to the starting point at the back. Pull gently to create a small dimple.
- Eyes:
- First point: Insert the needle between Rounds 22 and 23 in the center.
- Second point: Go to the marker thread you placed in Round 14, move one stitch to the left, and pull the needle back to the first point.
- Repeat this process mirrored on the other side of the face.
- Tension: Do not pull too tight; you only want to create a subtle relief that defines the muzzle and eye sockets.
Embroidery
- Eyelids: Using the main cotton yarn color, sew three small stitches over the eye indentations to create sleepy eyelids.
- Details: Using black embroidery thread, add tiny eyelashes to the eyelids and a small “V” or straight line for the nose.
Tips for Success
- Tension is Key: When working with plush yarn, it can be hard to see your stitches. Use a stitch marker in the first stitch of every round to avoid losing your place.
- Safety First: Since this is a baby toy, ensure that the rattle insert is securely encased in the stuffing and the head is sewn shut very tightly. Periodically check the wooden ring for any splinters and sand it down if necessary.
- Customization: Feel free to change the colors! A soft grey sheep or a pastel pink lamb makes for a wonderful variation.
- Cleaning: Because the wooden ring cannot be machine washed, we recommend spot cleaning the crochet portions with a damp cloth and mild baby soap.