Free Easy Crochet Horse Amigurumi Pattern: Step-by-Step Tutorial
Easy Crochet Horse Amigurumi Pattern: Free Step-by-Step Tutorial
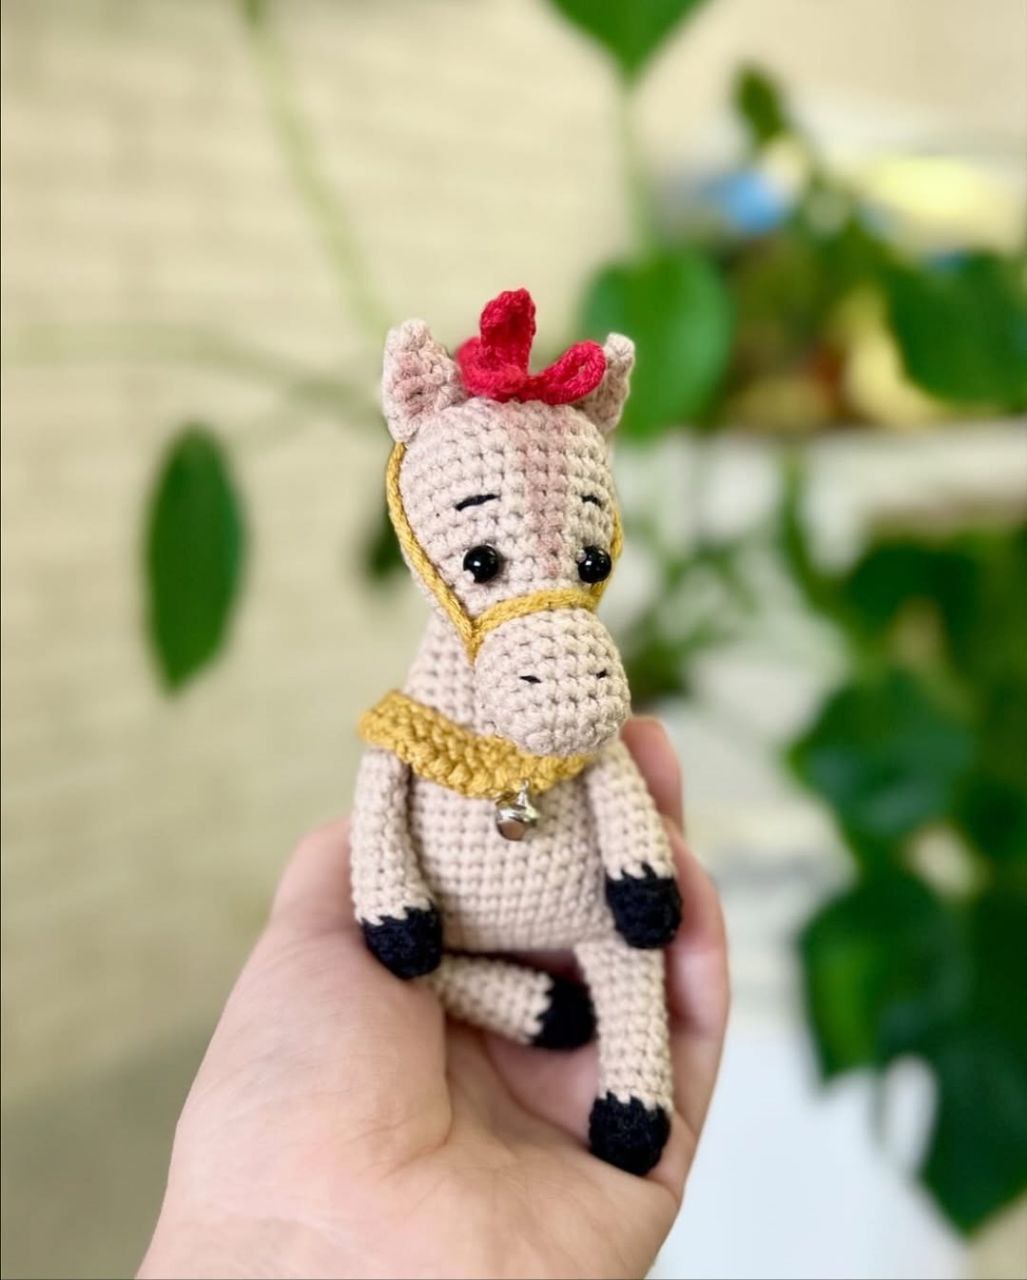
Looking for a charming new project to add to your crochet collection? This adorable mini horse amigurumi is the perfect companion for beginners and experienced crocheters alike. With its sweet expression and curly mane, this little pony is sure to bring a smile to anyone’s face. Whether you’re making a gift for a child or a cute desk buddy for yourself, this pattern guides you through every stitch.
This project creates a cozy, handheld horse approximately 5.5 inches tall. We will be working in continuous rounds for most of the body, so keep a stitch marker handy! Let’s dive into the magic of creating your own little crochet horse.
Materials & Abbreviations
Before we start, gather all your materials to ensure a smooth crocheting experience. For this pattern, we recommend a sport-weight yarn to get the perfect definition for the small details.
Materials Needed
- Yarn: Sport weight yarn (such as YarnArt Jeans or a similar acrylic/cotton blend) in light beige, black, red, and yellow.
- Crochet Hook: 2.0mm (or a size that works best for your tension to avoid gaps in the stuffing).
- Eyes: 5mm black beads or safety eyes.
- Stuffing: High-quality polyester fiberfill.
- Tools: Tapestry needle, scissors, tweezers (for stuffing small areas), and stitch markers.
- Optional: Soft pastels or acrylic paint for adding blush and shading to the muzzle and ears.
US Crochet Terms & Abbreviations
- MR: Magic Ring
- ch: Chain
- sc: Single crochet
- inc: Increase (two single crochets in one stitch)
- dec: Decrease (single crochet two stitches together)
- sl st: Slip stitch
- BLO: Back loop only
- st(s): Stitch(es)
Step-by-Step Instructions
The Legs (Make 4)
We start by creating the four legs. Each leg begins with a black hoof before transitioning to the beige body color.
The Hoof (Black Yarn):
Round 1: 8 sc in MR (8)
Round 2: BLO 8 sc (8)
Round 3: 8 sc (8)
Fasten off the black yarn and switch to light beige yarn.
The Leg (Beige Yarn):
Round 4: BLO 8 sc (8)
Rounds 5–12: 8 sc (8 rounds total)
Stuff the legs halfway with fiberfill. To close, sc 4 stitches together across the top. End with 1 ch, fasten off, and weave in the ends.
The Body
The body is worked starting from a foundation chain, creating an oval shape that we then build upon.
Round 1: Ch 19. Starting in the 2nd ch from the hook, work 18 sc along one side of the chain, then 18 sc along the other side (36).
Round 2: Attach the first two legs. Work 4 sc joined with the first leg, 10 sc, 4 sc joined with the second leg, then 18 sc (36).
Round 3: 35 sc (35). Stop one stitch before the end of the round and move your marker here; all future decreases will be placed at the sides of the body.
Round 4: dec, 16 sc, dec, 16 sc (34)
Round 5: dec, 15 sc, dec, 15 sc (32)
Round 6: 32 sc (32)
Round 7: dec, 14 sc, dec, 14 sc (30)
Round 8: dec, 13 sc, dec, 13 sc (28)
Round 9: 27 sc (27). Stop one stitch before the end and move marker.
Round 10: dec, 12 sc, dec, 12 sc (26)
Round 11: dec, 11 sc, dec, 11 sc (24)
Rounds 12–13: 24 sc (2 rounds)
Round 14: 23 sc (23). Stop one stitch before the end and move marker.
Now, we attach the back legs using the same method as the front legs.
Round 15: 4 sc joined with the third leg, 6 sc, 4 sc joined with the fourth leg, 10 sc (24)
Round 16: 24 sc (24)
Round 17: 1 sc, dec, 8 sc, dec, 11 sc (22)
Round 18: 1 sc, dec, 6 sc, dec, 11 sc (20)
Round 19: dec, 6 sc, dec, 10 sc (18)
Round 20: dec, 5 sc, dec, 9 sc (16)
Round 21: dec, 4 sc, dec, 8 sc (14)
Round 22: dec, 3 sc, dec, 7 sc (12)
Round 23: dec, 2 sc, dec, 5 sc (9). Stop one stitch before the end.
Stuff the body firmly up to the front legs, then stuff the top area lightly. Close the piece by sc 5 stitches together. Fasten off, leaving a long tail for sewing the head.
The Ears (Make 2)
Using beige yarn:
Round 1: Ch 8, join into a ring, 8 sc (8)
Round 2: 8 sc (8)
Round 3: (2 sc, dec) * 2 (6)
Round 4: (1 sc, dec) * 2 (4)
Round 5: 2 dec, 1 sl st. Fasten off, leaving a long tail for sewing.
The Head
The head is shaped to create a distinct muzzle and crown.
Round 1: Ch 5. Starting in the 2nd ch from hook: 3 sc in the first st, 2 sc, 3 sc in the last st, 2 sc along the other side of the chain (10).
Round 2: 3 inc, 2 sc, 3 inc, 2 sc (16)
Rounds 3–6: 16 sc (4 rounds)
Round 7: 3 sc, dec, 6 sc, dec, 3 sc (14)
Round 8: 3 sc, inc, 6 sc, inc, 3 sc (16)
Round 9: 3 sc, 2 inc, 6 sc, 2 inc, 3 sc (20)
Round 10: 20 sc (20). Move marker one stitch early.
Round 11: 5 sc, 2 inc, 6 sc, 2 inc, 5 sc (24)
Round 12: 7 sc, 2 inc, 6 sc, 2 inc, 7 sc (28)
Round 13: 28 sc (28). Move marker one stitch early.
Round 14: 9 sc, inc, 8 sc, inc, 9 sc (30)
Round 15: 30 sc (30). Move marker one stitch early.
Round 16: (inc, 4 sc) * 6 (36)
Round 17: 36 sc (36)
Round 18: (2 sc, dec, 2 sc) * 6 (30)
Round 19: (3 sc, dec) * 6 (24)
Round 20: (1 sc, dec, 1 sc) * 6 (18)
Stuff the head firmly. Continue decreasing:
Round 21: (1 sc, dec) * 6 (12)
Round 22: 6 dec. Fasten off and weave in ends.
Finishing Touches
Assembly
Now it’s time to bring our horse to life! Use your tapestry needle to sew the pieces together.
- Ears: Sew the ears to the head between rounds 18 and 19, spaced about 5 stitches apart.
- Body: Sew the body to the head, aligning the closed stitches of the body with rounds 15 and 16 of the head.
- Eyes & Face: Sew the 5mm beads into the head. Use a contrasting thread to embroider small eyebrows and nostrils for a cute, expressive face.
Bridle, Harness, and Tail
The Bridle (Yellow Yarn): Ch 45 (adjust the length to fit your horse’s head). Sew the start to the side of the muzzle, wrap it around the muzzle, then run it over the top of the head behind the ears, and fix the end to the other side of the muzzle.
The Harness (Yellow Yarn):
Row 1: Ch 31, sc in 2nd ch and each subsequent ch (30), turn.
Row 2: Ch 1, 30 sc (30), turn.
Row 3: (ch 1, sl st) * 30. Fasten off, leaving a long tail. Wrap the harness around the body just above the front legs and sew the ends together. Secure it to the body with a few small stitches in the front and back.
The Tail (Red Yarn): Create 5 curly locks. Attach the yarn between rounds 6 and 7 of the body with a sl st. Ch 18, then sl st back into the first chain stitch to create a curl. Fasten the curl to the body and repeat for a total of 5 curls.
The Mane (Red Yarn): Starting at the crown of the head, attach with a sl st. Ch 12, and sl st back into the first chain. Repeat this process 15 times, moving from the crown down the center of the head to the neck.
Tips for Success
Perfecting the Curls
To make the mane and tail curls extra springy, you can gently stretch them after crocheting or use a tiny bit of fabric stiffener. The key is to keep your chains tight and your slip stitches secure.
Adding Dimension with Shading
Want your horse to look professionally made? Use a soft pink or brown pastel to lightly shade the cheeks and the tips of the ears. Use a small brush to blend the color for a natural, soft look.
Tension Control
Amigurumi requires tight stitches so the stuffing doesn’t show through. If you see gaps, try going down a hook size. If the piece becomes too stiff to work with, go up half a millimeter.