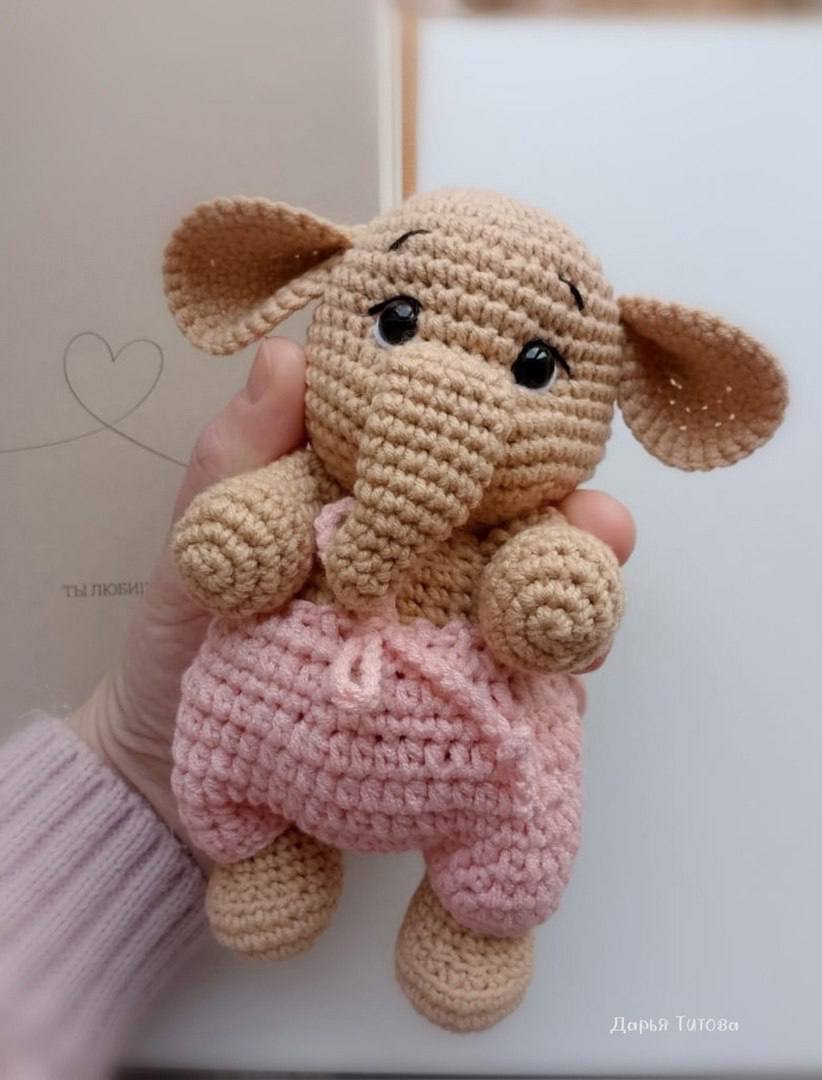
Tiny Trunk, Big Cuddles: The Ultimate Adorable Baby Elephant Crochet Pattern
“`html
How to Crochet a Cute Baby Elephant Amigurumi: Step-by-Step Pattern
Create your own adorable plush elephant with this detailed crochet guide. This amigurumi project is perfect for beginners and experienced crocheters alike, resulting in a sweet, huggable companion.
Materials Needed
- Yarn: YarnArt Jeans (or a similar sport-weight cotton blend yarn)
- Crochet Hook: 2.0mm
- Safety Eyes: 9-10mm
- Tapestry Needle
- Embroidery Thread: White and black for facial details
- Fiberfill Stuffing
Crochet Abbreviations (US Terms)
- MR: Magic Ring
- SC: Single Crochet
- INC: Increase (2 SC in one stitch)
- DEC: Decrease (SC 2 together)
- SL ST: Slip Stitch
- ST: Stitch
Pattern Instructions
Arms (Make 2)
- Round 1: 6 SC in MR (6)
- Round 2: INC in each ST around (12)
- Round 3: (1 SC, INC) * 6 (18)
- Rounds 4-5: SC in each ST around (18)
- Round 6: (1 SC, DEC) * 6 (12)
- Rounds 7-12: SC in each ST around (12)
Finishing: Flatten the piece and crochet 6 SC across the opening to close it. SL ST and cut the yarn.
Legs (Make 2)
- Round 1: 8 SC in MR (8)
- Round 2: INC in each ST around (16)
- Round 3: (1 SC, INC) * 8 (24)
- Rounds 4-5: SC in each ST around (24)
- Round 6: (6 SC, DEC) * 3 (18)
- Round 7: (7 SC, 2 DEC) * 2 (16)
- Rounds 8-15: SC in each ST around (16)
Finishing: Flatten the piece and crochet 8 SC across the opening to close it. SL ST and cut the yarn.
Trunk
- Round 1: 6 SC in MR (6)
- Round 2: (1 SC, INC) * 3 (9)
- Rounds 3-5: SC in each ST around (9)
- Round 6: (2 SC, INC) * 3 (12)
- Rounds 7-10: SC in each ST around (12)
Finishing: Flatten the piece and crochet 6 SC across the opening. SL ST and leave a long tail for sewing.
Ears (Make 2)
- Round 1: 8 SC in MR (8)
- Round 2: INC in each ST around (16)
- Round 3: (1 SC, INC) * 8 (24)
- Round 4: (2 SC, INC) * 8 (32)
- Round 5: SC in each ST around (32)
Finishing: SL ST and leave a long tail for sewing.
Head
- Round 1: 6 SC in MR (6)
- Round 2: INC * 6 (12)
- Round 3: (1 SC, INC) * 6 (18)
- Round 4: (2 SC, INC) * 6 (24)
- Round 5: (3 SC, INC) * 6 (30)
- Round 6: (4 SC, INC) * 6 (36)
- Round 7: (5 SC, INC) * 6 (42)
- Rounds 8-12: SC in each ST around (42)
- Round 13: 18 SC, INC * 6, 18 SC (48)
- Rounds 14-16: SC in each ST around (48)
- Round 17: (6 SC, DEC) * 6 (42)
- Round 18: (5 SC, DEC) * 6 (36)
- Round 19: (4 SC, DEC) * 6 (30)
- Round 20: (3 SC, DEC) * 6 (24)
Finishing: SL ST and leave a long tail for sewing. Stuff the head firmly.
Body
- Round 1: 6 SC in MR (6)
- Round 2: INC * 6 (12)
- Round 3: (1 SC, INC) * 6 (18)
- Round 4: (2 SC, INC) * 6 (24)
- Round 5: (3 SC, INC) * 6 (30)
- Round 6: (4 SC, INC) * 6 (36)
- Round 7: (5 SC, INC) * 6 (42)
- Round 8: 6 SC, join and SC 8 sts of the first leg, 14 SC, join and SC 8 sts of the second leg, 6 SC (42)
- Rounds 9-12: SC in each ST around (42)
- Round 13: (5 SC, DEC) * 6 (36)
- Rounds 14-15: SC in each ST around (36)
- Round 16: (4 SC, DEC) * 6 (30)
- Rounds 17-18: SC in each ST around (30)
- Round 19: (3 SC, DEC) * 6 (24)
- Round 20: SC around while joining the arms to the body (24)
- Round 21: SC in each ST around (24)
Finishing: SL ST and cut the yarn. Stuff the body firmly.
Assembly and Finishing Touches
Eyes and Face
- Place safety eyes above the increases of Round 13 on the head, approximately 6 SC apart.
- Sew the trunk to the head, aligning it with the increases.
- Sew the ears to the sides of the head at Round 7.
Detailed Embroidery
- Face Sculpting: Use a needle and thread to gently pull the muzzle area inward to create a more defined face.
- Details: Use white thread for eye highlights and black thread to embroider the eyelashes and eyebrows for an expressive look.
Final Step
- Sew the head securely to the body.
- Ensure all parts are firmly attached and the stuffing is evenly distributed.
Your baby elephant is now complete and ready for cuddles!
“`