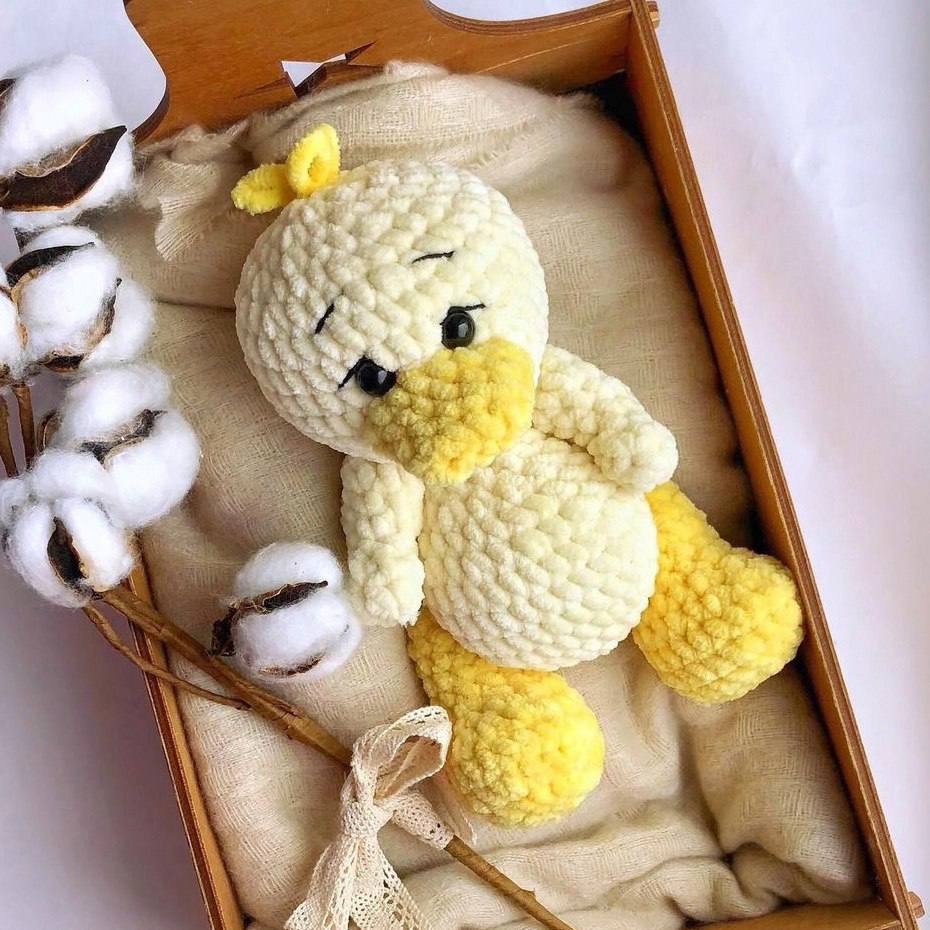
Quack-tastic Cuddles: How to Crochet an Adorable Plush Baby Duck
“`html
How to Crochet a Cute Plush Baby Duck: Step-by-Step Pattern
Create your own adorable, cuddly baby duck with this detailed crochet pattern. This plushie is perfect for beginners and experienced crocheters alike, resulting in a soft toy that makes a wonderful gift or a cozy companion.
Materials Needed
- Plush or Chenille yarn (Yellow/Cream for the body, Bright Yellow for the beak and feet)
- Crochet hook suitable for your yarn weight
- Safety eyes
- Fiberfill stuffing
- Yarn needle and scissors
- Black embroidery thread (for eyebrows)
Abbreviations (US Terms)
- MR: Magic Ring
- sc: Single crochet
- inc: Increase (2 sc in one stitch)
- dec: Decrease (sc 2 together)
- ch: Chain
- st: Stitch
The Wings (Make 2)
1. 6 sc in MR (6)
2-3. 6 sc (6)
4. (1 sc, inc) * 3 (9)
5. (2 sc, inc) * 3 (12)
6. (1 sc, inc) * 6 (18)
7. (1 sc, dec) * 6 (12)
8. (2 sc, dec) * 3 (9)
9. (1 sc, dec) * 3 (6)
Fasten off, pull the opening tight, and weave in the ends.
The Legs (Make 2)
1. 7 ch
2. Starting from the 2nd chain from the hook: inc, 4 sc, 3 sc in the last chain. Working along the other side of the chain: 5 sc (14)
3. 2 inc, 4 sc, 3 inc, 4 sc, inc (20)
4. 8 sc, (1 sc, inc) * 3, 6 sc (23)
5. 23 sc (23)
6. 7 sc, 5 dec, 6 sc (18)
7. 7 sc, 3 dec, 5 sc (15)
8. (3 sc, dec) * 3 (12)
9-10. 12 sc (12)
11. (dec, 4 sc) * 2 (10)
12. 10 sc (10)
13. 5 dec (5)
Fasten off, pull the opening tight, and weave in the ends.
The Beak
1. 5 ch
2. Starting from the 2nd chain from the hook: inc, 2 sc, 3 sc in the last chain, 3 sc (10)
3. 10 sc (10)
4. (inc, 4 sc) * 2 (12)
5. 1 sc, inc, 5 sc, inc, 4 sc (14)
6. 14 sc (14)
Fasten off and leave a tail for sewing.
The Body and Head
Note: This part is worked as one continuous piece from the bottom of the body up to the top of the head.
Body:
1. 6 sc in MR (6)
2. 6 inc (12)
3. (1 sc, inc) * 6 (18)
4. 1 sc, (2 sc, inc) * 5, 1 sc (24)
5. (3 sc, inc) * 6 (30)
6. 2 sc, inc, (4 sc, inc) * 5, 2 sc (36)
7-9. 36 sc for 3 rounds (36)
10. 9 sc, (1 sc, dec) * 6, 9 sc (30)
11. 30 sc (30)
12. 9 sc, 6 dec, 9 sc (24)
13. 24 sc (24)
14. (2 sc, dec) * 6 (18)
15. (1 sc, dec) * 6 (12)
Head:
16. 12 inc (24)
17. (3 sc, inc) * 6 (30)
18. 2 sc, inc, (4 sc, inc) * 5, 2 sc (36)
19-24. 36 sc for 6 rounds (36)
Insert safety eyes between rounds 21 and 22, with 3 sc between the eyes.
25. 2 sc, dec, (4 sc, dec) * 5, 2 sc (30)
26. (3 sc, dec) * 6 (24)
27. 1 sc, dec, (2 sc, dec) * 5, 1 sc (18)
28. (1 sc, dec) * 6 (12)
29. 6 dec (6)
Fasten off, pull tight, and weave in the ends.
Assembly and Finishing
- Wings: Attach the wings to the body approximately 2-3 rounds below the head. Connect the wing to the body using the 3rd round of the wing pattern.
- Legs: Attach the legs to the bottom of the body between rounds 6 and 7. Connect them using the 2nd or 3rd round of the leg.
- Face: Sew the beak firmly to the center of the face. Use black embroidery thread to stitch small eyebrows above the safety eyes to give the duck expression.
- The Tuft: To create the little hair tuft on top, attach yarn to the top of the head, crochet a small chain, and secure it back to the head with a slip stitch, creating a small loop or curl.
“`