How to Crochet a Cute Baby Doll Amigurumi: Free Step-by-Step Pattern
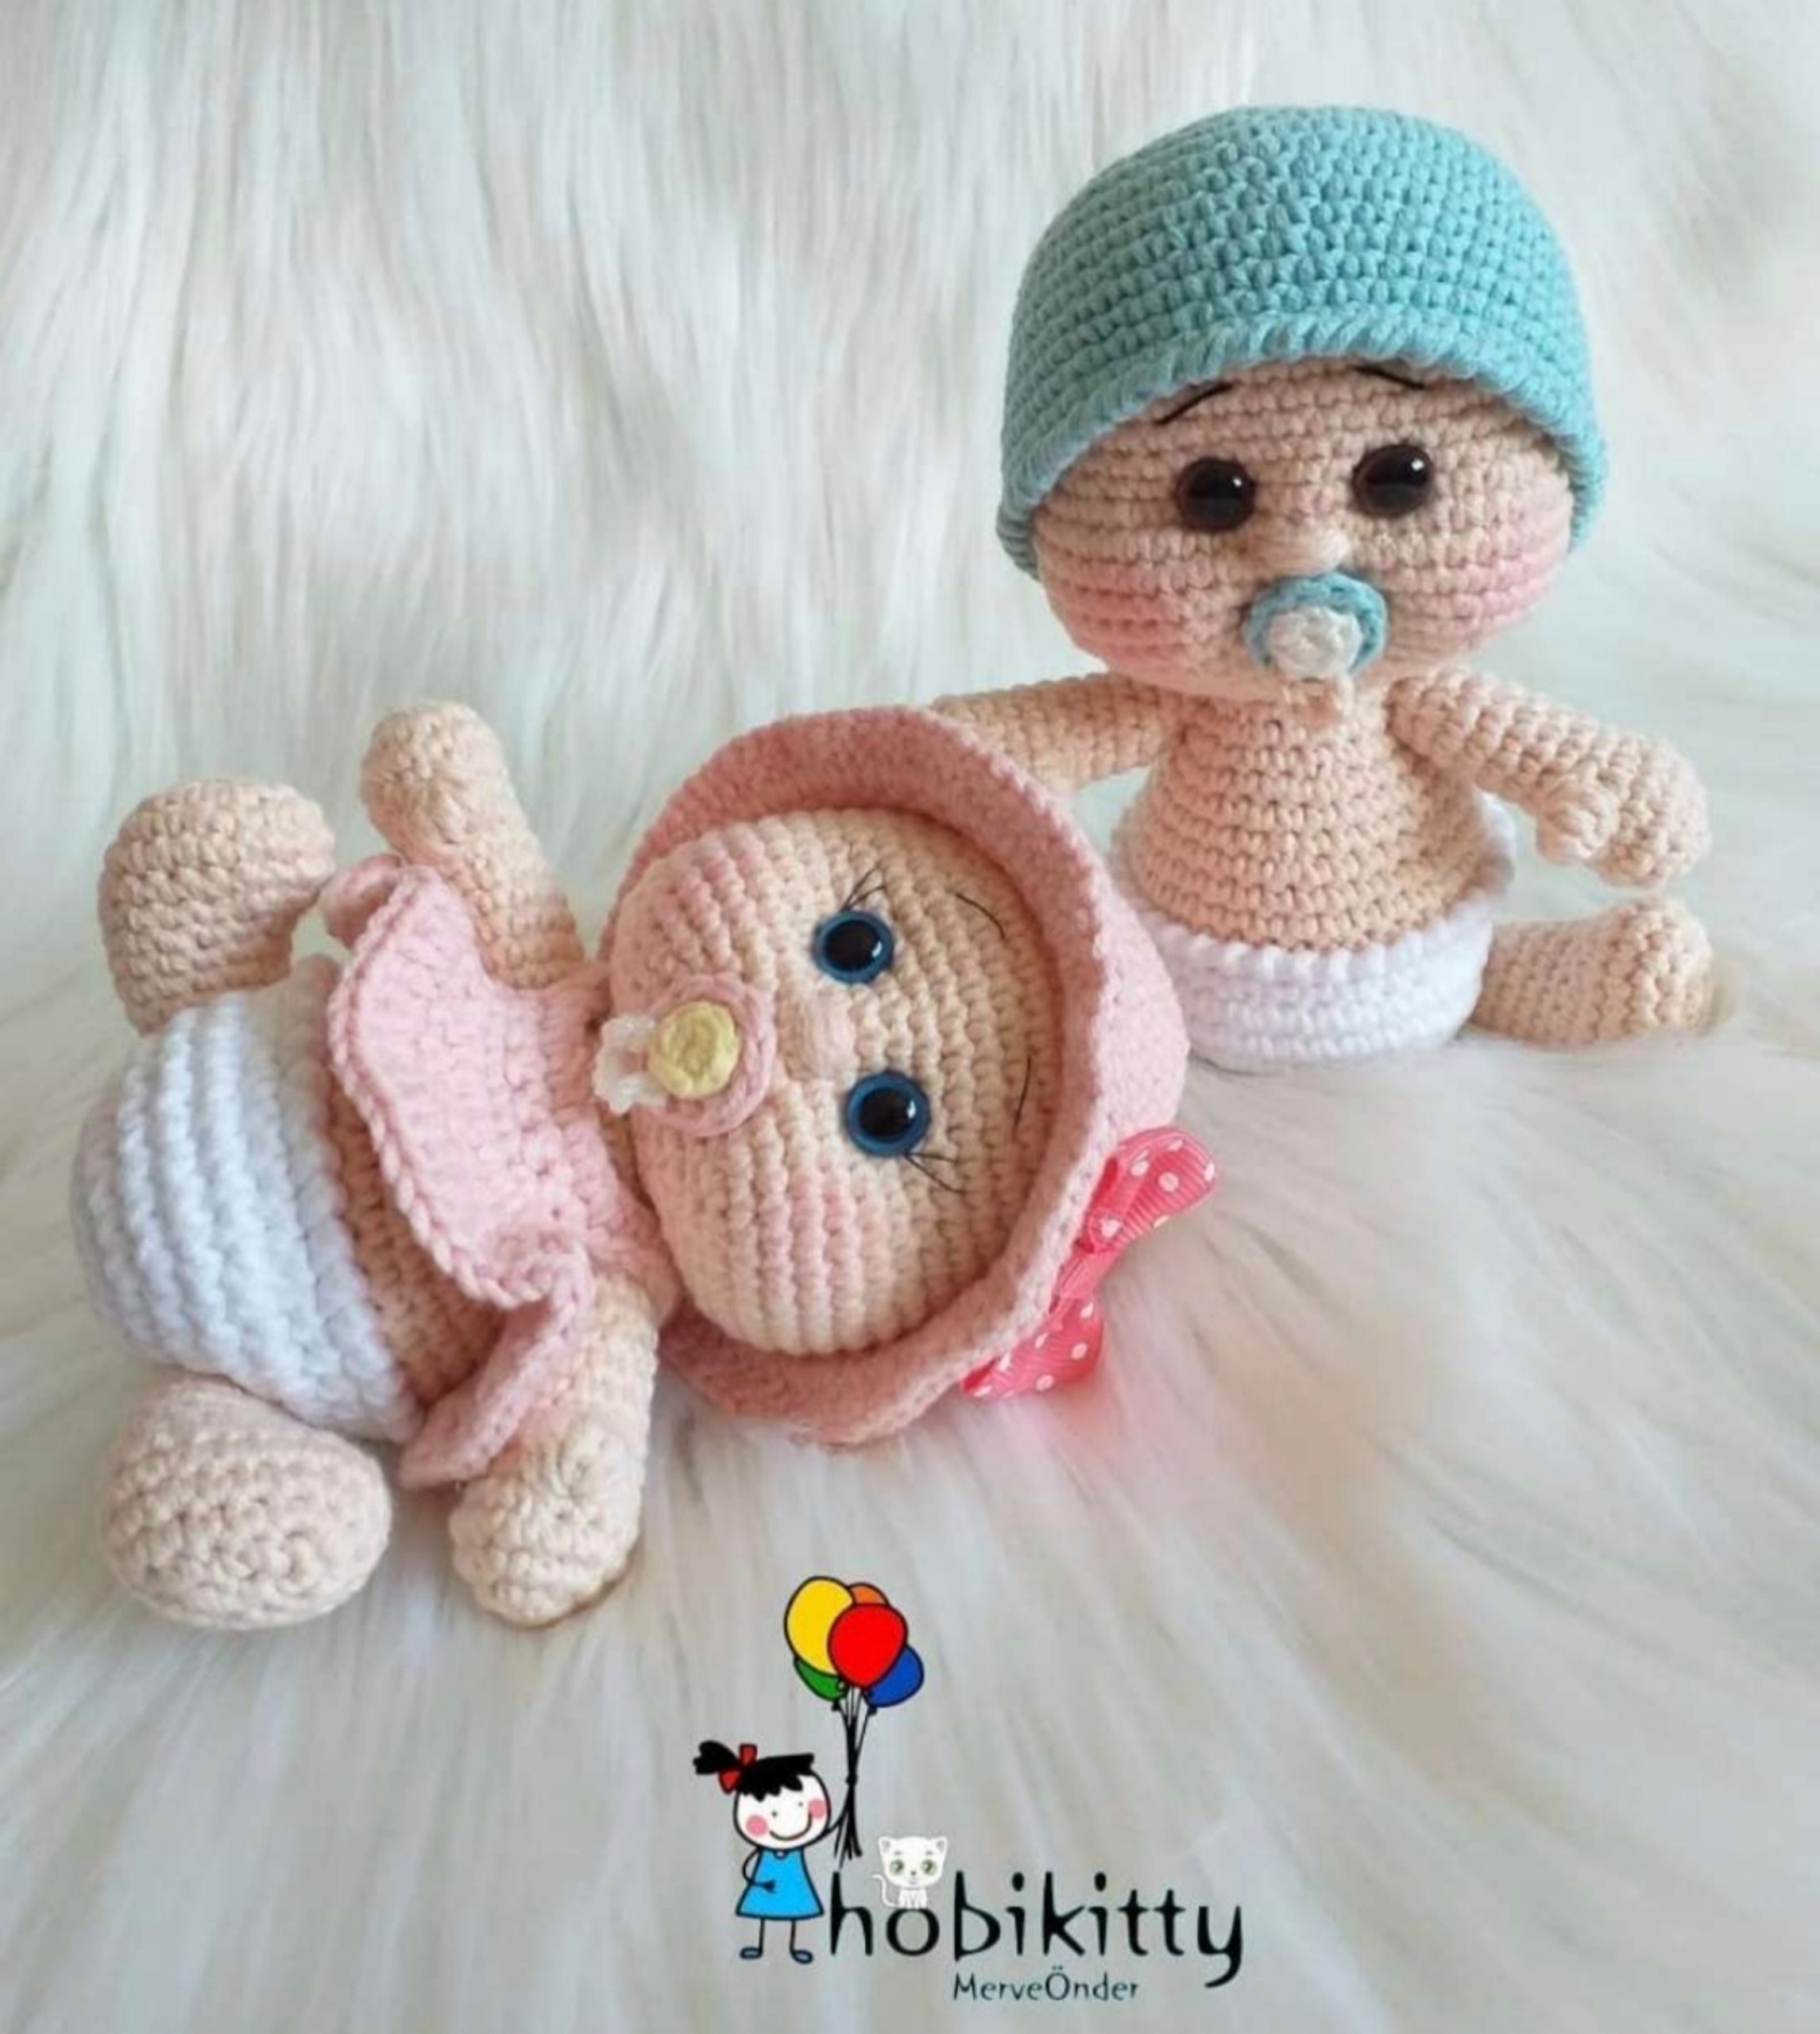
There is nothing quite as charming as a handmade amigurumi baby doll. Whether you are looking to create a special gift for a new parent, a sweet toy for a toddler, or just a cute addition to your own crochet collection, this baby doll pattern is the perfect project. With its chubby cheeks and adorable expressions, this doll is designed to be huggable and timeless.
This tutorial is written for beginners and intermediate crocheters. While the shaping of the face might seem intimidating at first, we have broken it down into simple steps to ensure your little doll looks professional and polished. Let’s grab our hooks and yarn and get started!
Materials & Abbreviations
To create this doll, you will need materials that provide a clean stitch definition to keep the stuffing from showing through. We recommend a mercerized cotton or a high-quality acrylic blend.
Materials Needed
- Yarn: Medium weight (4) yarn in skin tone, white (for the diaper), and your choice of colors for the hat and clothes.
- Crochet Hook: 2.5mm or 3.0mm (depending on your tension to ensure tight stitches).
- Safety Eyes: 8mm to 10mm black safety eyes.
- Stuffing: High-quality polyester fiberfill.
- Tools: Yarn needle, scissors, and stitch markers.
- Optional: Pink blush or fabric markers for the cheeks, embroidery thread for eyelashes and eyebrows.
US Crochet Terms & Abbreviations
- MR: Magic Ring
- Sc: Single Crochet
- Inc: Increase (two single crochet in one stitch)
- Dec: Decrease (invisible decrease recommended)
- Ch: Chain
- Dc: Double Crochet
- BLO: Back Loop Only
- St: Stitch
Step-by-Step Instructions
The Body
We begin with the body, starting from the bottom with the diaper area in white before transitioning to the skin tone.
Using White Yarn:
- Round 1: 6 sc in MR (6)
- Round 2: 6 inc (12)
- Round 3: (1 sc, inc) * 6 (18)
- Round 4: (2 sc, inc) * 6 (24)
- Round 5: (3 sc, inc) * 6 (30)
- Round 6: (4 sc, inc) * 6 (36)
- Round 7: (5 sc, inc) * 6 (42)
- Rounds 8-11: 42 sc (42)
Switch to Skin Tone Yarn:
- Round 12: 42 sc in BLO (42)
- Round 13: (5 sc, dec) * 6 (36)
- Rounds 14-15: 36 sc (36)
- Round 16: (4 sc, dec) * 6 (30)
- Rounds 17-19: 30 sc (30)
- Round 20: (3 sc, dec) * 6 (24) — Start stuffing the body firmly here.
- Round 21: (2 sc, dec) * 6 (18)
- Rounds 22-23: 18 sc (18)
Fasten off, leaving a long tail for sewing the head to the body later.
The Head
The head uses specific increases and decreases to create those signature chubby cheeks.
- Round 1: 6 sc in MR (6)
- Round 2: 6 inc (12)
- Round 3: (1 sc, inc) * 6 (18)
- Round 4: (2 sc, inc) * 6 (24)
- Round 5: (3 sc, inc) * 6 (30)
- Round 6: (4 sc, inc) * 6 (36)
- Round 7: (5 sc, inc) * 6 (42)
- Round 8: (6 sc, inc) * 6 (48)
- Rounds 9-14: 48 sc (48)
- Round 15: 15 sc, (inc, 1 sc) * 2, inc, 7 sc, (inc, 1 sc) * 2, inc, 16 sc (54)
- Rounds 16-20: 54 sc (54)
- Round 21: 16 sc, (dec, 1 sc) * 2, dec, 7 sc, (dec, 1 sc) * 2, dec, 15 sc (48)
- Round 22: (6 sc, dec) * 6 (42)
- Round 23: (5 sc, dec) * 6 (36)
- Round 24: (4 sc, dec) * 6 (30)
- Round 25: (3 sc, dec) * 6 (24)
- Round 26: (2 sc, dec) * 6 (18)
Fasten off, leaving a tail for sewing. Before closing the head completely, insert your safety eyes and embroider the eyebrows and eyelashes. You can also add a small tuft of yarn for a fringe/bangs.
The Nose
A tiny detail that adds a lot of personality!
- Round 1: 6 sc in MR (6)
- Round 2: 6 inc (12)
- Round 3: 12 sc (12)
Fasten off and sew to the center of the face between the eyes.
The Arms (Make 2)
- Round 1: 6 sc in MR (6)
- Round 2: 6 inc (12)
- Round 3: (1 sc, inc) * 6 (18)
- Round 4: 18 sc (18)
- Round 5: (1 sc, dec) * 6 (12)
- Round 6: 1 puff stitch (3 dc in one stitch), 11 sc (12)
- Round 7: 12 sc (12)
- Round 8: 2 sc, dec, 8 sc (11)
- Rounds 9-11: 11 sc (11)
- Round 12: 1 sc, dec, 8 sc (10)
- Rounds 13-14: 10 sc (10)
Stuff lightly and fasten off.
The Legs (Make 2)
- Round 1: Ch 4, starting in the 2nd chain from hook.
- Round 2: 2 sc, 4 sc in the last ch; turn to work along the other side of the chain: 1 sc, 3 sc in the last ch (10)
- Round 3: inc, 2 sc, 3 inc, 3 sc, inc (15)
- Round 4: (1 sc, inc, 2 sc, inc) * 2, 2 sc, inc, 1 sc, inc (21)
- Rounds 5-6: 21 sc (21)
- Round 7: 5 sc, 5 dec, 5 sc (15)
- Rounds 8-9: 15 sc (15) — Stuff the feet firmly.
- Round 10: 6 sc, dec, 7 sc (14)
- Round 11: 14 sc (14)
- Round 12: (dec, 2 sc) * 3, dec (10)
- Round 13: 10 sc (10)
- Round 14: dec, 8 sc (9)
Stuff the top of the leg and cinch the remaining stitches closed.
Finishing Touches
Assembly
Now it is time to bring your baby doll to life!
- Head to Body: Sew the head securely to the top of the body using a yarn needle and the tail left from the body.
- Arms and Legs: Position the arms at the sides of the torso and the legs at the bottom. Pin them in place before sewing to ensure the doll can sit upright.
- Face: Sew the nose in place. Add a touch of pink blush to the cheeks for a sweet, baby-like glow.
The Hat
You can customize your doll with different colors!
- Rounds 1-8: Repeat the head pattern.
- Rounds 9-11: 48 sc (48)
- Round 12: (2 sc, inc) around (64)
- Round 13: 64 sc (64)
The Clothing (Basic Outfit)
Base Pattern:
- Row 1: Ch 27, starting in the 2nd chain from hook.
- Row 2: 26 sc, ch 1, turn.
- Row 3: 3 sc, ch 5, skip 5 sc, 10 sc, ch 5, skip 5 sc, 3 sc, ch 1, turn (26)
- Row 4: 26 sc (26)
- Row 5: (1 dc, dc-inc) around.
For a Girl’s Dress: Continue with Row 6: (2 dc, dc-inc) around, and Row 7: (3 dc, dc-inc) around for extra length and flare.
Tips for a Perfect Doll
To make your amigurumi baby doll look as professional as possible, keep these a few tips in mind:
- Tension is Key: Amigurumi requires tight stitches so that the stuffing doesn’t leak out. If you see gaps, try dropping down half a hook size.
- The Invisible Decrease: Instead of a regular decrease, use the invisible decrease method (insert hook into front loops only of the next two stitches) to avoid lumps on the surface.
- Symmetry: When sewing on the arms and legs, use stitch markers to ensure they are placed at the same height on both sides of the body.
- Personalize: Feel free to add a small crocheted pacifier or a tiny bow to the hat to give your doll a unique personality!