Adorable Crochet Mouse Pattern: Easy Amigurumi Tutorial for Beginners
If you are looking for a quick, cute, and cozy project to add to your amigurumi collection, this crochet mouse pattern is the perfect choice. Whether you are crafting a gift for a loved one or simply using up some scrap yarn from your stash, this little mouse is designed to be beginner-friendly and incredibly endearing. With its rounded body and tiny ears, this little creature is sure to bring a smile to anyone’s face.
In this tutorial, we will walk you through every step of the process, from crafting the tiny ears to assembling the final piece. Amigurumi is a wonderful way to practice your shaping skills, and this mouse specifically helps you master the art of increases, decreases, and attaching separate pieces to a main body.
Materials & Abbreviations
Before we dive into the stitches, let’s make sure you have everything you need on your crochet hook. To achieve the best results, we recommend using a yarn that doesn’t stretch too much to ensure the stuffing stays hidden inside.
Supplies Needed
- Yarn: Approximately 50-70 yards of medium-weight (worsted or DK) yarn in your choice of color. A cotton blend or acrylic works best for a clean, defined stitch.
- Crochet Hook: A 2.5mm or 3.0mm hook (use a size smaller than your yarn suggests to keep the stitches tight).
- Safety Eyes: Two 8mm safety eyes.
- Stuffing: Polyester fiberfill or a similar stuffing material.
- Tools: A tapestry needle for sewing, stitch markers, and scissors.
US Crochet Terms & Abbreviations
This pattern uses standard US crochet terminology. If you are new to amigurumi, keep this key handy:
- MR: Magic Ring (also known as a magic circle)
- sc: Single crochet
- inc: Increase (two single crochet stitches in the same stitch)
- dec: Decrease (crochet two stitches together into one)
- ch: Chain
- sl st: Slip stitch
- st(s): Stitch(es)
Step-by-Step Instructions
We will work this mouse in several parts: the ears, the body, the tail, and the nose. The body is worked in a continuous spiral, while the ears are worked in rows.
The Ears (Make 2)
The ears are worked in rows. This means that at the end of each row, you will chain one and turn your work to start the next row in the opposite direction.
- Row 1: Create a Magic Ring and work 5 sc into the ring. (5 sts)
- Row 2: inc in every stitch around. (10 sts)
- Row 3: (1 sc, inc) repeat 5 times. (15 sts)
Fasten off, leaving a short tail for sewing, or leave the yarn attached if you prefer to crochet them directly into the head.
The Body
The body is the main part of the mouse. We will work in continuous rounds. Do not join the rounds with a slip stitch; instead, use a stitch marker to keep track of the first stitch of each round.
- Round 1: 6 sc in a Magic Ring. (6 sts)
- Round 2: (1 sc, inc) repeat 3 times. (9 sts)
- Round 3: sc in each stitch around. (9 sts)
- Round 4: (2 sc, inc) repeat 3 times. (12 sts)
- Round 5: sc in each stitch around. (12 sts)
- Round 6: 3 sc, (inc) repeat 6 times, 3 sc. (18 sts)
- Round 7: sc in each stitch around. (18 sts)
- Round 8: 3 sc, (1 sc, inc) repeat 6 times, 3 sc. (24 sts)
- Round 9: 3 sc, (2 sc, inc) repeat 6 times, 3 sc. (30 sts)
- Round 10: 3 sc, (3 sc, inc) repeat 6 times, 3 sc. (36 sts)
- Round 11: sc in each stitch around. (36 sts)
Adding the Eyes: Now is the time to place your safety eyes. Insert the 8mm eyes into Round 6. Place them specifically into the 2nd and 5th increase stitches of that round. Make sure they are spaced evenly to give your mouse a cute expression.
- Round 12 (Attaching Ears): sc in the next 12 sts. Now, attach your first ear by working 5 sc across the edge of the ear piece. Work 6 sc into the body, then attach the second ear by working 5 sc across its edge. Finish the round with 8 sc. (36 sts)
Note: Depending on your tension, you may need to adjust the number of sc at the start of the round (11 or 13 instead of 12) to ensure the ears are centered perfectly between the eyes. - Rounds 13-19: sc in each stitch around for 7 rounds. (36 sts)
- Round 20: (4 sc, dec) repeat 6 times. (30 sts)
- Round 21: (3 sc, dec) repeat 6 times. (24 sts)
- Round 22: (2 sc, dec) repeat 6 times. (18 sts)
- Round 23: (1 sc, dec) repeat 6 times. (12 sts)
- Round 24: dec 6 times. (6 sts)
Fasten off and weave in the ends. Stuff the body firmly with fiberfill before closing the hole completely.
The Tail
The tail is a simple chain that gives the mouse its characteristic look.
- Chain 16.
- Work 1 sl st into each of the 15 chains.
Fasten off, leaving a long tail for sewing.
The Nose
The nose can be embroidered using a contrasting color or crocheted separately as follows:
- Round 1: 6 sc in a Magic Ring. (6 sts)
- Round 2: inc in every stitch around. (12 sts)
- Rounds 3-4: sc in each stitch around for 2 rounds. (12 sts)
Fasten off, leaving a long tail for sewing.
Finishing
Now that all the components are complete, it’s time to put your mouse together. Use your tapestry needle to sew the nose onto the front of the body, centered between the eyes. Attach the tail to the back end of the body, ensuring it is secure so it doesn’t wiggle loose.
If you have any gaps where the stuffing is showing through, use your needle to gently pull the stitches closer together. Give your mouse a little pat to shape the body, and your project is complete!
Tips for Success
Perfecting the Magic Ring
If you struggle with the Magic Ring, you can substitute it by chaining 2 and working all the stitches of the first round into the first chain. However, the Magic Ring provides a cleaner finish without a hole at the top of the head.
Tension Control
Amigurumi requires a tight tension to prevent the stuffing from leaking. If you find your stitches are too loose, try dropping down a hook size. If the piece feels too stiff to work into, go up half a millimeter.
Seamless Decreases
For a smoother look, use the “invisible decrease” method. Instead of a standard decrease, insert your hook into the front loop of the first stitch and then the front loop of the second stitch, crocheting them together. This prevents the gaps often seen in amigurumi work.
Customizing Your Mouse
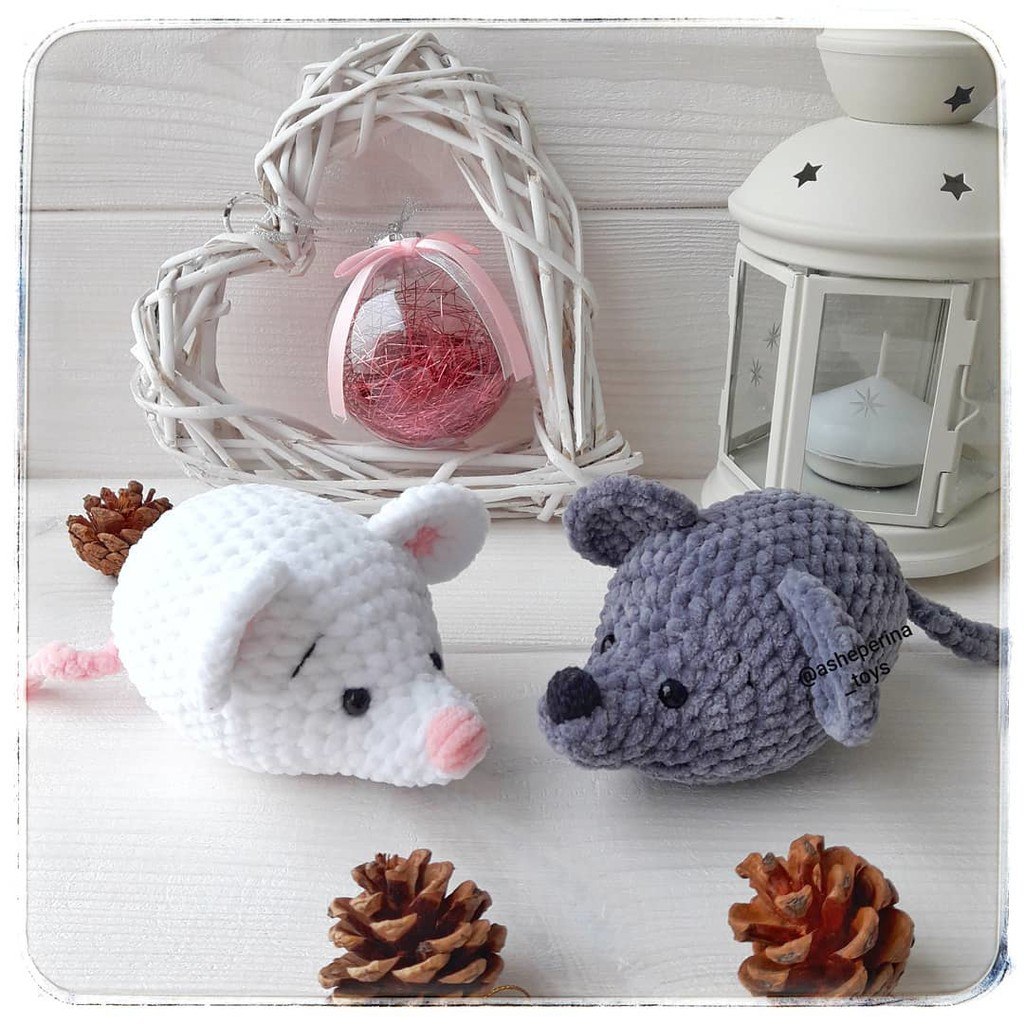
Feel free to experiment with colors! A grey mouse is classic, but a white mouse or even a colorful fantasy mouse can be just as cute. You can also add a tiny ribbon around the neck for an extra touch of personality.