Sweet Heart Astronaut Amigurumi: A Step-by-Step Crochet Tutorial
Introduction
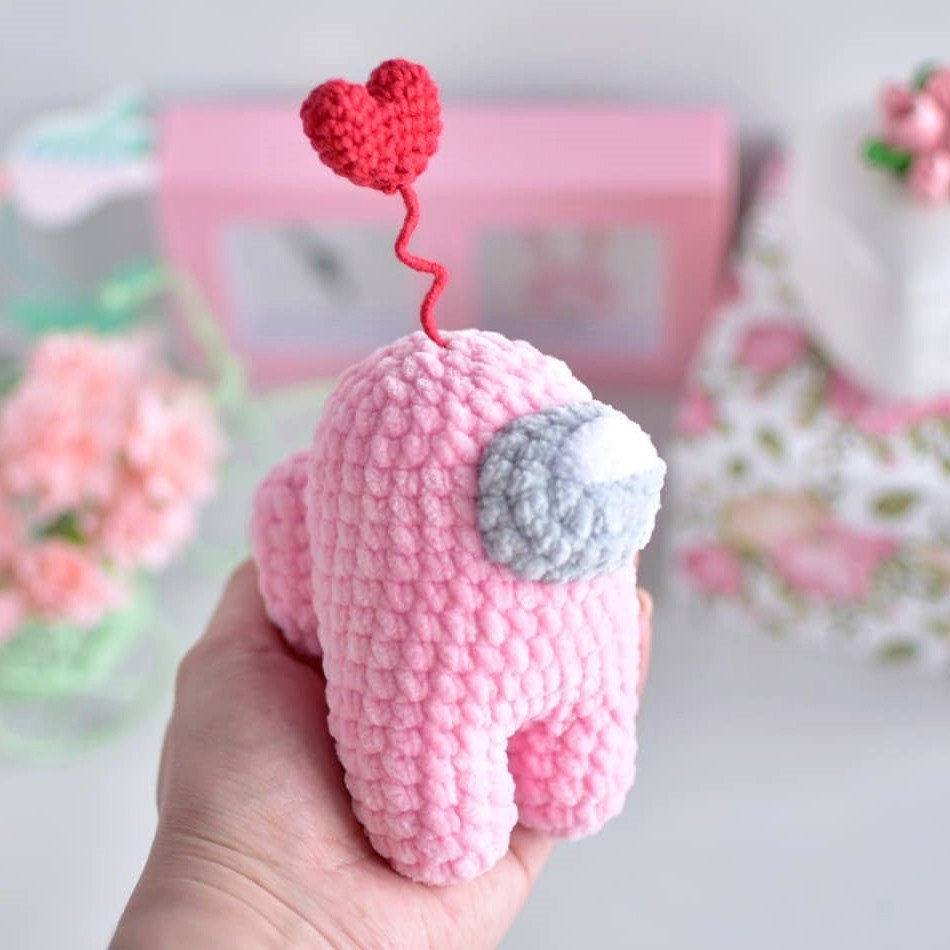
If you are looking for your next adorable amigurumi project, look no further! This Sweet Heart Astronaut is the perfect blend of trendy “space explorer” aesthetics and “kawaii” charm. Featuring a soft, chunky body and a whimsical floating heart, this little character is a fantastic project for both beginner and intermediate crocheters.
This pattern is designed to result in a cuddly, huggable toy that makes an incredible gift for Valentine’s Day, birthdays, or for any space lover in your life. Because we use plush, chenille-style yarn for the main body, the project works up quickly, and the finished product feels incredibly soft to the touch. In this tutorial, I will walk you through every single stitch, from the tiny visor to the wire-supported heart, ensuring you can create your own little cosmic companion with ease.
Materials & Abbreviations
Materials Needed
- Plush/Chenille Yarn: A soft, chunky yarn in your choice of color (the example uses pink).
- Cotton or Acrylic Blend Yarn: A thinner, standard weight yarn for the visor (grey/silver) and the heart (red).
- Crochet Hooks: A 4mm (approx. G/6) hook for the plush yarn and a 2mm (approx. D/0) hook for the smaller details and heart.
- Stuffing: Polyester fiberfill or eco-fiber.
- Stitch Marker: Highly recommended to keep track of your rounds.
- Tapestry Needle: For sewing the pieces together.
- Thin Wire: For the heart stem (approx. 8–10 inches).
- Scissors and Lighter: To trim yarn and carefully singe the ends of synthetic yarn to prevent fraying.
- Matching Thread: For embroidery and assembly.
Abbreviations (US Terms)
Please ensure you are using US crochet terminology for this pattern:
- MR: Magic Ring
- sc: Single crochet
- inc: Increase (2 sc in one stitch)
- dec: Decrease (sc 2 together)
- ch: Chain
- sl st: Slip stitch
- st(s): Stitch(es)
Step-by-Step Instructions
The Visor (The Window)
We will start with the visor using your thinner, grey/silver yarn and the 2mm hook.
Begin by making a ch 6. We will work around both sides of the chain to create an oval shape.
- Round 1: Starting in the 2nd ch from the hook, work 4 sc. In the very last ch, work 3 sc (this turns the corner). Now, working along the opposite side of the chain, work 3 sc and finish with 1 inc in the remaining space. (12 sts total)
- Round 2: 1 inc, 3 sc, 3 inc, 3 sc, 2 inc. (18 sts total)
- Round 3: 18 sc, then join with a sl st.
Fasten off the yarn. To give the visor a realistic look, use white thread to embroider small “glare” lines or highlights across the surface.
The Backpack
The backpack is worked using the same base as the visor to ensure a perfect fit.
- Rounds 1 & 2: Follow the instructions used for the Visor.
- Rounds 3–6: 18 sc for 4 rounds.
- Round 7: 1 dec, 3 sc, 1 dec, 3 sc, 2 dec. (12 sts total). Join with a sl st.
Fasten off, leaving a long tail for sewing. You may want to stuff the backpack very lightly with a small amount of fiberfill before closing it up.
The Body and Legs
This part is worked in the chunky plush yarn using the 4mm hook. We will crochet the legs and the body as one continuous piece.
Making the Legs
Make two identical legs:
- Round 1: 6 sc in a MR.
- Round 2: 6 inc. (12 sts total)
- Rounds 3–5: 12 sc for 3 rounds. Join with a sl st.
For the first leg, fasten off the yarn completely. For the second leg, do not fasten off; we will continue working directly from it to join the two legs together.
Joining the Legs and Shaping the Body
To connect the legs, ch 3 from the second leg and join it to the first leg with a sl st. Now, we will work all the way around the legs and the chain to create the base of the body.
- Round 6: 12 sc around the first leg, 3 sc in the ch between the legs, 12 sc around the second leg, and 3 sc in the ch on the other side. (30 sts total)
- Rounds 7–16: 30 sc for 10 rounds.
Note: Use your stitch marker here! It is helpful to keep it on the “back” of the astronaut so you know where you are when sewing the backpack later.
Begin stuffing the body firmly with fiberfill as you continue.
- Round 17: (3 sc, 1 dec) repeat 6 times. (24 sts total)
- Round 18: 24 sc.
- Round 19: (2 sc, 1 dec) repeat 6 times. (18 sts total)
- Round 20: (1 sc, 1 dec) repeat 6 times. (12 sts total)
- Round 21: 6 dec. Join with a sl st.
Fasten off, leaving a long tail for sewing. Close the hole by pulling the tail tight.
The Heart
Use your red yarn and the 2mm hook to create the floating heart.
Make two identical heart pieces:
- Round 1: 5 sc in a MR.
- Round 2: 5 inc. (10 sts total). Join with a sl st.
Now, join the two pieces together by working through both layers:
- Rounds 3–5: 20 sc for 3 rounds.
- Round 6: (2 sc, 1 dec) repeat 5 times. (15 sts total)
- Round 7: (1 sc, 1 dec) repeat 5 times. (10 sts total)
- Round 8: 5 dec. Join with a sl st.
Stuff the heart lightly. To create the stem, leave a tail of about 8 inches. Insert your thin wire into the heart, fold the wire in half, and secure it to the top of the heart using your yarn tail. You can wrap the remaining yarn around the wire to hide it and create the wavy stem effect.
Finishing
Assembly Instructions
Now comes the fun part—bringing your astronaut to life! Use your tapestry needle and matching thread to carefully sew the components together.
- The Visor: Sew the visor onto the front of the body. Position it between rounds 12 and 18 of the body.
- The Backpack: Sew the backpack onto the back of the astronaut. Position it between rounds 9 and 15 of the body.
- The Heart: Carefully insert the wire stem of the heart into the very top (the “head”) of the astronaut. Secure it firmly inside with a little extra stuffing or a small dab of glue if needed.
Tips
For a Professional Finish
When working with plush yarn, your tension can sometimes vary. If you see small gaps where the stuffing is peeking through, don’t worry! You can use a bit of extra yarn to “weave” through the gaps and close them up during assembly.
Working with Wire
When attaching the wire to the heart, be sure to fold the sharp ends of the wire inward toward the center of the heart. This ensures that the toy is safe for display and won’t poke anyone.
Achieving the Perfect Shape
If your astronaut looks a little lopsided, it’s usually due to uneven stuffing. Try to distribute the fiberfill very evenly, pushing it into the corners and the “legs” to ensure a smooth, rounded silhouette. Happy crocheting!