Adorable Amigurumi Lamb Crochet Pattern: A Step-by-Step Guide
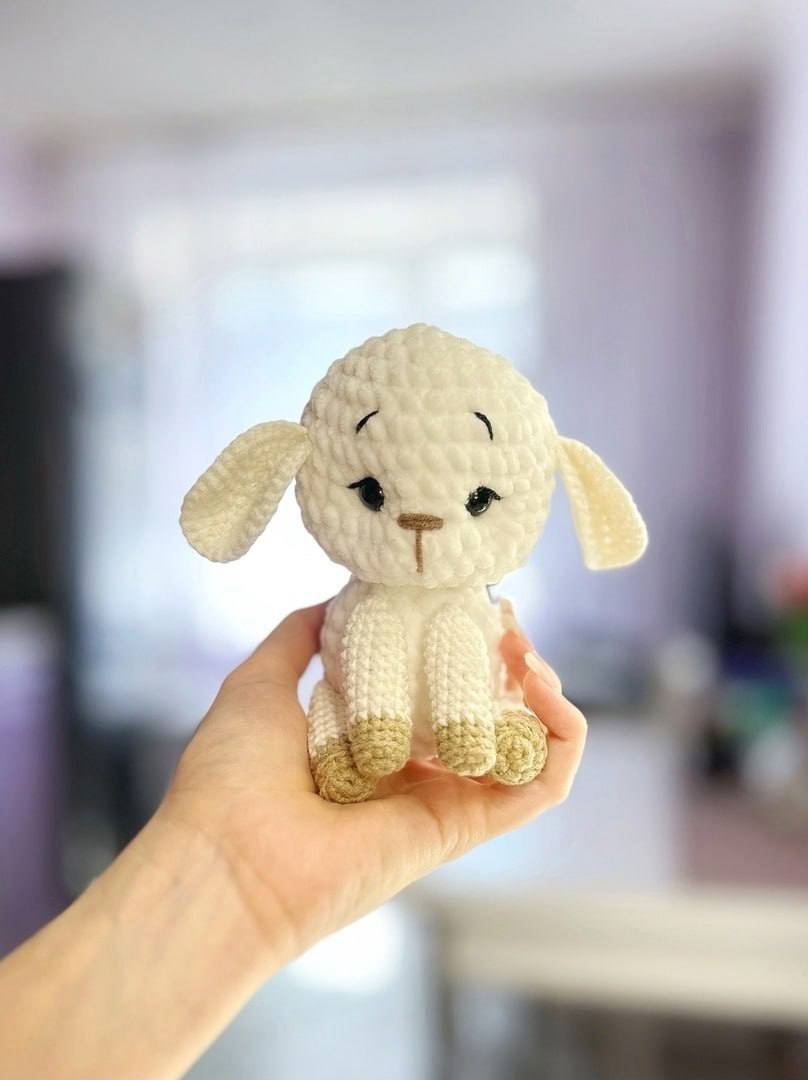
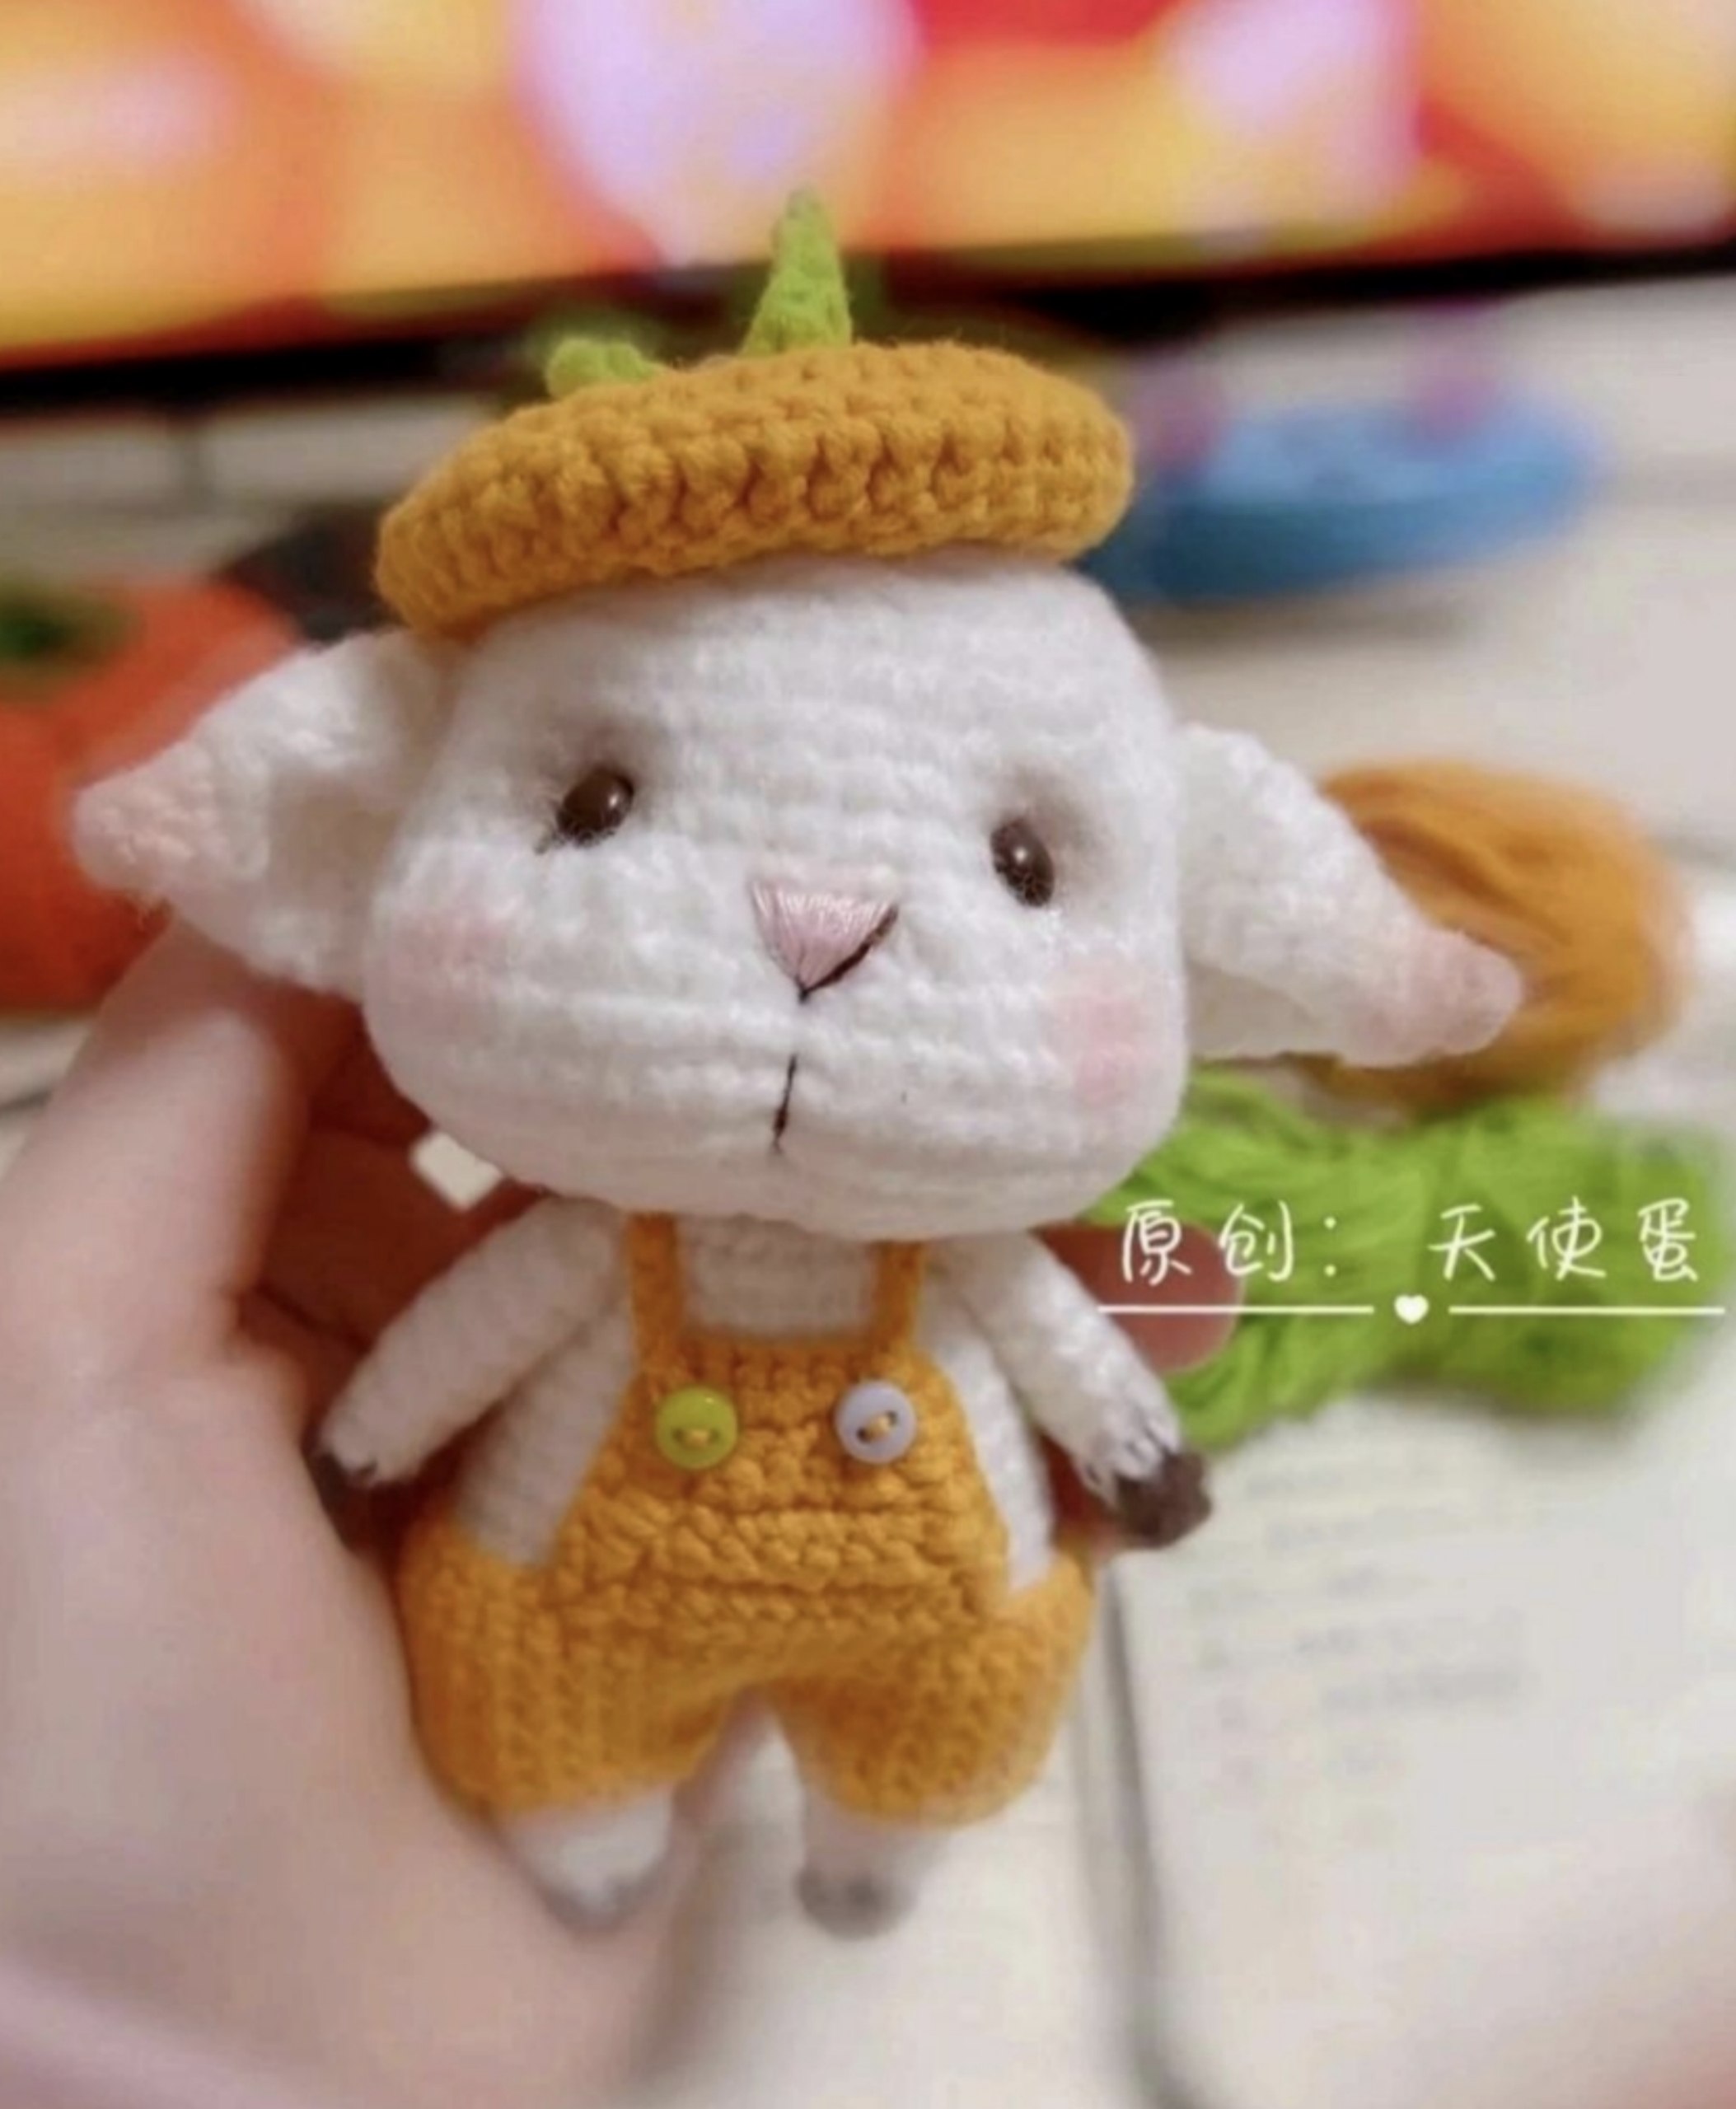
Are you looking for your next adorable crochet project? This little lamb, dressed in its cutest orange overalls and topped with a whimsical orange hat, is the perfect addition to any nursery, bookshelf, or crochet collection. This amigurumi pattern is designed to be sweet, squishy, and absolutely irresistible!
Whether you are looking to make a gift for a baby shower or just want to treat yourself to a new desk buddy, this little lamb is a joy to create. In this tutorial, we will walk through every single stitch to ensure your little friend turns out perfectly. Grab your favorite yarn and hook, and let’s get started!
Materials & Abbreviations
Before we dive into the stitches, let’s make sure you have everything you need. Since we are working with amigurumi, I recommend using a smaller hook than usual to ensure your stitches are tight, which prevents the stuffing from peeking through.
What You Will Need
- Yarn: Medium weight (Worsted or DK) cotton or acrylic yarn in White (for the body), Orange (for the overalls and hat), and a small amount of Green (for the hat sprout).
- Crochet Hook: A 3.5mm (E) or 4.0mm (G) crochet hook.
- Safety Eyes: 8mm to 10mm black safety eyes.
- Stuffing: High-quality polyester fiberfill.
- Tools: A tapestry needle for sewing, stitch markers (essential!), and scissors.
- Embroidering Thread: A small amount of pink or dark thread for the nose and mouth.
US Crochet Abbreviations
This pattern uses standard US crochet terms. Please ensure you are using US terminology to avoid confusion!
- MR: Magic Ring
- sc: single crochet
- inc: increase (2 sc in one stitch)
- dec: decrease (sc 2 together)
- ch: chain
- sl st: slip stitch
- hdc: half double crochet
- dc: double crochet
- st(s): stitch(es)
Step-by-Step Instructions
The Head
Start with White yarn.
- Round 1: 6 sc in MR (6)
- Round 2: 6 inc (12)
- Round 3: (1 sc, 1 inc) * 6 (18)
- Round 4: (1 sc, 1 inc, 1 sc) * 6 (24)
- Round 5: (3 sc, 1 inc) * 6 (30)
- Round 6: (2 sc, 1 inc, 2 sc) * 6 (36)
- Rounds 7-8: 36 sc (36)
- Round 9: (5 sc, 1 inc) * 6 (42)
- Rounds 10-11: 42 sc (42)
- Round 12: 14 sc, 14 inc, 14 sc (56)
- Rounds 13-16: 56 sc (56)
- Round 17: (5 sc, 1 dec) * 8 (48)
- Round 18: (2 sc, 1 dec, 2 sc) * 8 (40)
- Round 19: (3 sc, 1 dec) * 8 (32)
- Round 20: (1 sc, 1 dec, 1 sc) * 8 (24)
- Round 21: (1 sc, 1 dec) * 8 (16)
- Round 22: 8 dec (8)
Fasten off, leaving a long tail for sewing. Stuff the head firmly.
The Ears (Make 2)
Use White yarn.
- Round 1: 3 sc in MR (3)
- Round 2: 3 inc (6)
- Round 3: (1 sc, 1 inc) * 3 (9)
- Round 4: (1 sc, 1 inc, 1 sc) * 3 (12)
- Round 5: (3 sc, 1 inc) * 3 (15)
- Round 6: (2 sc, 1 inc, 2 sc) * 3 (18)
- Round 7: (5 sc, 1 inc) * 3 (21)
- Round 8: (6 sc, 1 inc) * 3 (24)
Flatten the ears (do not stuff) and fasten off, leaving a tail for sewing.
The Arms (Make 2)
Start with White yarn.
- Round 1: 6 sc in MR (6)
- Round 2: 6 sc (6)
- Round 3: Change to Orange yarn, 6 sc (6)
- Round 4: (1 sc, 1 inc) * 3 (9)
- Rounds 5-9: 9 sc (9)
- Round 10: (1 sc, 1 dec) * 3 (6)
Fasten off, leaving a tail for sewing. Lightly stuff the arms.
Legs and Body
This section is worked in one continuous piece to create the legs and then the torso. Start with White yarn.
The Legs
- Round 1: 6 sc in MR (6)
- Round 2: 6 sc (6)
- Round 3: Change to Orange yarn, (1 sc, 1 inc) * 3 (9)
- Round 4: (1 sc, 1 inc, 1 sc) * 3 (12)
- Rounds 5-7: 12 sc (12)
- Round 8: (3 sc, 1 inc) * 3 (15)
Joining and Body
Now, we will join the two legs together to form the body.
- Round 9: Chain 3, join to the second leg with a slip stitch, then work 36 sc around both legs (36)
- Round 10: 36 sc (36)
- Round 11: 10 sc, 6(sc, inc), 14 sc (42)
- Round 12: 42 sc (42)
- Round 13: 7 sc, 1 dec, 21 sc, 1 dec, 10 sc (40)
- Round 14: 7 sc, 1 dec, 19 sc, 1 dec, 10 sc (38)
- Round 15: 7 sc, 1 dec, 2(sc, dec), 1 sc, 1 dec, 2(dec, sc), 1 dec, 10 sc (30)
- Rounds 16-17: 30 sc (30)
- Round 18: (3 sc, 1 dec) * 6 (24)
- Round 19: 24 sc (24)
- Round 20: (1 sc, 1 dec, 1 sc) * 6 (18)
- Round 21: 9 dec (9)
Stuff the body firmly. Fasten off.
The Tail
Use White yarn.
- Round 1: 3 sc in MR (3)
- Round 2: 3 inc (6)
- Round 3: (1 sc, 1 inc) * 3 (9)
Fasten off, leaving a tail for sewing.
The Overalls (Outfit)
Use Orange yarn.
Main Body of Overalls
- Foundation: Chain 46
- Rounds 2-3: 46 sc (46)
- Round 4: 11 sc, 1 dec, 21 sc, 1 dec, 10 sc (44)
- Round 5: 10 sc, 1 dec, 20 sc, 1 dec, 10 sc (42)
- Round 6: Divide the work into two legs. Work 21 sc on each leg.
- Round 7: 21 sc (21)
Straps
Work these in rows (back and forth) using the orange yarn.
- Row 1: 9 sc
- Row 2: 9 sc
- Row 3: 7 sc
- Row 4: 5 sc
- Row 5: 5 sc
Fasten off. You can finish the edges with a single crochet stitch and create the actual shoulder straps by crocheting a simple chain of your desired length.
The Hat and Sprout
Use Orange yarn for the hat and Green for the sprout.
The Hat
- Round 1: 10 sc in MR (10)
- Round 2: 10 inc (20)
- Round 3: (1 sc, 1 inc) * 10 (30)
- Round 4: (1 sc, 1 inc, 1 sc) * 10 (40)
- Round 5: 40 sc (40)
- Round 6: (2 sc, 1 inc) * 10 (50)
Fasten off, leaving a tail for sewing.
The Sprout
Using Green yarn, create a small leaf. You can simply chain 4, then sc in the second chain from the hook, sc in the next, and sc in the last. Fasten off.
Finishing
Now comes the fun part—bringing your lamb to life!
- Assemble the Body: Sew the head to the top of the body. Sew the ears to the sides of the head and the arms to the sides of the body. Attach the tail to the back.
- Add the Face: Insert the safety eyes between rounds 14 and 15 of the head. Use your embroidery thread to stitch a small “v” or line for the nose and a little smile beneath it.
- Dress the Lamb: Carefully slide the overalls onto the body and secure them. Attach the straps over the shoulders.
- The Final Touch: Sew the little green sprout onto the top of the orange hat.
Tips for Success
- Use Stitch Markers: In amigurumi, it is very easy to lose track of your rounds. Always place a marker in the first stitch of every round.
- Watch Your Tension: Keep your tension consistent. If your stitches are too loose, the stuffing will show; if they are too tight, it will be hard to work.
- Stuffing Tip: When stuffing the head and body, push the fiberfill into the corners to ensure a smooth, rounded shape without lumps.
- Safety First: If you are making this for a very small child, consider embroidering the eyes instead of using plastic safety eyes to prevent choking hazards.