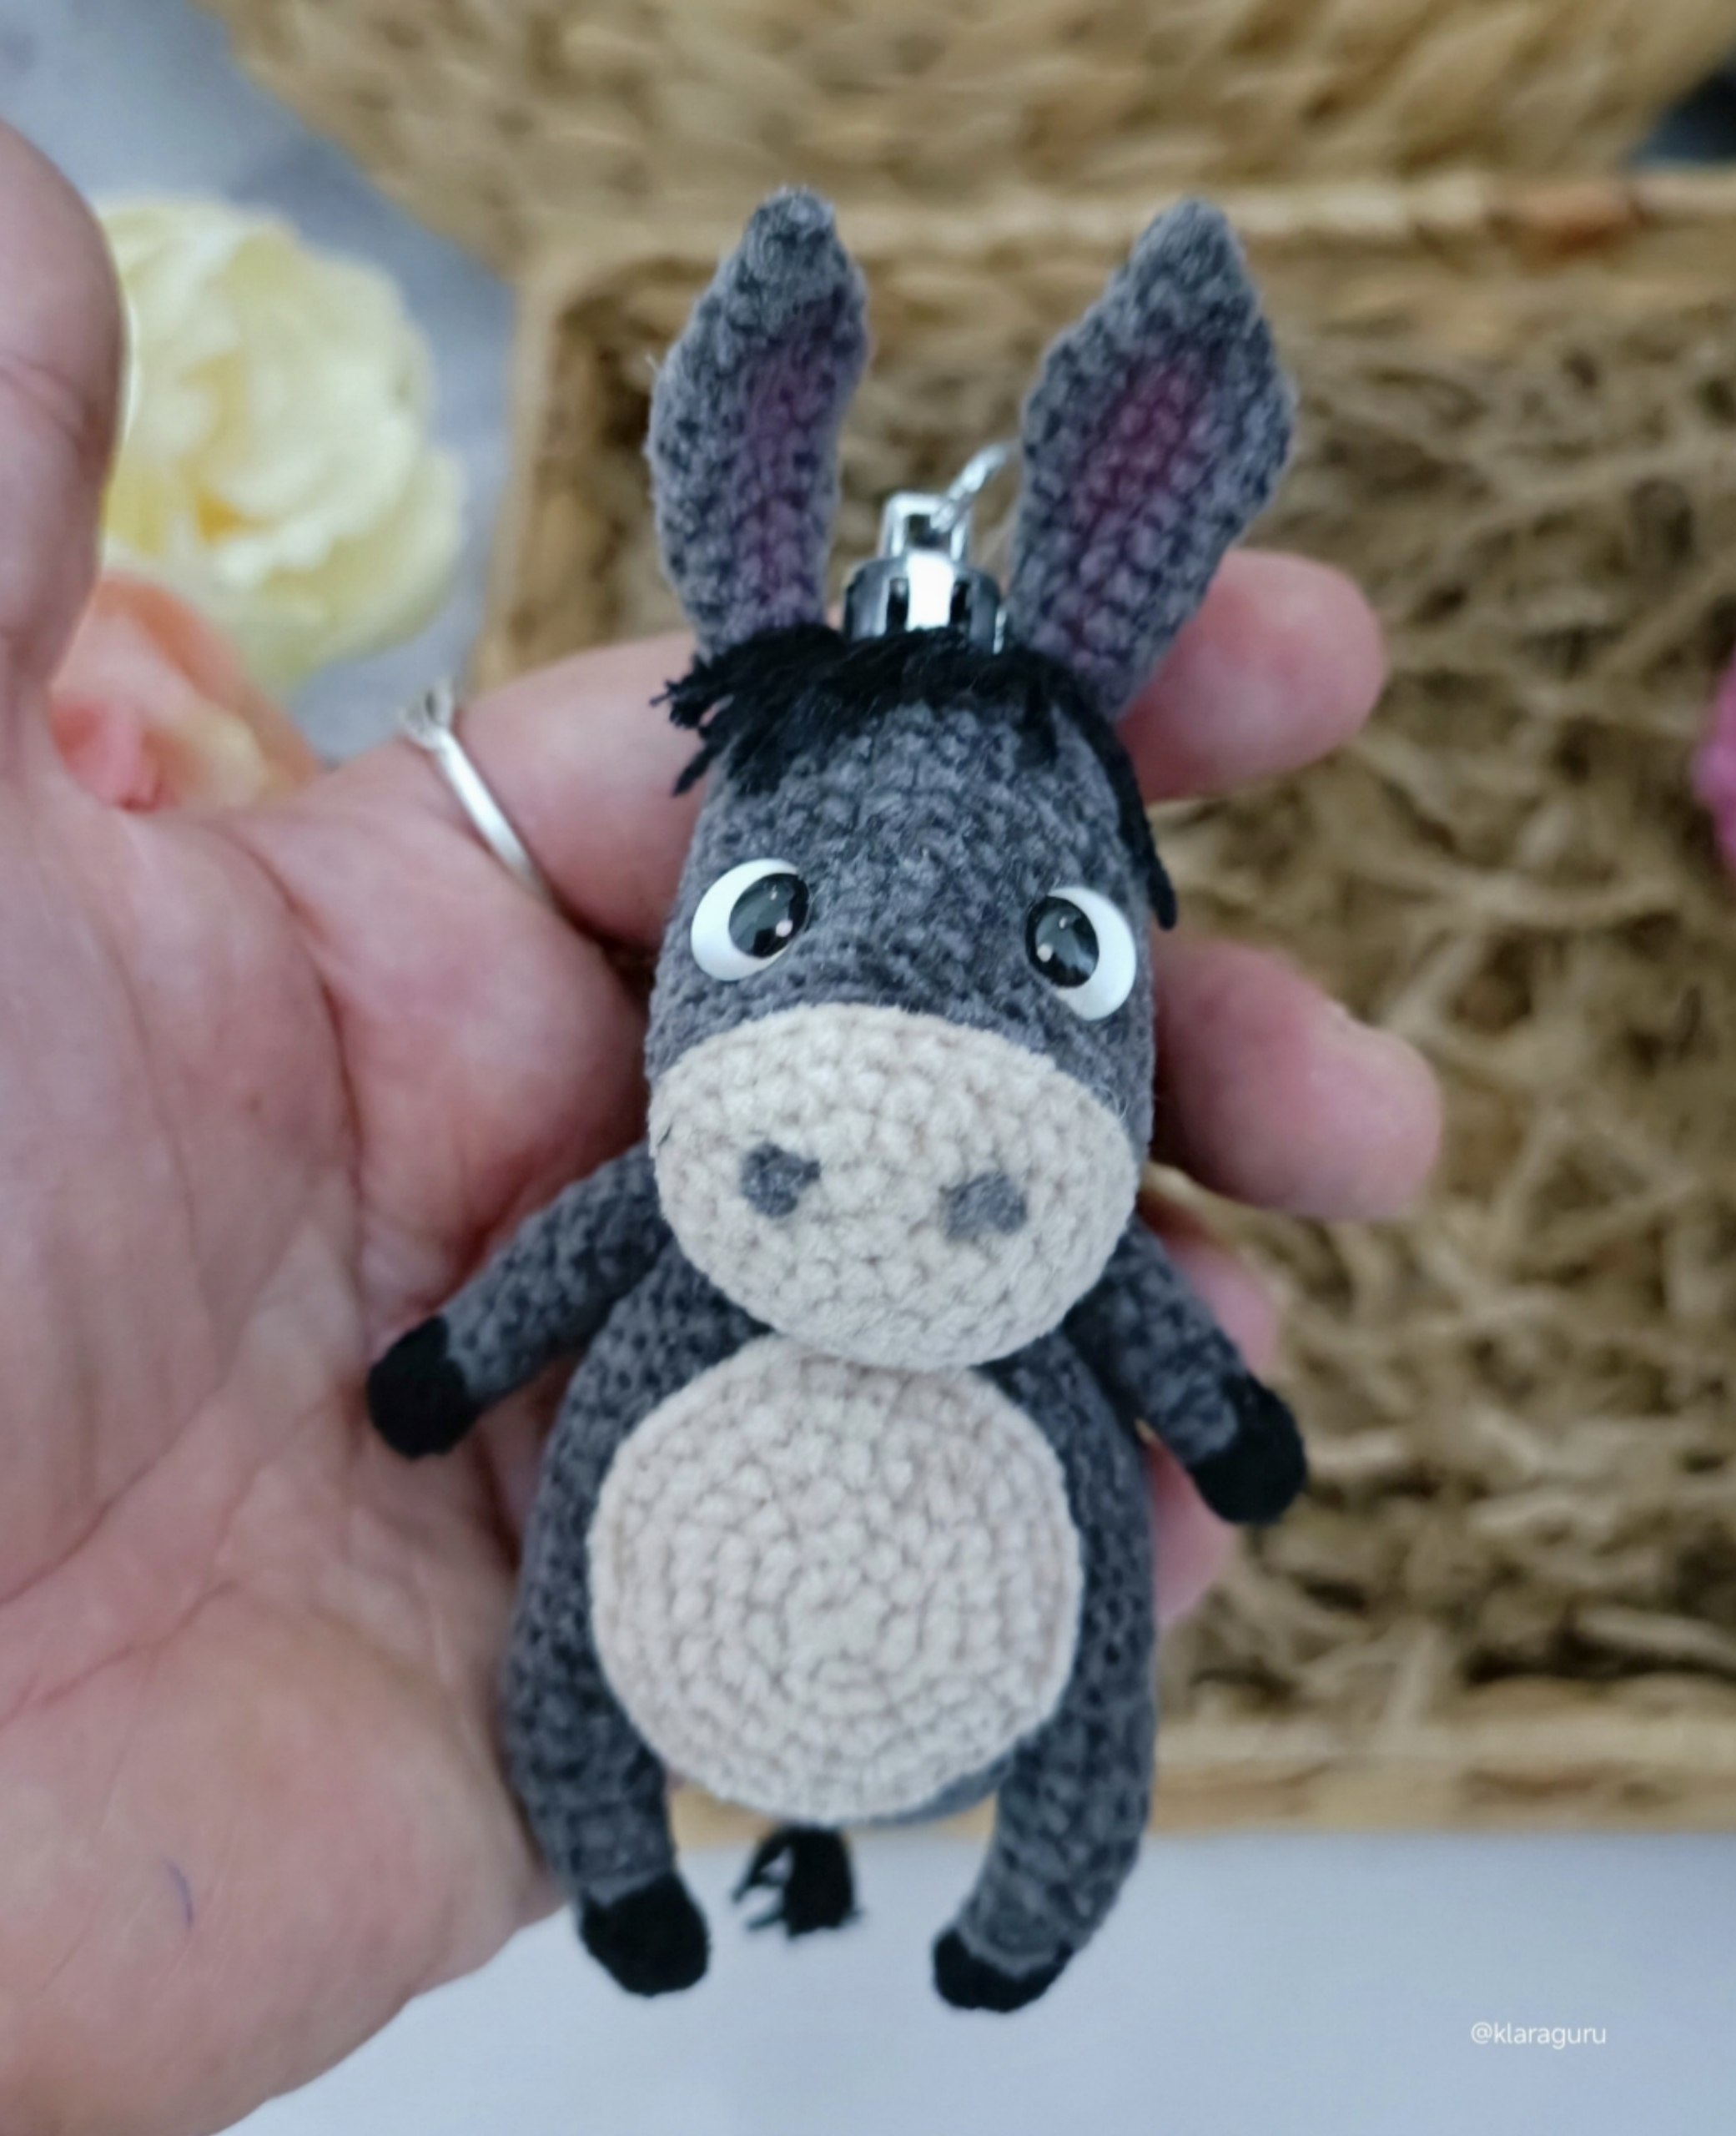
Adorable Crochet Donkey Ornament Pattern: A DIY Amigurumi Tutorial
Are you looking for a quick, charming, and incredibly cute crochet project? This tiny amigurumi donkey ornament is the perfect addition to your holiday decor! Whether you want to hang it on a Christmas tree, attach it to a keychain, or gift it to a friend, this little donkey is sure to bring a smile to everyone’s face. This pattern is designed to be manageable for intermediate crocheters, but with a little patience, beginners can definitely tackle this adorable creature.
Measuring approximately 4.7 inches tall, this donkey is the ideal size for a miniature ornament. The combination of soft microvelour yarn and expressive eyes gives it a professional, high-end look that makes it feel like a boutique find. Let’s dive into the materials you’ll need and get started on this delightful project!
Materials & Abbreviations
Before you begin, gather all your supplies to ensure a smooth crafting experience. Because we are working with microvelour (a type of velvet or chenille yarn), it is important to keep your tension consistent to ensure your stuffing doesn’t peek through the stitches.
Materials Needed
- Yarn: Microvelour or similar velvet-style yarn in Grey, Cream (or Milk), Blue, and Black.
- Crochet Hook: 1.5mm hook.
- Eyes: 8mm safety eyes (or adhesive cabochon eyes).
- Stuffing: High-quality fiberfill.
- Adhesives: B-7000 glue or a strong super glue.
- Details: Pink blush or pastel for toning, an ornament hanger or loop.
- Tools: Tapestry needle, scissors, and stitch markers.
US Crochet Abbreviations
- MR: Magic Ring
- Ch: Chain
- Sc: Single Crochet
- Inc: Increase (2 stitches in one stitch)
- Dec: Decrease (Join two stitches into one)
- Sl st: Slip stitch
- Hdc: Half Double Crochet
- Dc: Double Crochet
- FLO: Front Loops Only
- BLO: Back Loops Only
- St(s): Stitch(es)
Step-by-Step Instructions
Legs and Arms
We will start by creating the four limbs. You will need to make two legs and two arms. Both should be worked starting with black yarn to create the “socks” and “hands” effect.
For the Legs and Arms:
- Start with Black yarn: 6 sc in a MR.
- Work 6 sc in the same color.
- Change to Grey yarn.
- Work 6 sc in the FLO (Front Loops Only).
- Work 6 sc in the BLO (Back Loops Only).
- (2 sc, 1 inc) * 2 (8)
- (3 sc, 1 inc) * 2 (10)
- Stuff the limb firmly.
- Work 10 sc for the next 3 rounds (Rows 7-9).
- Fasten off, leaving a tail for sewing.
Repeat this process to create two legs and two arms.
The Body
The body is worked in Grey yarn and provides the foundation for the entire ornament.
- Start with Grey yarn: 7 sc in a MR.
- 7 inc (14)
- (1 sc, inc) * 7 (21)
- (2 sc, inc) * 7 (28)
- (3 sc, inc) * 7 (35)
- (4 sc, inc) * 7 (42)
- (5 sc, inc) * 7 (49)
- 13 sc, attach the 1st leg by working 5 sc through both the leg and the body, 13 sc, attach the 2nd leg by working 5 sc through both, then 13 sc.
- 13 sc, 5 sc through the leg loop, 13 sc, 5 sc through the other leg loop, 13 sc (49).
- Work 49 sc for the next 7 rounds (Rows 10-16).
- (5 sc, 1 dec) * 7 (42)
- 42 sc (Row 18)
- (4 sc, 1 dec) * 7 (35) (Row 19)
- Attaching Arms (Round 20): 9 sc along the body, attach the 1st arm by working 5 sc through both, 10 sc, attach the 2nd arm by working 5 sc through both, then 6 sc.
- 3 sc, 1 dec, 4 sc, 5 sc through the arm loop, (3 sc, 1 dec) * 2, 5 sc through the other arm loop, 3 sc, 1 dec, 1 sc (31).
- 3 sc, 1 dec, 11 sc, 1 dec, 10 sc, 1 dec, 1 sc (28).
- Work 28 sc for the next 3 rounds (Rows 23-25). Stuff the body firmly.
- (5 sc, 1 dec) * 4 (24)
- 10 sc, ch, turn.
- Skip the first stitch, 9 sc, remove marker, 7 sc, ch, turn (16).
- Skip the first stitch, 13 sc, 1 dec, ch, turn.
- Skip the first stitch, 5 sc, 1 dec, 4 sc, 1 dec, ch, turn.
- Skip the first stitch, 4 sc, 1 dec, 2 sc, 1 dec, ch, turn.
- Skip the first stitch, 2 sc, 1 dec, 1 sc, 1 dec. Stuff well.
Fasten off, leaving a long tail for sewing the head to the body.
The Belly
This small piece adds a wonderful color contrast to the donkey’s underside.
- Use Cream/Milk yarn: 6 sc in a MR.
- 6 inc (12)
- (1 sc, inc) * 6 (18)
- (2 sc, inc) * 6 (24)
- (3 sc, inc) * 6 (30)
- 2 sc, 1 inc, (4 sc, 1 inc) * 5, 2 sc, 1 sl st (30).
You can glue this to the front of the body using B-7000 glue, or sew it on if you prefer a more permanent attachment.
The Head
The head is worked in two colors to create the snout.
- Start with Cream/Milk yarn: 6 sc in a MR.
- 6 inc (12)
- (1 sc, inc) * 6 (18)
- (2 sc, inc) * 6 (24)
- (3 sc, inc) * 6 (30)
- Work 30 sc for 2 rounds (Rows 6-7).
- Change to Grey yarn.
- Work 30 sl st in the BLO (Back Loops Only) for Round 8.
- Work 30 sc in the BLO for Round 9.
- Work 30 sc for the next 10 rounds (Rows 10-19). Stuff firmly.
- (3 sc, 1 dec) * 6 (24)
- 24 sc (Row 21). Stuff more.
- (2 sc, 1 dec) * 6 (18)
- (1 sc, 1 dec) * 6 (12). Stuff.
- Dec (Row 24).
Fasten off, leaving a 6-inch tail. Gather the remaining stitches and pull tight to close the head.
Ears, Tail, and Bow
Ears (Make 2): Use Grey yarn. 6 ch, join in a ring. Work 6 sc for 3 rounds. (2 sc, 1 inc) * 2 (8). 8 sc. (3 sc, 1 inc) * 2 (10). 10 sc for 2 rounds. (4 sc, 1 inc) * 2 (12). 12 sc for 2 rounds. (4 sc, 1 dec) * 2 (10). (3 sc, 1 dec) * 2 (8). (2 sc, 1 dec) * 2 (6). (1 sc, 1 dec) * 2 (4). Fasten off, leaving a 10-inch tail. Use pink blush to tone the inner part of the ears.
Tail: Use Black yarn. 8 ch. Leave a 1-inch tip and a long tail. Sew to the back. Cut two 1.2-inch pieces of black yarn, thread them through the very last stitch of the tail, knot them, and trim to 0.4 inches to create a fluffy effect.
Blue Bow: Use Blue yarn. 2 ch. In the 2nd ch from hook: 3 dc, 3 hdc, 1 sl st in the same stitch, 3 hdc, 3 dc, 1 sl st in the same stitch. Tie the center with yarn to create the bow shape. Glue above the tail.
Finishing
Assembly is where your donkey really comes to life! Follow these steps carefully to ensure the face looks perfect.
Eye Placement and Face Details
To get the eyes positioned correctly, place two pins between rounds 10 and 11 of the head. Between those pins, work 4 single crochet stitches. Then, place two more pins in the next stitch closer to the edge. This ensures the eyes are angled slightly inward for a cute expression. Glue your 8mm safety eyes into these spots.
For the nostrils, use a grey thread and the French Knot technique to create two small dots. Make sure to place 4 single crochet stitches between the two nostrils.
Final Assembly
- Bangs: Cut four 1.2-inch pieces of black yarn. Fold them in half and pull through between the ears to create “hair” or bangs. Trim to your desired look.
- Head to Body: Pin the head to the body as shown in your reference photos. Sew the head securely to both the neck and the chest area.
- Limbs: Sew the legs and arms to the sides of the body, ensuring they lie flat against the body rather than sticking out awkwardly.
- Ornament Loop: Finally, glue your ornament hanger or loop between the ears so the donkey can hang beautifully.
Tips
- Tension is Key: When working with microvelour/velvet yarn, try not to pull too hard, or you might split the fibers. If you find you are seeing the stuffing, try using a slightly smaller hook.
- The Power of Blush: Don’t be afraid to use a little bit of pink pastel on the cheeks or the inside of the ears. It adds a level of professional “life” to the amigurumi.
- Pinning is Your Friend: Always pin your eyes, ears, and limbs in place before you start sewing. This prevents you from having to unpick stitches if you realize something is crooked.