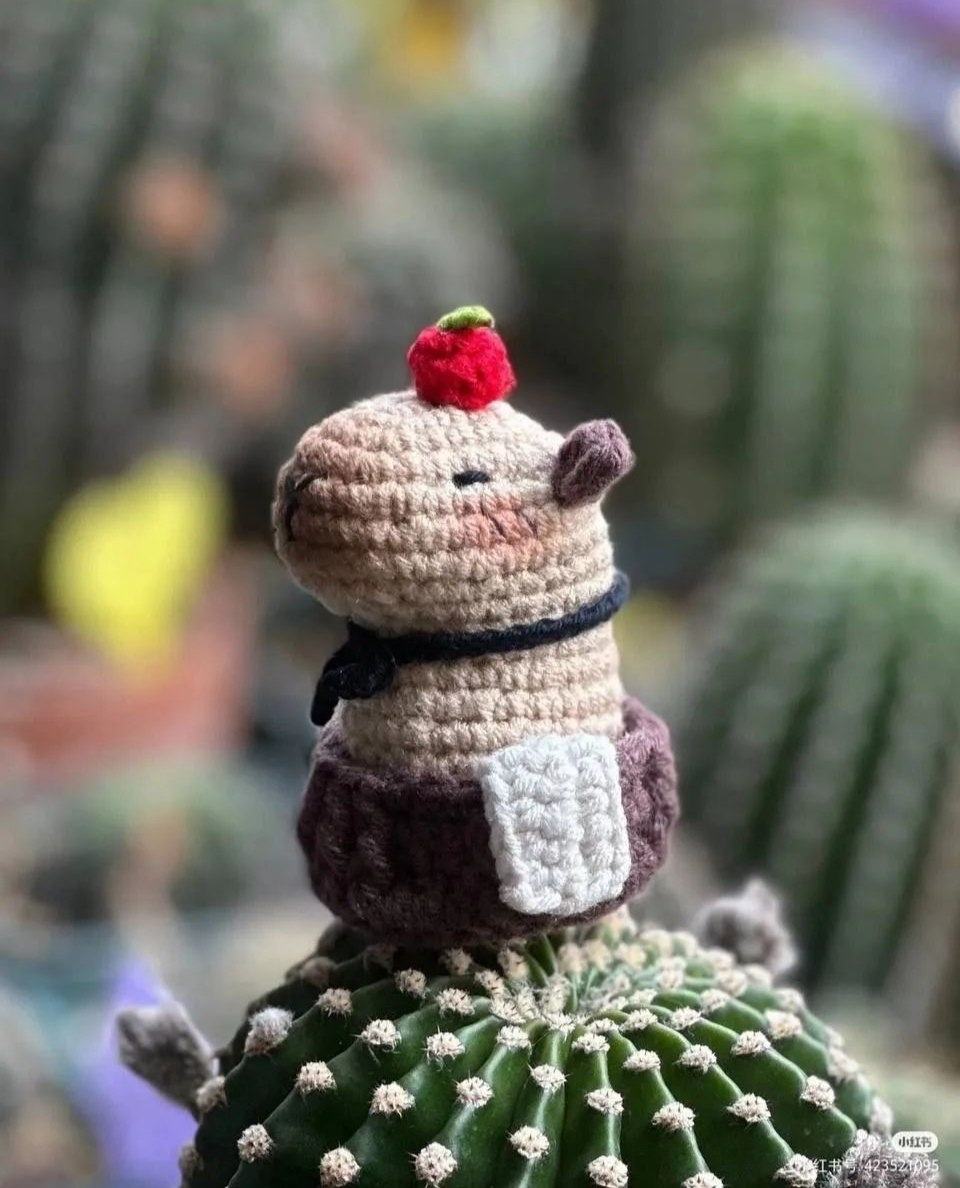
The Ultimate Crochet Capybara in a Bath Pattern: A Cute Amigurumi Tutorial
Are you looking for your next adorable crochet project? There is nothing quite as trendy or wholesome as a capybara! These giant, friendly rodents have captured the internet’s heart, and now you can bring one into your home with this charming “Capybara in a Bath” amigurumi pattern. This project is the perfect size for a desk companion, a bookshelf decoration, or a unique gift for a friend who loves quirky animals.
Whether you are a seasoned amigurumi artist or a beginner looking to practice your shaping techniques, this tutorial will guide you through every stitch. We will be making a cozy little capybara, complete with a tiny bathtub, a miniature towel, a little apple to snack on, and even a tiny scarf to keep them stylish. Grab your favorite yarn and let’s get started!
Materials & Abbreviations
Before we dive into the stitches, let’s make sure you have everything you need on your crochet hook. Because this is a small amigurumi project, using a smaller hook will help keep your stitches tight so the stuffing doesn’t peek through.
Materials Needed
- Yarn: Medium weight (worsted) cotton or acrylic yarn. You will need tan/light brown for the capybara, dark brown for the bath, white for the towel, red for the apple, and green for the leaf.
- Crochet Hook: A 3.5mm (E) or 4.0mm (G) hook, depending on your tension.
- Stuffing: Polyester fiberfill.
- Safety Eyes: 6mm or 8mm black safety eyes, or black embroidery thread if you prefer to stitch the eyes.
- Tapestry Needle: A blunt-ended needle for sewing pieces together and weaving in ends.
- Scissors: For cutting your yarn.
- Stitch Marker: Highly recommended to keep track of your rounds.
Abbreviations (US Terms)
Please ensure you are using US crochet terms for this pattern:
- ch: chain
- sc: single crochet
- inc: increase (2 sc in the same stitch)
- dec: decrease (sc 2 stitches together)
- dc: double crochet
- mr: magic ring (magic circle)
- st(s): stitch(es)
- blo: back loop only
- fpdc: front post double crochet
- bpdc: back post double crochet
Step-by-Step Instructions
The Head and Body
The capybara is worked as one continuous piece to create its signature oval shape. Start with your tan or light brown yarn.
Round 1: Start with 5 ch. From the 2nd ch from your hook, work: 3 sc, 3 sc in the next stitch, 2 sc, and 1 inc. (10 sts)
Round 2: 1 inc, 2 sc, 3 inc, 2 sc, 2 inc. (16 sts)
Round 3: 1 inc, 3 sc, (1 inc, 1 sc) repeat 3 times, 2 sc, (1 inc, 1 sc) repeat 2 times. (21 sts)
Round 4: 1 inc, 4 sc, (1 inc, 2 sc) repeat 3 times, 2 sc, (1 inc, 2 sc) repeat 2 times. (28 sts)
Rounds 5-7: sc in each st around. (28 sts)
Round 8: 1 sc, 1 inc, 7 sc, 1 dec, (1 sc, 1 dec) repeat 2 times, 8 sc, 1 inc, 1 sc, 1 inc. (28 sts)
Round 9: 9 sc, 3 dec, 13 sc. (22 sts)
Round 10: 9 sc, 1 dec (worked over 3 stitches), 13 sc. (19 sts)
Round 11: 8 sc, 3 inc, 12 sc. (25 sts)
Rounds 12-16: sc in each st around. (26 sts)
Round 17: (1 dec, 2 sc) repeat 6 times, 2 sc. (Note: If your tension is loose, you may have more stitches; aim for a rounded shape).
Round 18: (1 dec, 1 sc) repeat 6 times, 2 sc.
Round 19: 7 dec.
Fasten off, leaving a long tail for sewing. Before closing the hole, stuff the head and body firmly with fiberfill. The stuffing should be even to maintain the oval shape.
The Ears
Use your tan/brown yarn for the ears.
Round 1: 6 sc in a magic ring. Fasten off, leaving a tail for sewing.
The Bathtub
Use your dark brown yarn for the tub. This part provides the base for your capybara to sit in.
Round 1: 6 sc in a magic ring.
Round 2: 6 inc. (12 sts)
Round 3: (1 sc, 1 inc) repeat 6 times. (18 sts)
Round 4: (2 sc, 1 inc) repeat 6 times. (24 sts)
Round 5: (3 sc, 1 inc) repeat 6 times. (30 sts)
Round 6: sc in each st around. (30 sts)
Rounds 7-8: Work a pattern to create texture for the tub: (3 regular dc, 3 puff stitches or bobble stitches) repeat around until you reach the desired height for the tub walls.
Stuff the tub lightly and fasten off.
The Tiny Accessories
The Towel
Use your white yarn. This is worked in rows rather than rounds.
Row 1: Ch 10.
Row 2: 10 sc in the second ch from the hook and each ch across.
Rows 3+: Continue working in rows of 10 sc until the towel is roughly 1 inch long. Fasten off.
The Apple
Use your red yarn.
Round 1: 6 sc in a magic ring.
Rounds 2-3: 6 sc in each round.
Round 4: 3 dec. Fasten off and leave a tail.
The Leaf
Use your green yarn.
Row 1: Ch 2. Fasten off.
The Scarf
Use whatever color you like for the scarf (black is used in the photo). Simply chain as long as you want the scarf to be (roughly 4-6 inches), then work one row of sc across the chain. Fasten off.
Finishing
Now comes the best part—bringing your capybara to life! Assembly is key to making the character look adorable.
Assembly Steps
- Eyes & Face: Before sewing the head to the body, insert your safety eyes between rounds 2 and 3 of the head. Use black embroidery thread to stitch a small, simple nose and a tiny mouth to give your capybara that sleepy, happy expression.
- Ears: Sew the ears onto the top sides of the head, roughly level with the eyes.
- Body & Tub: Stuff the body thoroughly. Sew the bottom of the capybara’s body into the center of the bathtub. Ensure it sits snugly so it doesn’t tip over.
- Accessories:
- Sew the tiny white towel to the side of the bathtub or over the capybara’s shoulder.
- Sew the tiny red apple (with the green leaf attached) near the capybara or inside the tub.
- Wrap the scarf around the capybara’s neck and sew it in place.
Tips for Success
Crocheting amigurumi can be tricky if you are new to the craft. Here are a few pro-tips to ensure your capybara turns out perfect:
- Tension is everything: Try to keep your stitches consistent. If you crochet too loosely, the stuffing will show through, which can make the toy look messy. If you find your stitches are too loose, switch to a smaller hook.
- Use Stitch Markers: Amigurumi is worked in continuous spirals. It is incredibly easy to lose count of your rounds. Always place a stitch marker in the first stitch of every round.
- Don’t overstuff: While you want the capybara to be firm, overstuffing can cause the crochet stitches to stretch out and lose their shape. Aim for a firm but smooth surface.
- The Magic Ring: If you struggle with the magic ring, don’t worry! You can always start with a chain of 2 and work your first round of stitches into the first chain.
Congratulations! You have just completed a custom, handmade Capybara in a Bath. This little guy is ready to bring a smile to anyone’s face!