Crochet Your Own Sweet Treat: Easy Gingerbread House
How to Crochet a Gingerbread House Blanket: Easy Step-by-Step C2C Pattern
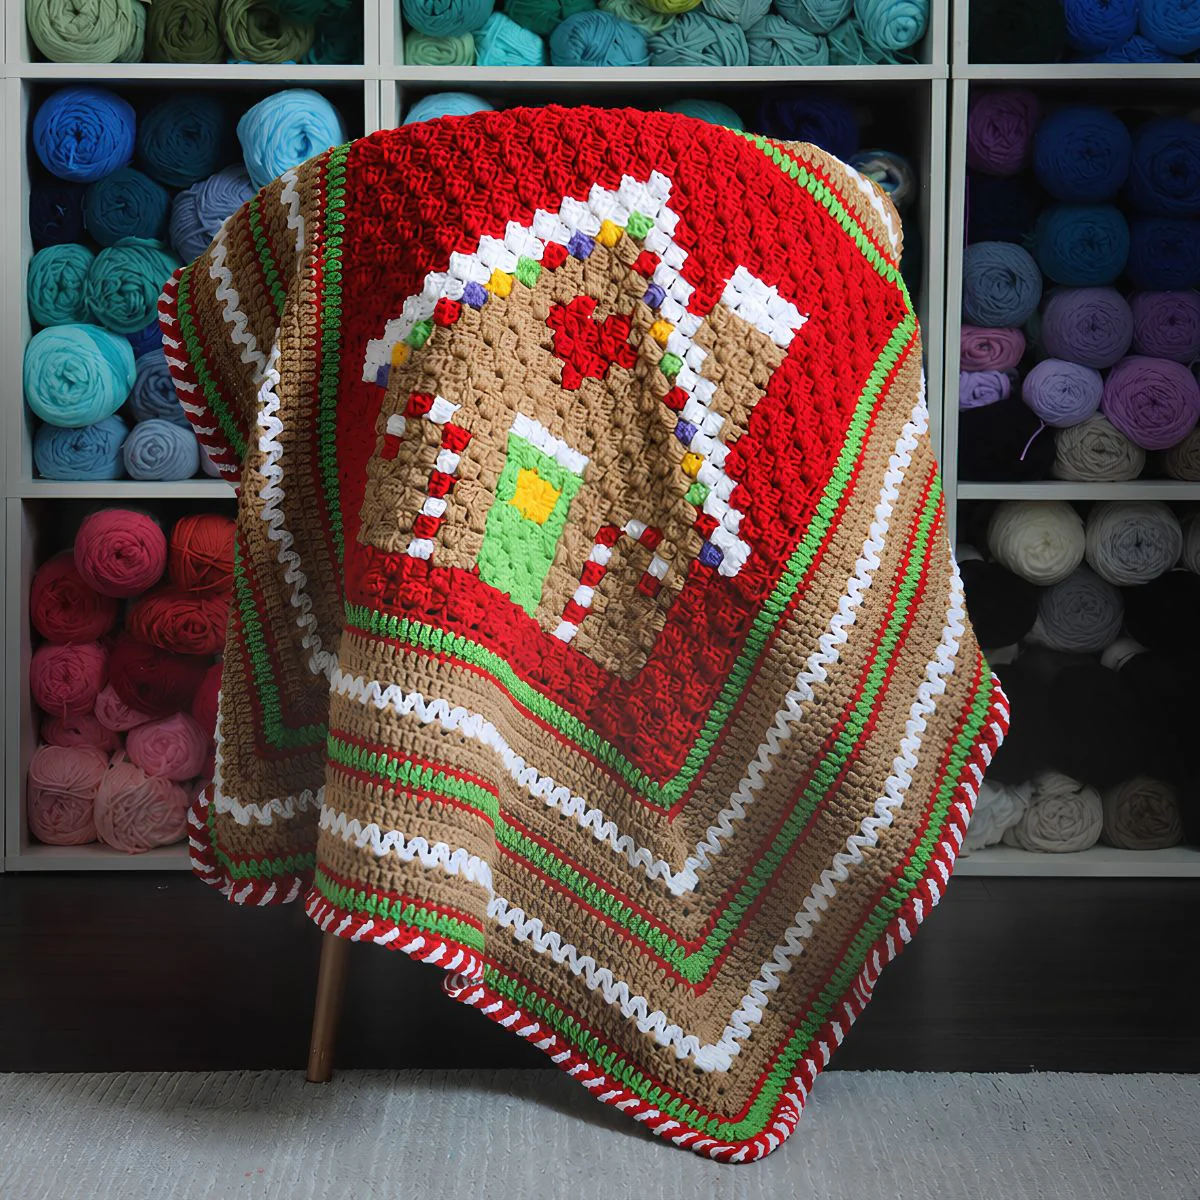
Add a cozy, festive touch to your home with this adorable Gingerbread House Blanket. This project uses the popular Corner-to-Corner (C2C) technique to create a pixelated image of a gingerbread house, surrounded by a colorful, striped border. Perfect for beginners and intermediate crocheters alike, this blanket makes a wonderful holiday gift or a cheerful addition to your winter decor.
Project Overview
Skill Level: Easy
Finished Size: Approximately 40 x 40 inches
Materials Needed
Yarn
- Bernat Super Value: 1 ball in Topaz
- Red Heart Super Saver:
- 2 balls in Cherry Red
- 1 ball in White
- 1 ball in Spring Green
- 1 ball in Lavender
- 1 ball in Saffron
Tools
- Size H/8 (5mm) Crochet Hook
- Tapestry Needle
- Gingerbread House Pixel Graph (25×25 grid)
Important Pattern Notes
Before you begin, keep these technical details in mind to ensure your blanket turns out perfectly:
- C2C Technique: The center square is worked using the Corner-to-Corner (C2C) method.
- The Pixel Formula: In this specific pattern, one pixel square equals a chain 2 + 3 Half Double Crochet (HDC) stitches. Please note that this pattern uses HDC instead of the traditional Double Crochet (DC) for the C2C section.
- Color Changes: For the small “gumdrop” details, it is recommended to pre-cut strands of yarn approximately 40 inches long for each color to make weaving in ends easier.
Step-by-Step Instructions
Phase 1: The Center Square
Start by crocheting the Gingerbread House Square using the 25×25 pixel graph. Follow the grid to change colors according to the image.
- Work from one corner to the opposite corner.
- The completed center square should measure approximately 18 x 18 inches.
- Tip: While weaving in your ends, check for any gaps or unconnected corners and fill them in to ensure a solid fabric.
Phase 2: The Decorative Border
Once your center square is complete, you will add a multi-colored border to frame the house and increase the size of the blanket.
Round 1 (Cherry Red Yarn)
Work a Single Crochet (SC) into the spaces between each “pixel square.” Chain 2 between each SC. In each of the four corners, work: SC + chain 2 + SC.
Round 2 (Cherry Red Yarn)
Work 2 SC into each chain-2 space from the previous round. In each corner, work: SC + chain 2 + SC.
Round 3 (Spring Green Yarn)
Work a Double Crochet (DC) in each stitch around. In each corner, work: 2 DC + chain 2 + 2 DC.
Round 4 (Cherry Red Yarn)
Work an SC in each stitch around. In each corner, work: SC + chain 2 + SC.
Rounds 5 & 6 (Topaz Yarn)
Work a DC in each stitch around. In each corner, work: 2 DC + chain 2 + 2 DC.
Round 7 (White Yarn)
Chain 4 and work a DC in the first stitch. Skip one stitch. *Work a V-stitch (DC + chain 1 + DC) in the next stitch, skip one stitch; repeat from * around. In each corner, work: 2 DC + chain 2 + 2 DC. Join to the 3rd chain of your starting chain 4.
Round 8 (Topaz Yarn)
Join the Topaz yarn. Chain 2. Work 2 DC into each V-stitch chain space. In each corner, work: 2 DC + chain 2 + 2 DC. Join to the first DC and chain 2.
Round 9 (Topaz Yarn)
Work a DC in each stitch around. In each corner, work: 2 DC + chain 2 + 2 DC.
Round 10 (Cherry Red Yarn)
Work an SC in each stitch around. In each corner, work: SC + chain 2 + SC.
Finishing the Blanket
To achieve the final 40 x 40 inch size, repeat Rounds 3 through 10.
You can continue this sequence as long as you like to make the blanket even larger. Once you reach your desired size, fasten off and weave in all remaining ends. For an extra festive touch, you can add a candy cane striped edging to the final perimeter.