DIY Crochet Flamingo Keychain Pattern: A Cute & Easy Amigurumi Tutorial
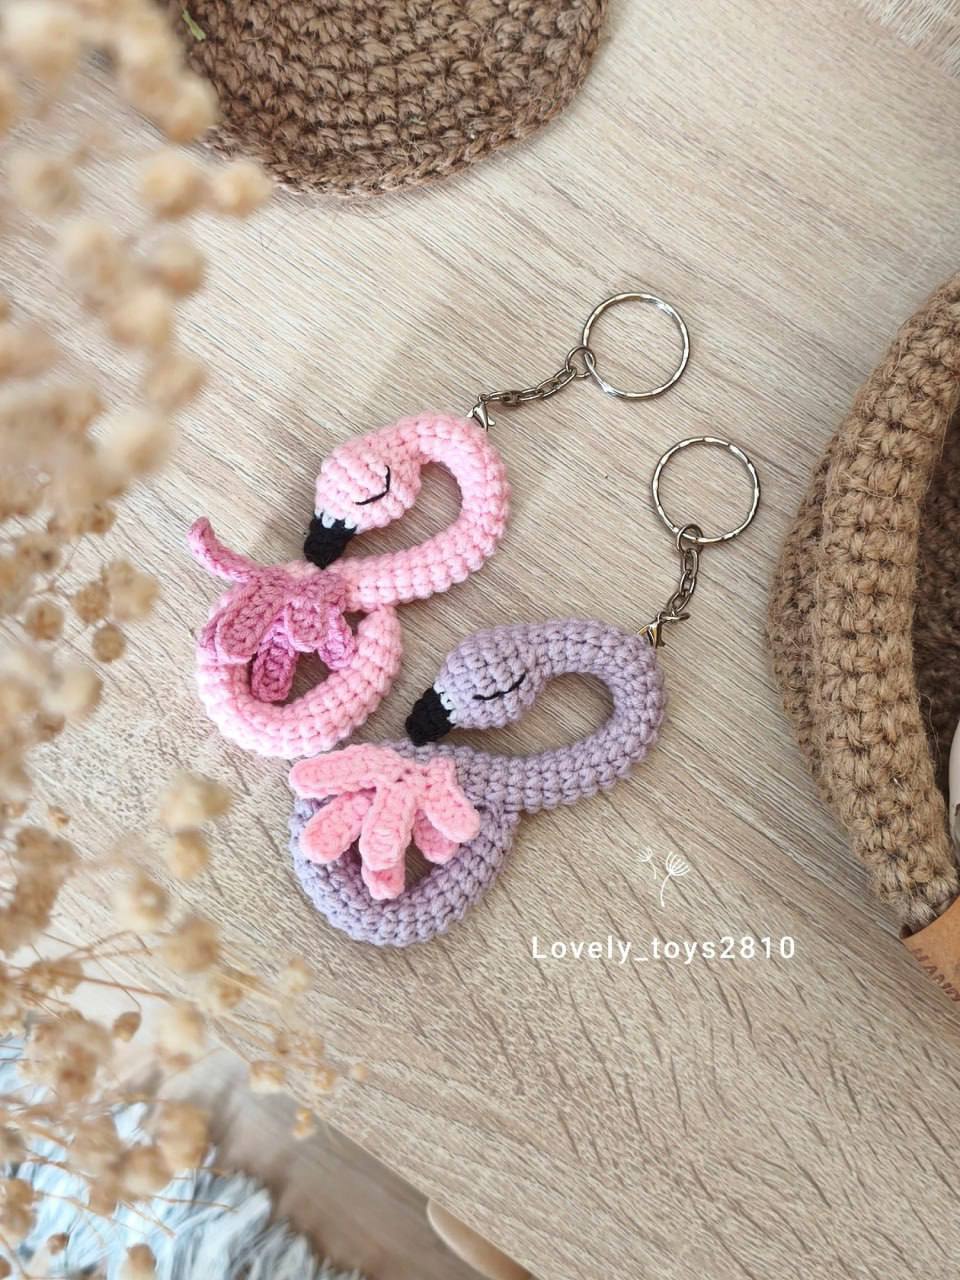
Looking for a quick, adorable, and rewarding crochet project? This crochet flamingo keychain is the perfect choice! Whether you are looking to create a unique handmade gift, a cute accessory for your keys, or a charming bag charm, this little flamingo is sure to bring a pop of color and personality to your day.
Amigurumi (the Japanese art of knitting or crocheting small, stuffed yarn creatures) can sometimes feel intimidating for beginners, but this pattern is designed to be accessible. The construction is straightforward, utilizing a long, tube-like body that you shape into the iconic flamingo silhouette. By the end of this tutorial, you’ll have a professional-looking miniature flamingo that fits right in the palm of your hand.
Materials & Abbreviations
Before we dive into the stitches, let’s gather all the necessary supplies. To get the best results for a keychain, I recommend using a cotton yarn; it provides great stitch definition and is more durable for items that will be handled frequently.
Supplies Needed
- Yarn: Medium weight (4) cotton yarn in Pink (main color), Black (for the beak), and White (for the beak detail). You will only need a few yards of each.
- Crochet Hook: A 3.25mm (D) or 3.5mm (E) hook. Using a slightly smaller hook than the yarn suggests helps ensure the stuffing doesn’t peek through the stitches.
- Stuffing: A small amount of polyester fiberfill.
- Tools: A tapestry needle for sewing, scissors, and a stitch marker.
- Hardware: One 1-inch metal keychain ring and a jump ring.
US Crochet Terms & Abbreviations
- ch: chain
- sc: single crochet
- inc: increase (work two single crochets into the same stitch)
- dec: decrease (crochet two stitches together into one)
- hdc: half double crochet
- MR: magic ring (or magic circle)
- st: stitch
- sl st: slip stitch
Step-by-Step Instructions
The flamingo is worked in continuous rounds. Do not join the rounds with a slip stitch; instead, use a stitch marker to keep track of the beginning of each round.
Part 1: The Head and Body
We start at the very tip of the beak and work our way back through the head, neck, and body in one long piece. This minimizes sewing and creates a seamless look.
Using Black Yarn:
Round 1: Create a MR and work 4 sc into the ring. (4 sts)
Round 2: sc in each st around. (4 sts)
Round 3: inc in every st around. (8 sts) Change to white yarn at the end of the round.
Using White Yarn:
Round 4: sc in each st around. (8 sts) Change to your main pink yarn at the end of the round.
Using Pink Yarn:
Round 5: (1 sc, inc) repeat 4 times. (12 sts)
Round 6: (2 sc, inc) repeat 4 times. (16 sts)
Round 7-8: sc in each st around. (16 sts)
Round 9: (2 sc, dec) repeat 4 times. (12 sts)
Round 10: (1 sc, dec) repeat 4 times. (8 sts)
The Neck and Body Tube:
Round 11-50: sc in each st around. (8 sts)
Important Note on Length: The pattern suggests 50 rounds, but you should adjust this based on your own tension and the desired size of your flamingo. Continue working these 8 sc rounds until you have a long tube that allows you to curve the neck and form a rounded body. If you want a taller neck or a larger body, simply add more rounds. Once you reach your desired length, fasten off, leaving a long tail for sewing. Pull the tail through the last few stitches to cinch the hole closed tightly.
Part 2: The Wings
You will need to make two identical wings. These are worked in rows rather than rounds.
Wing Instructions:
1. Chain 6.
2. Starting in the second chain from the hook, work 1 sc.
3. Chain 6, then work 5 hdc back along the chain.
4. In the next stitch, work 1 sc.
5. Chain 6, then work 5 hdc back along the chain.
6. In the next stitch, work 1 sc.
7. Chain 5, then work 4 hdc back along the chain.
8. Finish by working 2 sc into the final stitch.
9. Fasten off and leave a tail for sewing.
Finishing Your Flamingo
Now comes the magical part where your crochet tube turns into a bird!
Shaping the Body
Begin stuffing the head area firmly with fiberfill. As you move down the tube, stuff lightly. To create the “figure eight” shape, bend the tube so the head curves back toward the body. Use your tapestry needle and some pink yarn to sew a few hidden stitches where the neck meets the body to lock the curve in place. Ensure the body section is plump and round, while the neck remains elegant and curved.
Adding the Details
- The Wings: Position the wings on the sides of the body section. Sew them securely using the tails left on the wings.
- The Eyes: Using a tapestry needle and black embroidery thread or thin black yarn, create two small “sleeping” eyes (small downward-curving lines) or simple French knots on the sides of the head.
- The Keychain: Attach the jump ring to the top of the flamingo’s back or the top of the neck curve, then slide the keychain ring onto the jump ring.
Tips for Success
To make sure your flamingo looks its best, keep these tips in mind:
Maintain Consistent Tension
Because this project is a long, narrow tube, inconsistent tension can cause the neck to look “lumpy” or spiral. Try to keep your stitches even. If you find your tube is widening, you may be accidentally adding stitches; if it’s tightening, you might be missing some.
The Art of the Curve
The “figure eight” shape is what gives the flamingo its character. Don’t be afraid to “sculpt” the stuffing. If the neck feels too floppy, you can insert a piece of floral wire or a pipe cleaner inside the tube before stuffing to give the flamingo a poseable neck.
Yarn Alternatives
While cotton is recommended, you can try this pattern with chenille or velvet yarn for a “plushie” version. If you use bulky velvet yarn, remember to go up in hook size (try a 4.5mm or 5mm) and reduce the number of rounds in the neck/body section, as the yarn is much thicker and will grow in length much faster.
That’s it! You’ve just created a beautiful, handmade crochet flamingo keychain. This project is a wonderful way to use up scrap yarn and makes a fantastic gift for animal lovers or crochet enthusiasts.