Adorable Crochet Round Pug Pattern: Easy Amigurumi Tutorial
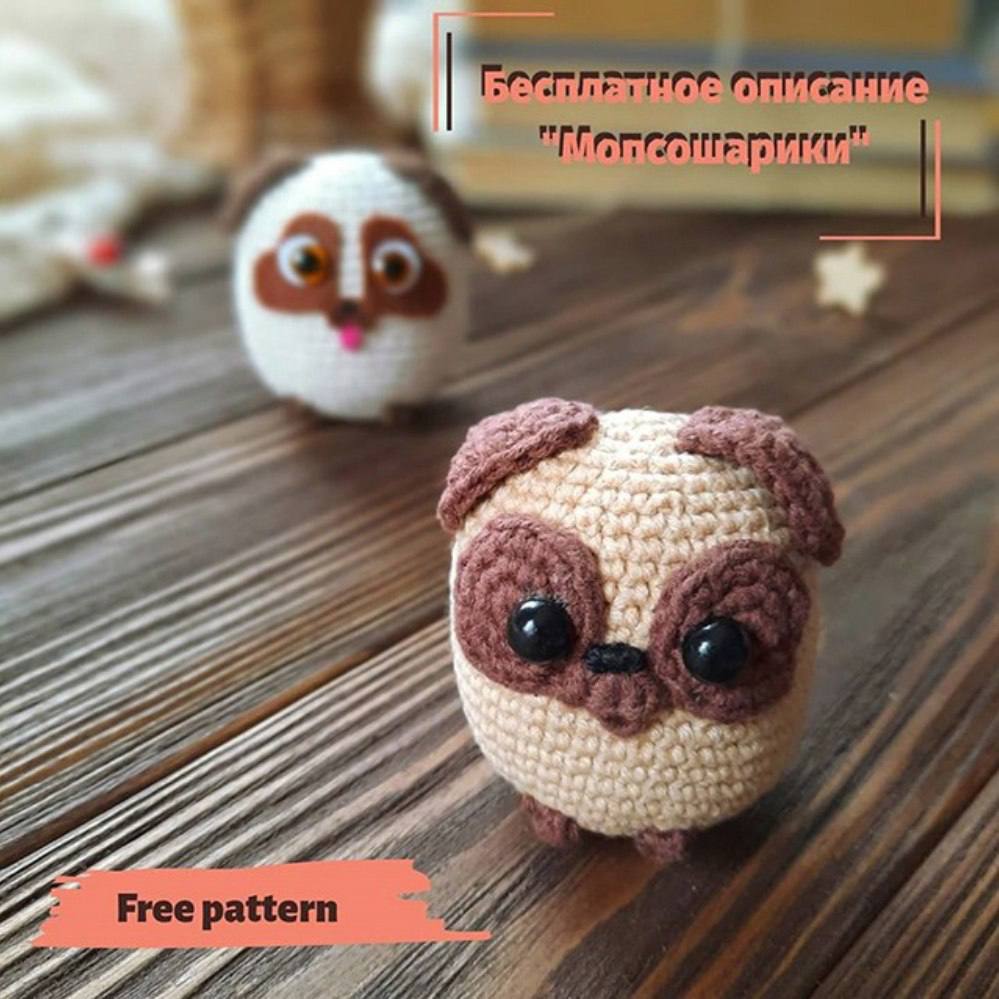
If you are looking for a quick, cute, and satisfying crochet project, you have come to the right place! Today, we are making a “Pug-Ball”—a tiny, spherical amigurumi pug that captures all the charm of the breed in a compact, round shape. Whether you want to make a desk companion, a keychain, or a gift for a dog lover, this little guy is the perfect project.
This pattern is designed with beginners in mind. We will be using basic stitches to create a round body, small floppy ears, and a tiny muzzle. The result is an irresistibly squishy pug that looks professional but is surprisingly simple to assemble. Let’s grab our hooks and get started!
Materials & Abbreviations
Before we dive into the stitches, let’s make sure you have everything you need. For this project, a cotton or cotton-blend yarn is recommended to keep the stitches tight and the shape firm.
Supplies Needed
- Yarn: Medium weight (4) cotton or cotton-blend yarn in Beige and Brown. (Approximately 50-100 yards of each).
- Crochet Hook: 2.0mm (or a size that ensures your stuffing doesn’t show through).
- Safety Eyes: 6-8mm black plastic eyes (glue-on or safety eyes).
- Stuffing: Polyester fiberfill.
- Felt: Small scraps of brown and white felt (for the facial details).
- Tools: Yarn needle, scissors, and a strong craft glue.
Abbreviations (US Terms)
- MR: Magic Ring
- sc: Single crochet
- inc: Increase (two single crochets in the same stitch)
- dec: Decrease (single crochet two stitches together)
- ch: Chain
- st: Stitch
- (…) x6: Repeat the instructions inside the parentheses 6 times.
Step-by-Step Instructions
The Body
We will start with the beige yarn. The body is worked in a continuous spiral, so you won’t need to join your rounds with a slip stitch. I recommend using a stitch marker to keep track of the start of each row.
- Round 1: 6 sc in MR (6 sts)
- Round 2: inc in every st around (12 sts)
- Round 3: (1 sc, inc) x6 (18 sts)
- Round 4: (2 sc, inc) x6 (24 sts)
- Round 5: (3 sc, inc) x6 (30 sts)
- Round 6: (4 sc, inc) x6 (36 sts)
- Round 7: (5 sc, inc) x6 (42 sts)
- Rounds 8-20: sc in each st around for 13 rounds (42 sts)
- Round 21: (5 sc, dec) x6 (36 sts)
- Round 22: (4 sc, dec) x6 (30 sts)
- Round 23: sc in each st around (30 sts). Stop here and add your fiberfill stuffing. Make sure the body is firm and round!
- Round 24: (3 sc, dec) x6 (24 sts)
- Round 25: (2 sc, dec) x6 (18 sts)
- Round 26: (1 sc, dec) x6 (12 sts)
- Round 27: dec around 6 times (6 sts)
Fasten off, leaving a short tail. Use your yarn needle to weave the tail through the remaining 6 stitches and pull tight to close the hole. Hide the end inside the body.
The Ears (Make 2)
Switch to the brown yarn. The ears are worked in rows rather than rounds.
- Start: Ch 5. Beginning in the 2nd chain from the hook, work the following:
- Rows 1-3: 4 sc across. Ch 1 and turn (4 sts)
- Row 4: sc, dec, sc. Ch 1 and turn (3 sts)
- Row 5: dec, sc. Ch 1 and turn (2 sts)
- Row 6: dec (1 st)
Fasten off. To give the ears a clean, professional look, work a round of single crochet stitches all the way around the edge of the ear piece. This adds stability and a nice border.
The Muzzle
Using the brown yarn, we will create a tiny, simplified snout.
Make a Magic Ring and work 6 sc into the ring. Do not join the round. Instead, leave the stitches as a small, curved line. Fasten off, leaving a long tail for sewing.
The Paws (Make 2)
Using the brown yarn:
- Start: Ch 3. Beginning in the 2nd chain from the hook, work 2 sc.
Fasten off, leaving a long tail for sewing.
Finishing & Assembly
Now comes the fun part: bringing your pug to life! Assembly is where you can really customize the expression of your little dog.
The Face
Since pugs are known for their distinct facial “masks,” we will use felt to create this look. Cut two almond-shaped pieces of brown felt for the eye patches and a smaller brown shape for the bridge of the nose.
- Glue the brown felt eye patches onto the body.
- Place your 6-8mm eyes in the center of the felt patches and secure them with glue or safety washers.
- Sew the crocheted muzzle to the center of the face, just below the eye patches.
- Optional: Glue a tiny piece of pink felt or a small stitch of pink yarn to the bottom of the muzzle to create a cute little tongue!
The Ears and Paws
- Position the ears on the top sides of the head. Sew them securely using a yarn needle.
- Sew the two tiny paws to the bottom of the sphere so the pug looks like it is sitting.
Tips for Success
Tight Stitches are Key
When making amigurumi, it is important to use a hook that is slightly smaller than what the yarn label suggests. This prevents the stuffing from leaking through the gaps in your stitches, which keeps your pug looking neat and professional.
The Magic Ring Trick
If you struggle with the Magic Ring, you can substitute it by chaining 2 and working all your first-round stitches into the first chain. However, the Magic Ring is the best way to ensure there is no hole at the top of the head.
Customizing Your Pug
While we used beige and brown, you can use this pattern to make any “ball dog”! Try using a white yarn for a little Maltese or a grey yarn for a French Bulldog. You can also add a tiny crocheted collar or a bow using a scrap of colorful ribbon to give your pug some extra personality.