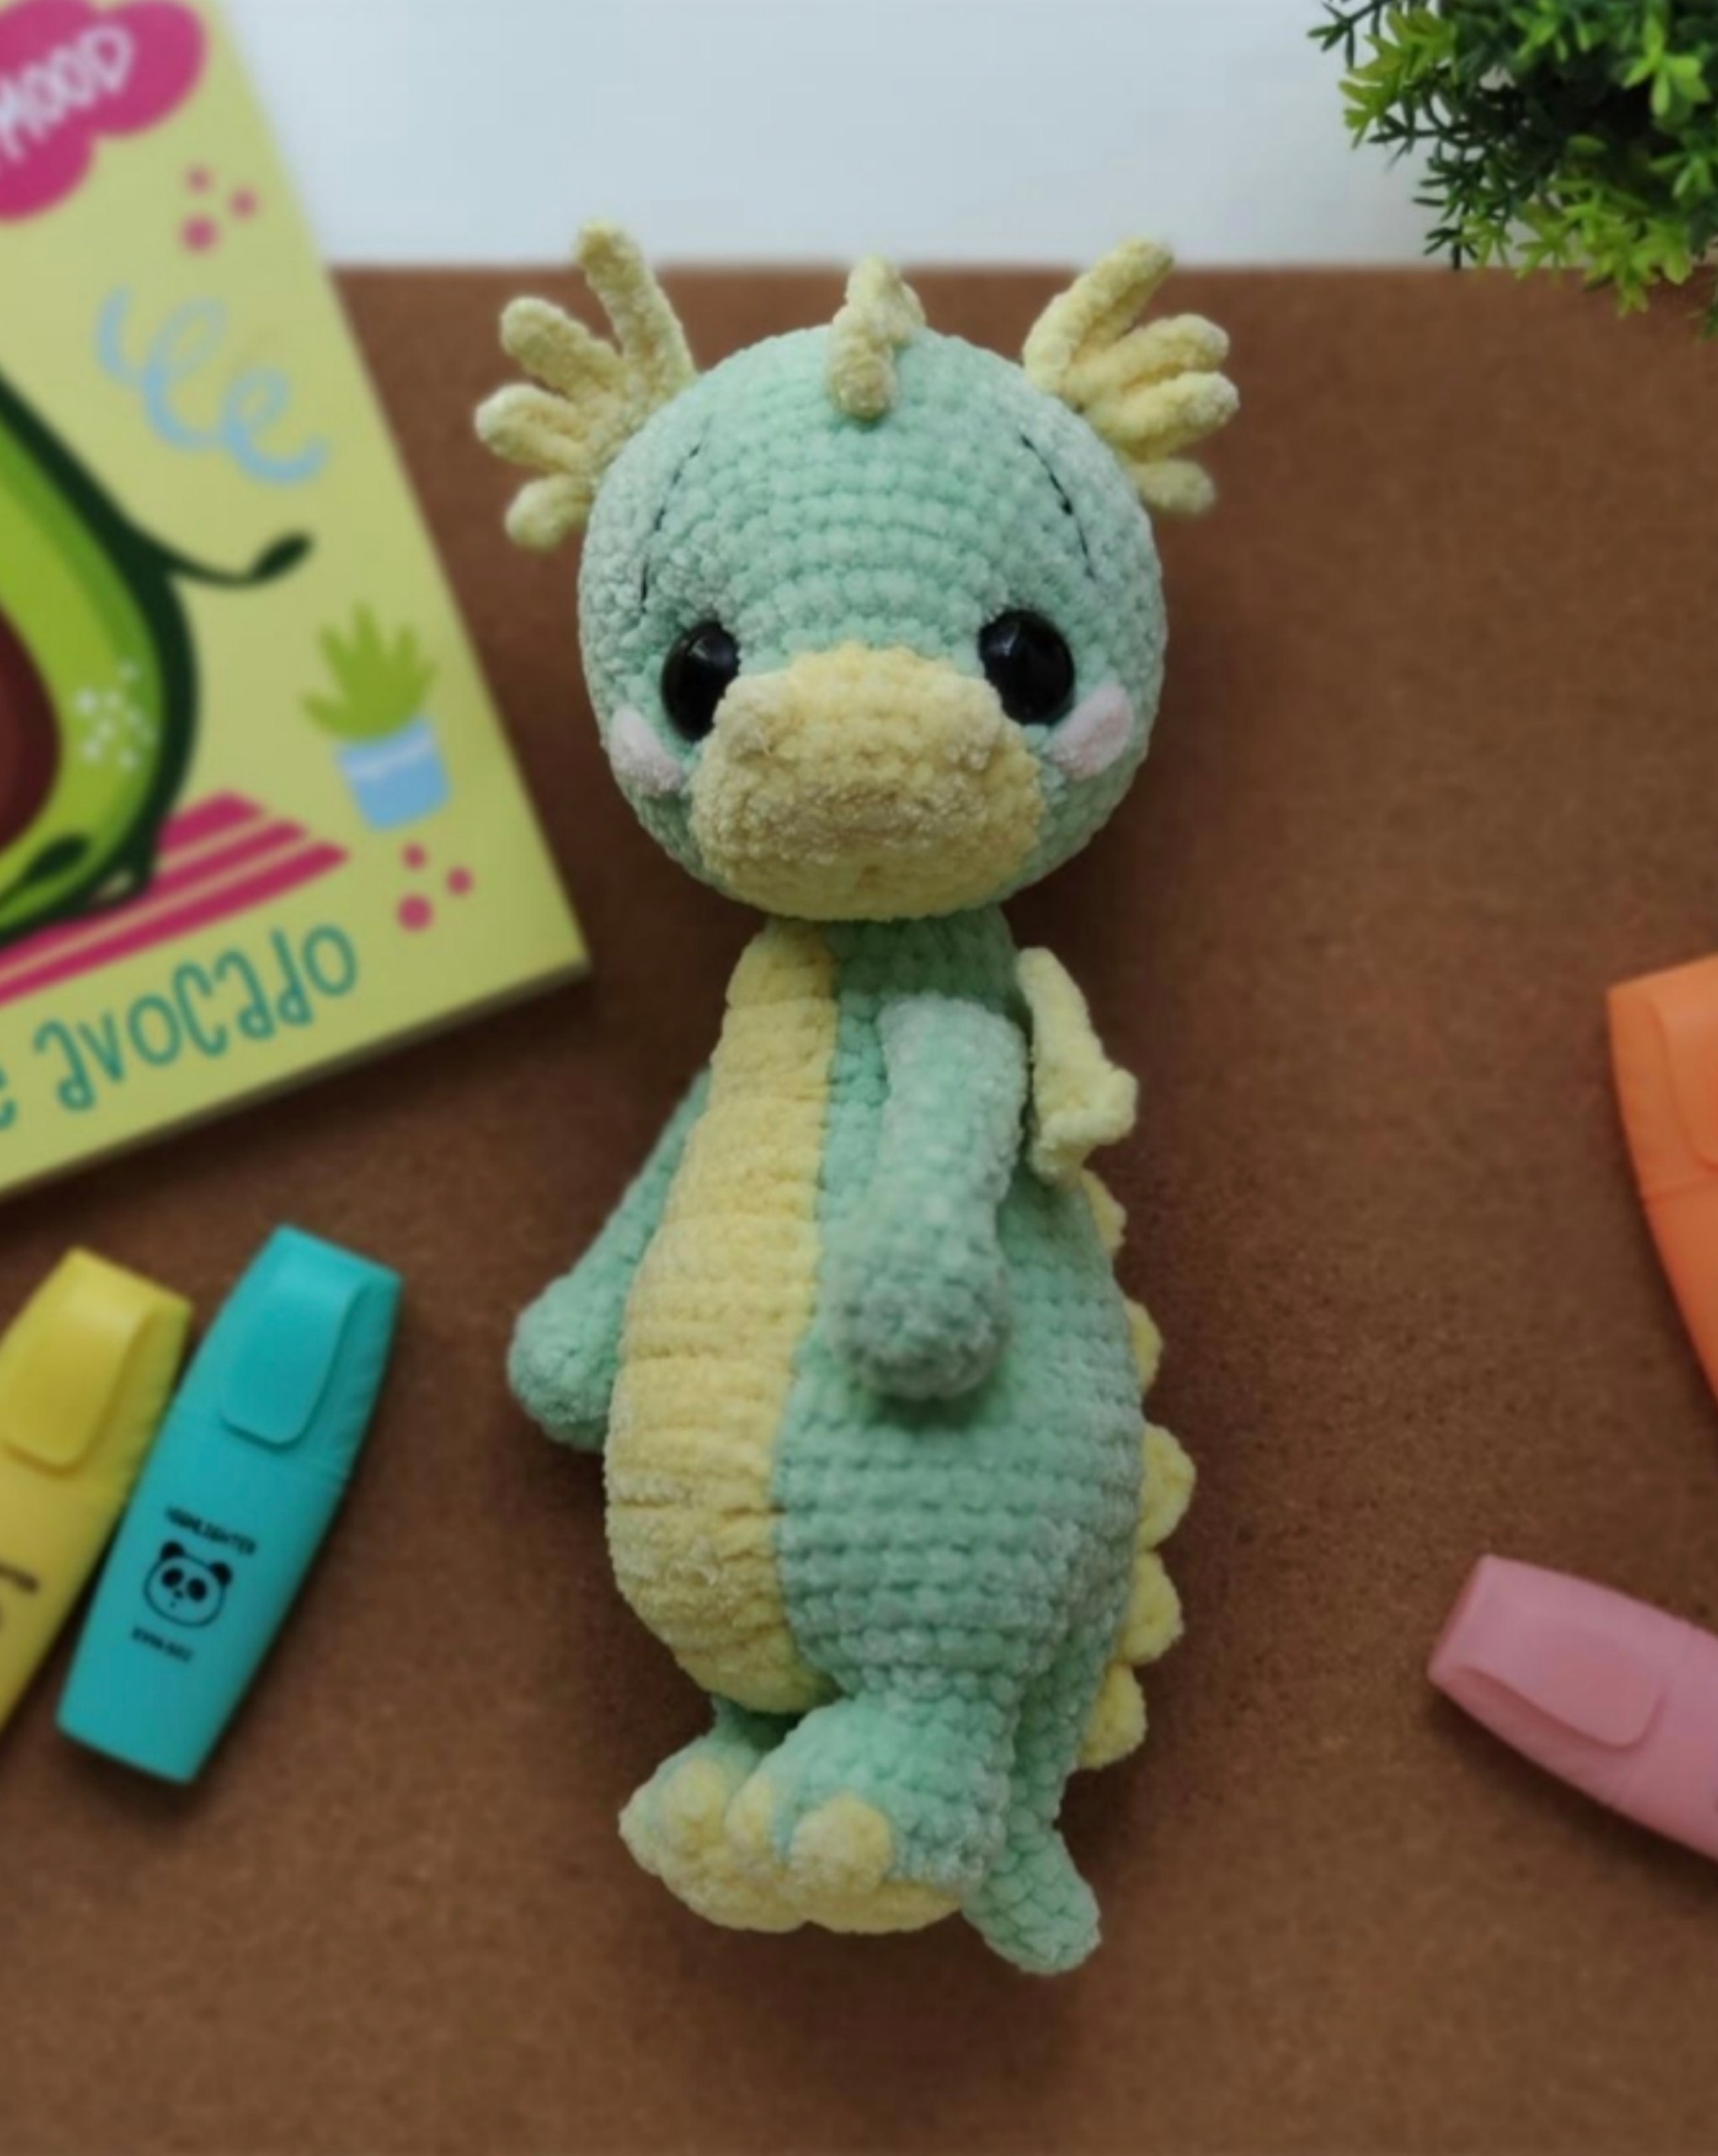
Craft Your Own Cuddly Companion: The Ultimate DIY Plush Dragon Pattern
“`html
DIY Crochet Plush Dragon Pattern: Step-by-Step Guide
Create your own adorable plush dragon with this detailed crochet pattern. This guide is designed for those who love amigurumi and want to make a soft, huggable companion. Below you will find everything you need, from materials to the final assembly.
Materials Needed
Depending on the size you prefer, you can choose between two different yarn options:
For a Large Dragon (Approx. 27cm / 10.6 inches)
- Yarn: HIMALAYA Dolphin Baby (approx. 100g main color, 50g accent color).
- Hook: 2.75mm or 3mm.
- Eyes: 20mm safety eyes.
- Head Joint: 30mm plastic safety joint or cotter pin.
- Other: Black embroidery thread for eyebrows, matching thread for sewing, fiberfill stuffing, scissors, and a stitch marker.
For a Small Dragon (Approx. 20cm / 7.8 inches)
- Yarn: YarnArt Velour (approx. half a skein main color, 20g accent color).
- Hook: 2mm (a smaller hook is recommended to prevent the velour from stretching).
- Eyes: 15mm safety eyes.
- Head Joint: 25mm plastic safety joint or cotter pin.
- Other: Black embroidery thread for eyebrows, matching thread for sewing, fiberfill stuffing, scissors, and a stitch marker.
Stitch Key (US Terms)
- ch: chain
- sc: single crochet
- hdc: half double crochet
- dc: double crochet
- sl st: slip stitch
- inc: increase (two sc in one stitch)
- dec: decrease (sc two together)
- puff: puff stitch (3-4 unfinished double crochets worked into one loop, joined at the top)
Step-by-Step Pattern
Upper Paws (Make 2)
Work in a spiral. Use green yarn. Stuff the bottom part only; leave the top unstuffed.
- ch 4, start in 2nd ch from hook: 2 sc, 3 sc in one loop, 1 sc, inc = 8 sc.
- inc, 1 sc, 3 inc, 1 sc, 2 inc = 14 sc.
- 14 sc.
- 4 dec, 6 sc = 10 sc.
- 2 dec, 6 sc = 8 sc.
- -14. 8 sc (9 rounds) = 8 sc.
- 15. 5 sc, fold the piece in half and sc 4 stitches across to close = 4 sc.
Fasten off and leave a long tail for sewing.
Tail
Work in a spiral using green yarn.
- 6 sc in magic ring = 6 sc.
- 6 sc.
- 2 sc, inc, 3 sc = 7 sc.
- 7 sc.
- 3 sc, inc, 3 sc = 8 sc.
- 4 sc, inc, 3 sc = 9 sc.
- 4 sc, 2 inc, 3 sc = 11 sc.
- 5 sc, 2 inc, 4 sc = 13 sc.
- 6 sc, 2 inc, 5 sc = 15 sc.
- 7 sc, 2 inc, 6 sc = 17 sc.
- 9 sc, 2 inc, 6 sc = 19 sc.
- 10 sc, inc, 8 sc = 20 sc.
- 20 sc + 5 sc (to shift the start of the round).
Fasten off and leave a long tail.
Lower Paws
Right Paw
Work in a spiral. Start with yellow yarn.
- 6 sc in magic ring = 6 sc.
- 6 inc = 12 sc.
- (1 sc, inc) x 6 = 18 sc.
- Switch to green yarn (keep the yellow thread attached for toes): 6 sc, (puff, 2 sc) x 3, 3 sc = 18 sc.
- 18 sc.
- 2 sc, 6 dec, 4 sc = 12 sc.
- 2 sc, 2 dec, 6 sc = 10 sc.
- 10 sc + 2 sc (to shift the round), sl st.
Left Paw
Work in a spiral. Start with yellow yarn.
- 6 sc in magic ring = 6 sc.
- 6 inc = 12 sc.
- (1 sc, inc) x 6 = 18 sc.
- Switch to green yarn (keep yellow thread attached): 6 sc, (puff, 2 sc) x 3, 3 sc = 18 sc.
- 18 sc.
- 5 sc, 6 dec, 1 sc = 12 sc.
- 7 sc, 2 dec, 1 sc = 10 sc.
- 10 sc.
Do not cut the thread; you will continue directly into the body.
The Body
Stuff as you go.
- 9. From the left paw, ch 4. Join to the right paw starting from the last slip stitch: 2 sc, (inc, 1 sc) x 4, 1 sc into the starting stitch of the paw, 4 sc along the chain, 1 sc into the end stitch of the left paw, (1 sc, inc) x 4, 2 sc = 38 sc. (The stitch marker should be at the front/belly).
- 10. 4 inc along the chain, 34 sc = 42 sc.
- 11. 42 sc.
- 12. 21 sc, attach the tail to the body and sc 8 stitches through both the tail and body, 13 sc = 42 sc.
- 13. 21 sc, sc 12 stitches along the top of the tail, 13 sc = 46 sc.
- 14-18. 46 sc (5 rounds).
- 19. 12 sc, 5 dec, 14 sc, 5 dec = 36 sc.
- 20-22. 36 sc (3 rounds).
- 23. (10 sc, dec) x 3 = 33 sc.
- 24. 33 sc.
- 25. (9 sc, dec) x 3 = 30 sc.
- 26. 30 sc.
- 27. (8 sc, dec) x 3 = 27 sc.
- 28. (7 sc, dec) x 3 = 24 sc.
- 29. 23 sc (to shift the round), place marker on 23rd stitch. Start round 30 from the 24th stitch.
- 30. Attach the first upper paw: sc 4 stitches together with the paw, 8 sc, sc 4 stitches together with the second upper paw, 8 sc = 24 sc.
- 31. 24 sc.
- 32. (6 sc, dec) x 3 = 21 sc.
- 33. 21 sc.
- 34. (5 sc, dec) x 3 = 18 sc.
Stuff the body firmly. Install the head joint/safety joint now.
- (1 sc, dec) x 6 = 12 sc.
- 6 dec = 6 sc.
Close the opening and weave in the ends.
The Head
Work in a spiral. Start with yellow yarn.
- ch 6, start in 2nd ch from hook: 4 sc, 3 sc in one loop, 3 sc, inc = 12 sc.
- inc, 3 sc, 3 inc, 3 sc, 2 inc = 18 sc.
- 1 sc, inc, 3 sc, (1 sc, inc) x 3, 3 sc, (1 sc, inc) x 2 = 24 sc.
- 14 sc, puff, 4 sc, puff, 4 sc = 24 sc.
- -6. 24 sc (2 rounds).
- 7. 7 sc, switch to green yarn, 4 sc, 12 inc, 1 sc = 36 sc.
- 8. 12 sc, (1 sc, inc) x 12 = 48 sc.
- 9-18. 48 sc (10 rounds).
Placement: Insert safety eyes between rounds 8 and 9, approximately 14-16 stitches apart. Secure the head joint between rounds 10 and 11.
- (6 sc, dec) x 6 = 42 sc.
- (5 sc, dec) x 6 = 36 sc.
- (4 sc, dec) x 6 = 30 sc.
- (3 sc, dec) x 6 = 24 sc.
Stuff the head firmly and evenly.
- (2 sc, dec) x 6 = 18 sc.
- (1 sc, dec) x 6 = 12 sc.
- 6 dec = 6 sc.
Close and weave in the ends.
Belly
Work in rows with yellow yarn. Start each row with a turning chain (ch 1).
- ch 5, start in 2nd ch from hook: 4 sc = 4 sc.
- -4. ch 1, 4 sc (3 rows).
- 5. ch 1, inc, 2 sc, inc = 6 sc.
- 6-7. ch 1, 6 sc (2 rows).
- 8. ch 1, inc, 4 sc, inc = 8 sc.
- 9-10. ch 1, 8 sc (2 rows).
- 11. ch 1, inc, 6 sc, inc = 10 sc.
- 12-16. ch 1, 10 sc (5 rows).
- 17. ch 1, skip 1 stitch, 7 sc, skip 1 stitch, 1 sc in last stitch = 8 sc.
- 18. ch 1, 8 sc.
- 19. ch 1, skip 1 stitch, 5 sc, skip 1 stitch, 1 sc in last stitch = 6 sc.
- 20. ch 1, skip 1 stitch, 3 sc, skip 1 stitch, 1 sc in last stitch = 4 sc.
Sc around the entire perimeter of the belly piece. Fasten off and sew to the body.
Wings (Make 2)
Work in rows with yellow yarn. Start each row with a turning chain (ch 1).
- ch 6, start in 2nd ch from hook: 2 sc, inc, 2 sc = 6 sc.
- ch 1, 3 sc, inc, 2 sc = 7 sc.
- ch 2, start in 2nd ch from hook: 3 sc, inc, 3 sc = 8 sc.
- ch 1, 4 sc, inc, 3 sc = 9 sc.
- ch 2, start in 2nd ch from hook: 6 sc, 3 sc in one loop, 3 sc to end, 2 sc along the side back to the first stitch.
Fasten off and sew to the sides of the body.
The Crest (Back Spikes)
Mark the line of the crest along the back and head. Use a contrasting color yarn.
- Attach yarn at the bottom. In one stitch, ch 4 and work 2 dc into the same stitch.
- sl st into a stitch two rows above.
- Repeat this process moving upward from the bottom of the body to the top of the head.
The Ears
Use yellow yarn. Attach to the sides of the head.
Left Ear: Attach yarn. ch 4, 3 dc in 2nd ch from hook, sl st into next stitch. ch 5, 4 dc in 2nd ch from hook, sl st into next stitch. ch 6, 5 dc in 2nd ch from hook, sl st into next stitch. ch 7, 6 dc in 2nd ch from hook, sl st into next stitch. This creates 4 segments of different lengths.
Right Ear: Repeat the same process, but in reverse order of length (starting with ch 7 and ending with ch 4).
Final Touches
- Cheeks: Use pink plush yarn to embroider three small stitches under the eyes on both sides.
- Eyebrows: Use black thread to embroider small eyebrows above the eyes.
Your plush dragon is now complete!
“`