Knit Your New Favorite Cuddle Buddy: The Chunky Square Bear Pillow
“`html
How to Knit a Chunky Square Bear Pillow: A Beginner-Friendly Guide
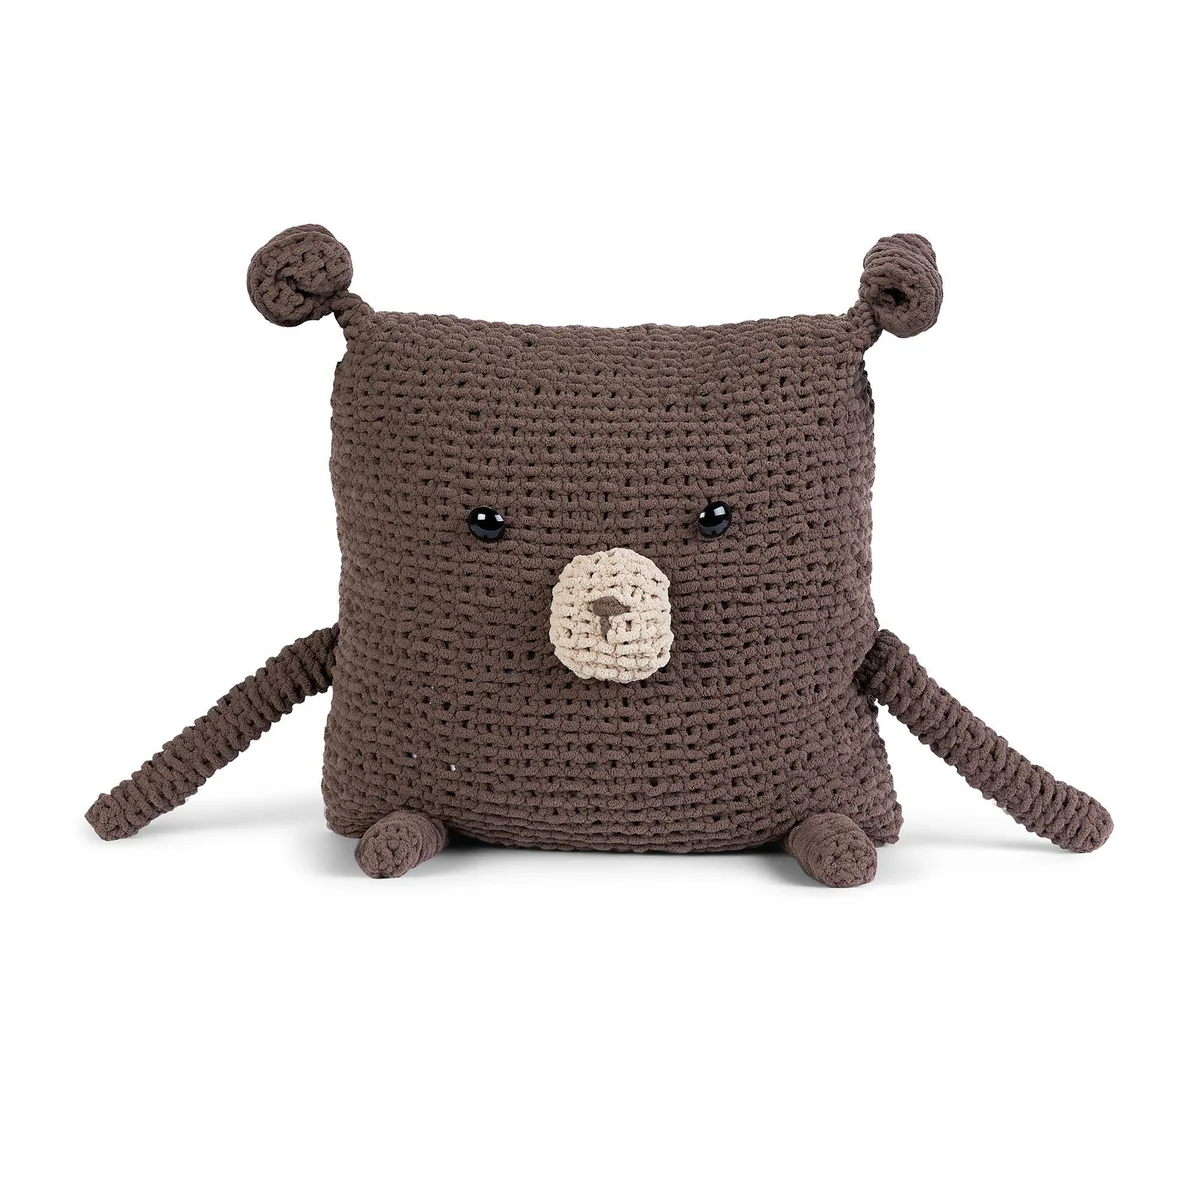
Looking for a cozy addition to your home or a unique handmade gift? This chunky square bear pillow is the perfect project for beginner knitters. Using super bulky yarn, this project works up quickly and results in a huggable, modern piece of decor that looks great in any nursery or living room.
Project Overview
This project is designed for beginners. It primarily uses the garter stitch (knitting every row), making it an excellent way to practice your casting on, casting off, and basic sewing skills.
Finished Size: Approximately 20″ x 20″ square (excluding arms and legs).
Materials Needed
Yarn
- Main Color (Taupe): Super Bulky (Weight 6) yarn – approximately 390 yards (2 balls).
- Contrast Color (Almond): Super Bulky (Weight 6) yarn – approximately 20 yards (1 ball).
Tools
- Knitting Needles: Size U.S. 11 (8 mm) or a size needed to obtain the correct gauge.
- Yarn Needle: For sewing and finishing.
- Safety Eyes: One pair of 1″ (25 mm) black safety eyes.
- Safety Pins: 4 large safety pins for assembly.
- Pillow Form: 20″ [51 cm] square pillow insert.
- Measuring Tools: Tape measure.
Gauge
To ensure your pillow is the correct size, aim for 7 stitches (sts) and 14 rows = 4″ [10 cm] in garter stitch.
Step-by-Step Knitting Instructions
The Body (Make 2)
You will create two identical squares for the front and back of the bear.
- Using the main color (Taupe), cast on 35 stitches.
- Work in garter stitch (knit every row) until the piece measures 20″ [51 cm] from the beginning.
- Cast off all stitches.
The Ears (Make 2)
- Using the main color (Taupe), cast on 11 stitches.
- Work in garter stitch until the piece measures 6″ [15 cm] from the beginning.
- Cast off, leaving a long yarn tail for sewing.
The Snout (Make 1)
- Using the contrast color (Almond), cast on 11 stitches.
- Work in garter stitch until the piece measures 6″ [15 cm] from the beginning.
- Cast off, leaving a long yarn tail for sewing.
Arms and Legs (Make 4)
- Using the main color (Taupe), cast on 7 stitches.
- Work in garter stitch until the piece measures 8″ [20 cm] from the beginning.
- Cast off, leaving a long yarn tail for sewing.
Assembling Your Bear Pillow
Finishing the Limbs
Before attaching the arms and legs to the body, you need to shape them:
- Fold each arm and leg piece in half.
- Using the long yarn tail left from the cast-off and a yarn needle, work a whipstitch seam across the long edge and the top short edge. This creates a hollow tube.
Connecting the Body
- Lay the Front Body piece flat on a surface with the right side (RS) facing up.
- Position the finished arms at the sides and the legs at the bottom edge.
- Place the Back Body piece on top, with the right side facing down (the “sandwich” method).
- Use large safety pins to pin the arms and legs securely in place between the two body pieces.
- Using a long yarn tail, whipstitch around the right side, bottom edge, and left side of the body. Ensure you sew through all layers where the limbs are pinned.
- Remove the safety pins and turn the body right side out so the limbs are on the exterior.
Adding the Face and Stuffing
- Following the manufacturer’s instructions, secure the black safety eyes onto the front of the pillow.
- Insert the 20″ square pillow form into the body.
- Whipstitch the top edge of the body closed.
Final Finishing Touches
The Snout and Nose
- Shape the Snout: Using the long yarn tail, gather the corners of the snout piece together. Pull tight and repeat until the piece forms a rounded, circular shape.
- Attach: Sew the rounded snout to the center of the face between the eyes.
- Embroider the Nose: Using a small length of the main color (Taupe) yarn, use a satin stitch to embroider a small nose on the top of the snout.
The Ears
- Shape the Ears: Repeat the gathering process used for the snout (gathering the corners until rounded).
- Attach: Sew the ears to the top two corners of the body.
Your chunky knit square bear pillow is now complete! Enjoy your cozy, handmade creation.
“`