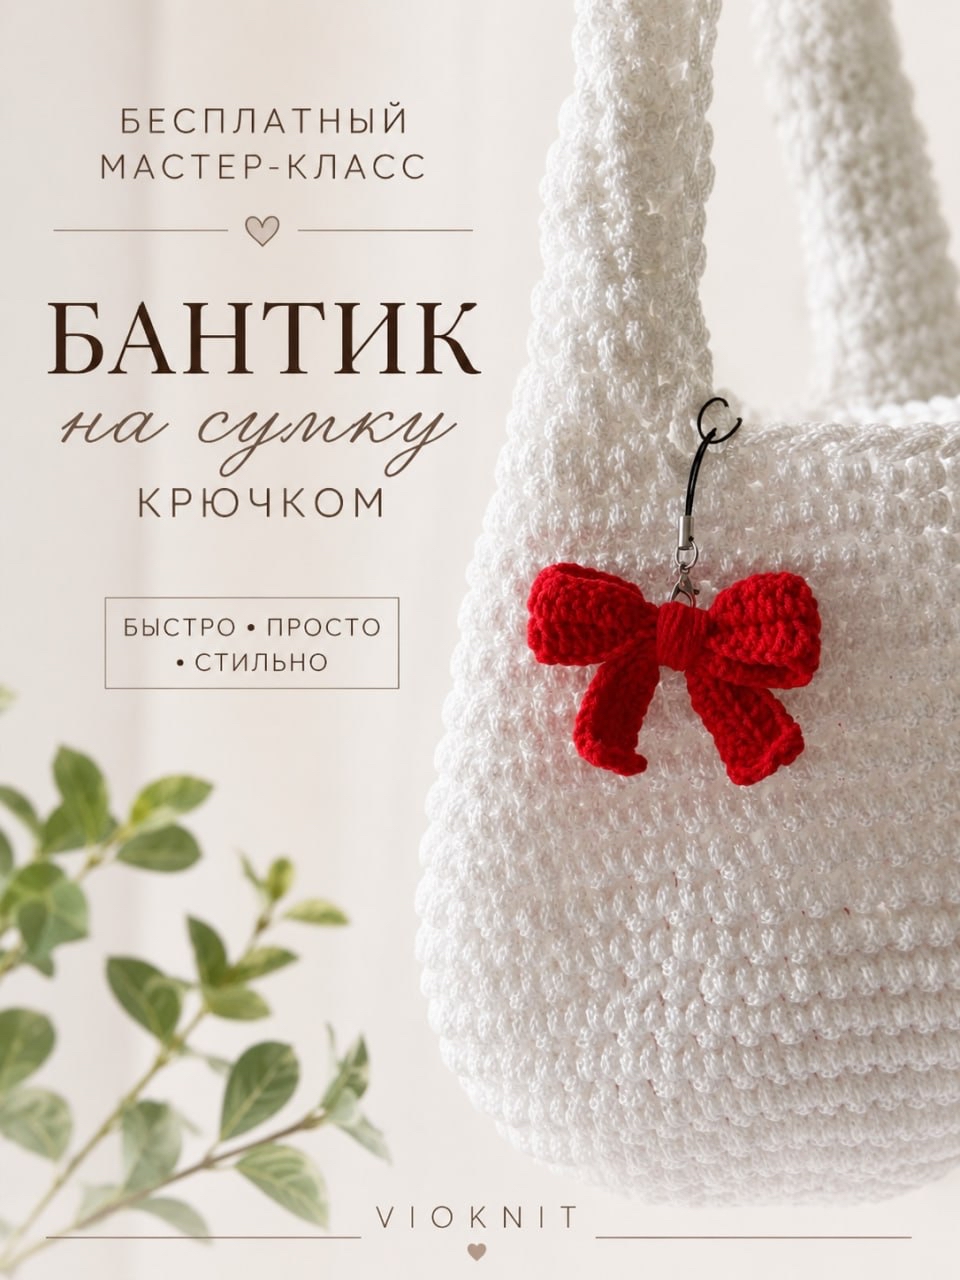
Easy Crochet Bow Pattern for Bag Charms and Accessories
Looking for a quick and adorable way to personalize your favorite handbag, backpack, or tote? A handmade crochet bow is the perfect solution. Whether you want to add a pop of color to a neutral bag or create a set of matching accessories for a gift, this little project is a fantastic way to spend a few minutes of your crafting time. This pattern is specifically designed to be a “scrap buster,” meaning you can use those small leftover balls of yarn that are too short for a full blanket but too pretty to throw away.
This bow is characterized by its elegant shape—tapering at the ends and widening in the middle—which gives it a professional, boutique look. Because it is worked in just two rows, it is an ideal project for beginners who want to practice different stitch heights and the “back loop only” technique. Let’s dive into how you can create this stylish accessory!
Materials & Abbreviations
Before you start, gather your materials. To achieve the look seen in the tutorial, you will want a yarn that has a bit of definition and doesn’t stretch too much. A sport-weight or fine-weight cotton blend works best for accessories that need to hold their shape.
Materials Needed
- Yarn: Approximately 15–25 yards of sport weight yarn (Example: YarnArt Jeans or a similar 50g/174yd ball). You only need about 10–15 grams total.
- Crochet Hook: 2.0mm (Size 0 or 00). Using a smaller hook ensures the stitches are tight, which prevents the bow from sagging over time.
- Yarn Needle: For weaving in ends and securing the center wrap.
- Scissors: For trimming your yarn.
- Optional Accessory: A lobster clasp or key ring if you intend to use this as a removable bag charm.
Abbreviations (US Terms)
- ch: chain
- sl st: slip stitch
- hdc: half double crochet
- dc: double crochet
- BLO: back loop only
- st: stitch
Step-by-Step Instructions
The bow is worked as a flat rectangle with varying stitch heights to create the curved “bow” silhouette. Follow these steps carefully to ensure your bow is symmetrical.
Creating the Foundation
Start by creating your foundation chain. Chain 64. This length determines the overall width of your bow once it is folded. Ensure your tension is consistent; if your chains are too tight, the bow may curl.
Row 1: Shaping the Bow
We will now work back across the chain. Start in the 3rd chain from your hook (the skipped chains count as your first stitch). Follow this sequence to create the shape:
- The First End: Work 8 hdc.
- The First Transition: Work 6 sl st.
- The First Loop: Work 14 dc.
- The Center Transition: Work 6 sl st.
- The Second Loop: Work 14 dc.
- The Second Transition: Work 6 sl st.
- The Second End: Work 8 hdc.
Row 2: Adding Texture and Stability
Row 2 mirrors the first row but adds a professional finish and a bit more thickness. To do this, we will work entirely in the back loops only.
- Turn your work.
- Chain 2 (this counts as your first stitch).
- Work across the entire row, placing each stitch into the back loop only (BLO) of the corresponding stitch from Row 1.
- Repeat the exact same sequence as Row 1: 8 hdc, 6 sl st, 14 dc, 6 sl st, 14 dc, 6 sl st, and 8 hdc.
Fasten off your yarn, leaving a tail if you wish to use it for sewing, although the assembly process below uses a separate piece of yarn for a cleaner finish.
Finishing and Assembly
Now that you have your crocheted strip, it is time to transform it from a rectangle into a beautiful bow. This is the most important part of the process!
Forming the Shape
Lay your piece flat on a table. To create the classic bow look, fold the piece “accordion style.” This means you will push the center of the strip toward the middle, creating two loops on the sides and a pinched center. Adjust the folds until the loops are symmetrical and the ends look like ribbons.
Securing the Center
- Cut a new length of yarn (about 12–18 inches).
- Take your yarn needle and thread the new piece of yarn.
- Wrap the yarn tightly around the pinched center of the bow. You should wrap it between 8 and 12 times to create a thick, sturdy “knot” that holds the loops in place.
- Once the center is securely wrapped, tie a double knot at the back.
- Use your needle to weave the remaining ends of the yarn into the body of the bow so they are completely hidden.
Attaching to Your Bag
Depending on your preference, you can sew the bow directly onto your bag using a yarn needle, or you can attach a lobster clasp. To add a clasp, simply loop the metal ring through the center wrap of the bow and squeeze it shut. This allows you to move the bow between different bags or even use it as a keychain.
Tips for a Perfect Crochet Bow
To ensure your accessory looks high-end and lasts a long time, keep these tips in mind:
Choosing the Right Yarn
While acrylic yarn works, a mercerized cotton or a cotton-blend yarn is highly recommended for bag charms. Cotton is less likely to pill and holds the “stiff” shape of the bow much better than wool or soft acrylics.
Managing Your Tension
The transition between the slip stitches (sl st) and the double crochets (dc) is where the bow gets its shape. If you find the slip stitches are too tight and pulling the fabric, try to relax your grip. The contrast between the short sl st and the tall dc is what creates those beautiful curves.
Customizing the Size
Want a bigger or smaller bow? You can easily adjust this pattern! To make a larger bow, simply increase the number of double crochets in the “loop” sections. To make a smaller, daintier bow, reduce the number of dc and hdc while keeping the slip stitch transitions the same to maintain the proportions.
Blocking for a Crisp Look
If your bow looks a little curled after finishing, you can “steam block” it. Hold a steam iron slightly above the bow (do not touch the yarn!) and gently press it with your fingers into the desired shape. Let it dry completely before attaching it to your bag.