Free Crochet Seagull Amigurumi Pattern: Step-by-Step Tutorial
Adorable Crochet Seagull Amigurumi Pattern: A Step-by-Step Tutorial
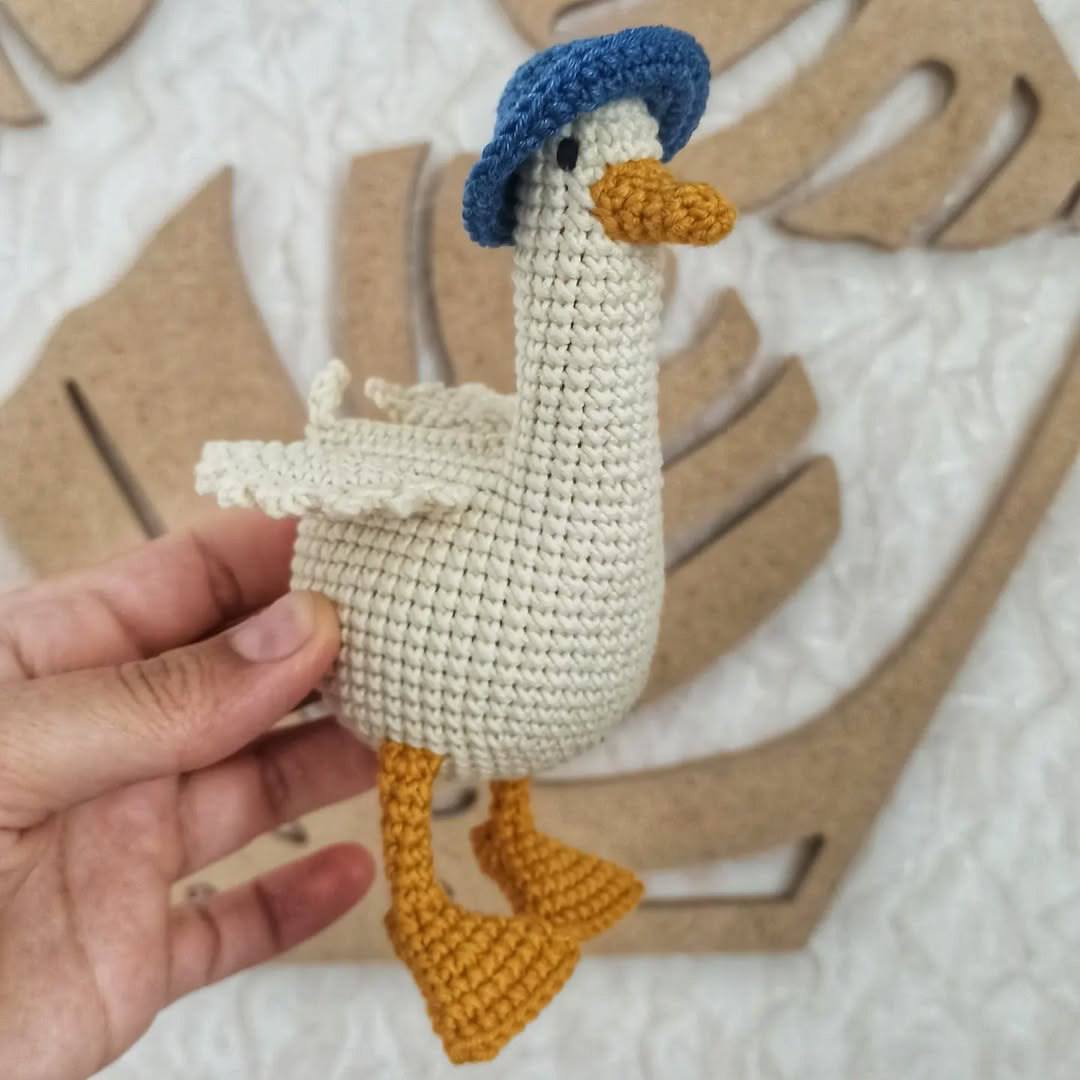
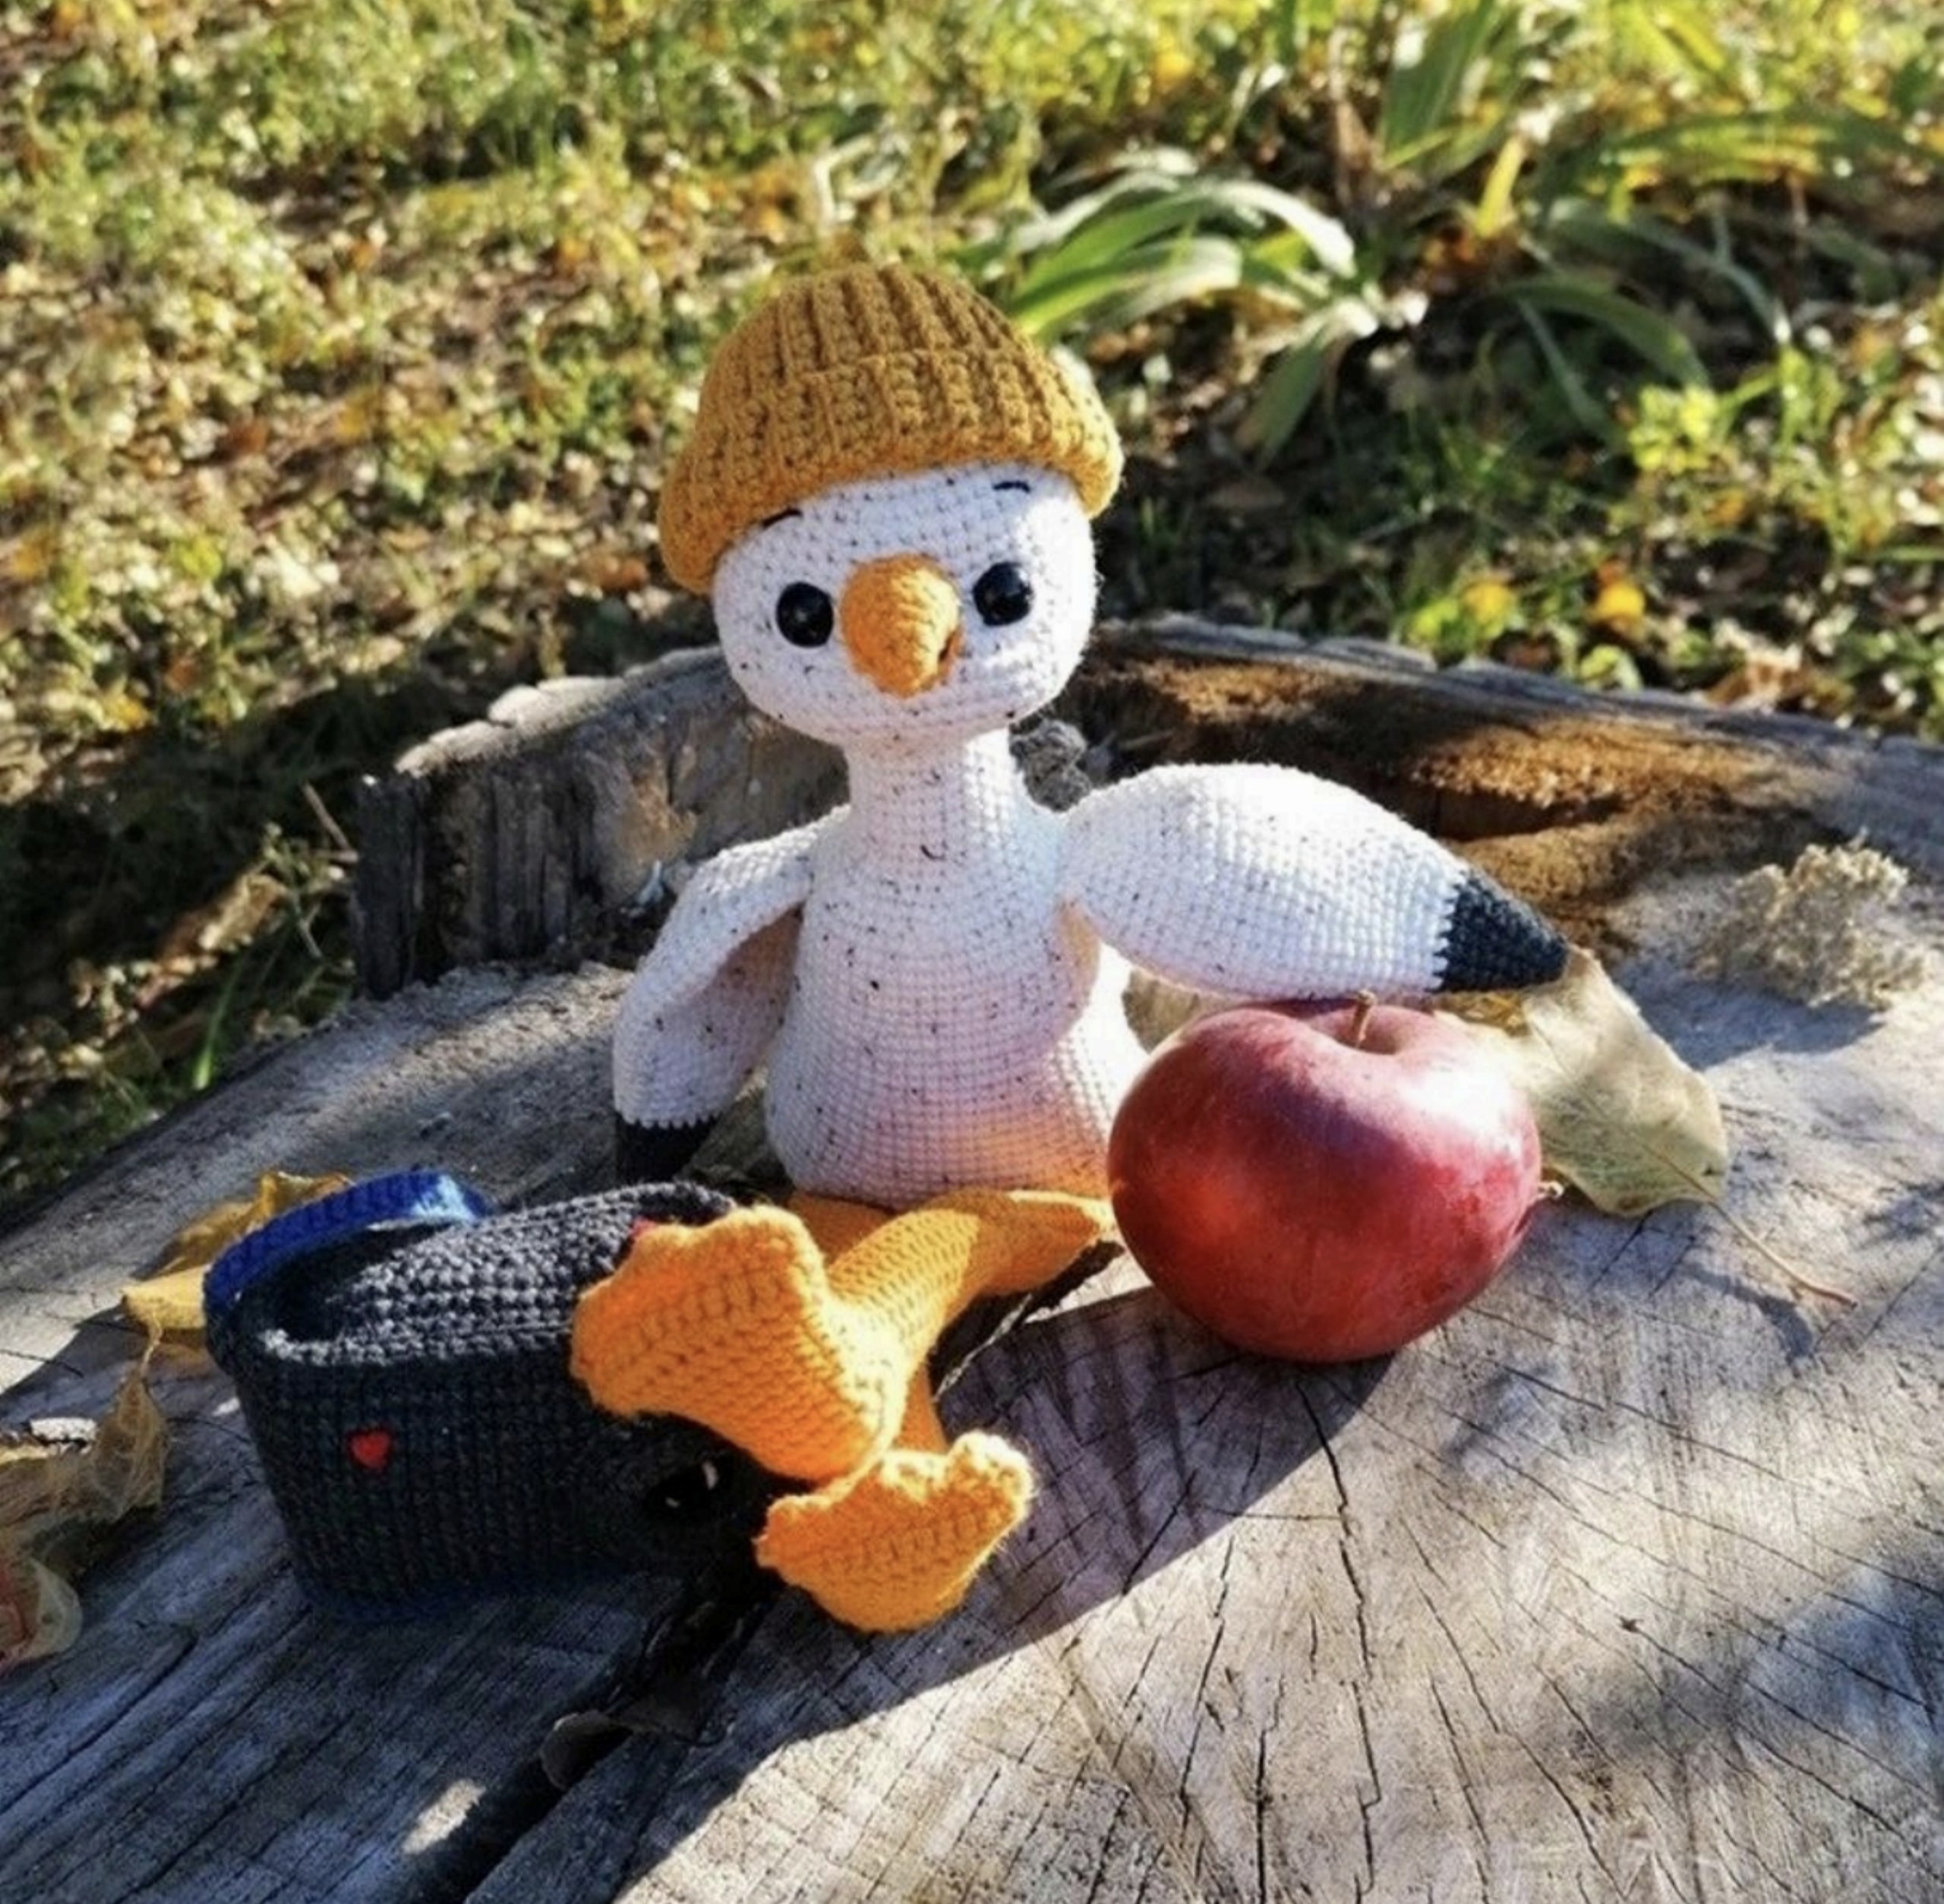
Looking for a quirky and charming project to add to your crochet collection? Meet our little seagull! This adorable amigurumi bird is the perfect blend of cute and curious, complete with his own tiny camera and a cozy mustard-yellow beanie. Whether you are looking for a unique gift or a fun weekend project, this pattern is designed to be accessible for beginners while producing a high-quality, professional-looking result.
In this tutorial, we will walk you through every step of creating this little feathered friend. From the shaping of the feet to the detailed construction of his miniature camera, you’ll find everything you need right here.
Materials & Abbreviations
To get started, gather the following materials. We recommend using a cotton or cotton-blend yarn for a clean, defined stitch that holds its shape well.
Materials Needed
- Yarn: Sport or DK weight cotton yarn in the following colors:
- Milky White (Main Body)
- Mustard Yellow (Hat)
- Orange (Beak and Feet)
- Graphite/Dark Grey (Camera and Accents)
- Black (Camera Lens)
- Royal Blue (Camera Strap)
- Crochet Hook: 1.75 mm (or a size that ensures your stitches are tight enough so stuffing doesn’t show through).
- Safety Eyes: 9 mm diameter.
- Stuffing: High-quality polyester fiberfill.
- Tools: Yarn needle, stitch markers, and scissors.
US Crochet Terms & Abbreviations
- MR: Magic Ring
- ch: Chain
- sc: Single crochet
- hdc: Half double crochet
- dc: Double crochet
- sl st: Slip stitch
- inc: Increase (2 sc in one stitch)
- dec: Decrease (sc 2 together)
- (…) * 6: Repeat the instructions inside the parentheses 6 times.
- BLO: Back loop only
Step-by-Step Instructions
The Feet (Make 2)
Using orange yarn. Stuff the piece as you go, but keep the knee area lightly stuffed to allow for better movement.
Row 1: Ch 13. Starting in the 2nd ch from hook, work 12 sc. Ch 1, turn. Work 24 sc around both sides of the foundation chain. Place a marker.
Rows 2-3: sc in each stitch around (24).
Row 4: (10 sc, dec) * 2 (22).
Rows 5-7: sc in each stitch around (22).
Row 8: (9 sc, dec) * 2 (20).
Row 9: sc in each stitch around (20).
The Heel (Worked in rows):
Row 10: 8 sc, sl st.
Row 11: 6 sc, sl st.
Row 12: 7 sc, sl st.
Row 13: 8 sc, sl st.
Row 14: 9 sc, sl st.
Row 15: 5 sc, dec, 3 sc, sl st.
The Leg (Return to rounds):
Row 16: 4 sc, dec, 12 sc. Place marker and continue in spirals.
Row 17: 18 sc.
Row 18: 3 sc, dec, 13 sc (17).
Row 19: 17 sc.
Row 20: 3 sc, dec, 12 sc (16).
Rows 21-32: sc in each stitch around (16) for 12 rows.
Row 33: Fold the piece in half and sc through the inner loops to close. Place marker at the fold. Without cutting yarn, sc through the outer loops for 16 sc.
Row 34: 2 sc, 4 inc, 3 sc, 3 dec, 1 sc (17).
Rows 35-36: 17 sc for 2 rows.
Row 37: 2 sc, 4 dec, 3 sc, 3 inc, 1 sc (16). Work necessary shifting sc to center the marker.
Row 38: Fold in half and sc through inner loops. Place marker at fold. Without cutting, sc through outer loops for 16 sc.
Rows 39-50: 16 sc for 12 rows. Center the marker at the side. Fold and sc through both layers to close. Fasten off and weave in ends.
Toe Detail: Reattach yarn to the starting chain of the foot. Ch 3, 1 hdc, 1 sc, sl st, 1 sc, (hdc, dc, hdc in one stitch), 1 sc, sl st, 1 sc, 1 hdc, dc. Sl st to finish.
The Tail
Using graphite grey, then switching to white. Do not stuff the tail.
Row 1: Ch 21. Starting in 2nd ch from hook, work 20 sc. Ch 1, turn. Work 40 sc around both sides of the chain.
Row 2: 40 sc. Change color to White.
Rows 3-4: 40 sc (2 rows).
Row 5: (18 sc, dec) * 2 (38).
Rows 6-7: 38 sc (2 rows).
Row 8: (17 sc, dec) * 2 (36).
Rows 9-12: 36 sc (4 rows).
Row 13: (7 sc, dec) * 4 (32).
Rows 14-17: 32 sc (4 rows).
Row 18: (6 sc, dec) * 4 (28).
Rows 19-22: 28 sc (4 rows).
Row 23: (5 sc, dec) * 4 (24).
Rows 24-29: 24 sc (6 rows). Center the marker. Fold in half and sc across both layers to close. Fasten off.
Tail Fringe: Attach yarn to the starting chain. Work 4 “fans”: (sl st, skip 1 sc, 5 dc in next stitch, skip 1 sc, sl st) * 4.
The Wings (Make 2)
Using graphite grey, then white. Do not stuff.
Row 1: 6 sc in MR.
Row 2: (1 sc, inc) * 3 (9).
Row 3: 9 sc.
Row 4: (2 sc, inc) * 3 (12).
Row 5: 12 sc.
Row 6: (3 sc, inc) * 3 (15).
Row 7: 15 sc.
Row 8: (4 sc, inc) * 3 (18).
Row 9: 18 sc. Change color to White.
Row 10: (5 sc, inc) * 3 (21).
Row 11: 21 sc.
Row 12: (6 sc, inc) * 3 (24).
Row 13: (7 sc, inc) * 3 (27).
Row 14: 27 sc.
Row 15: (8 sc, inc) * 3 (30).
Row 16: (9 sc, inc) * 3 (33).
Row 17: 33 sc.
Row 18: (10 sc, inc) * 3 (36).
Row 19: (11 sc, inc) * 3 (39).
Row 20: 39 sc.
Row 21: (12 sc, inc) * 3 (42).
Rows 22-27: 42 sc (6 rows).
Row 28: (5 sc, dec) * 6 (36).
Row 29: 36 sc.
Row 30: (4 sc, dec) * 6 (30).
Row 31: 30 sc.
Row 32: (3 sc, dec) * 6 (24).
Row 33: (2 sc, dec) * 6 (18). Fold and sc across both layers to close.
The Head
Using white yarn. Stuff firmly.
Row 1: 6 sc in MR.
Row 2: 6 inc (12).
Row 3: (1 sc, inc) * 6 (18).
Row 4: 1 sc, inc, (2 sc, inc) * 5, 1 sc (24).
Row 5: (3 sc, inc) * 6 (30).
Row 6: 2 sc, inc, (4 sc, inc) * 5, 2 sc (36).
Row 7: 36 sc.
Row 8: (5 sc, inc) * 6 (42).
Row 9: 3 sc, inc, (6 sc, inc) * 5, 3 sc (48).
Rows 10-14: 48 sc.
Row 15: 18 sc, 3 inc, 6 sc, 3 inc, 18 sc (54).
Row 16: 18 sc, (1 sc, inc) * 3, 6 sc, (1 sc, inc) * 3, 18 sc (60).
Rows 17-19: 60 sc.
Row 20: (8 sc, dec) * 6 (54).
Row 21: (7 sc, dec) * 6 (48).
Row 22: (6 sc, dec) * 6 (42).
Row 23: (5 sc, dec) * 6 (36).
Row 24: (4 sc, dec) * 6 (30).
Row 25: (3 sc, dec) * 6 (24). Fasten off, leaving a long tail for sewing.
Eyes: Place safety eyes between rows 14 and 15, aligned over the increases. Space them 6 sc apart.
The Beak
Using orange yarn.
Row 1: 4 sc in MR.
Row 2: (1 sc, inc) * 2 (6).
Row 3: 6 sc.
Row 4: (1 sc, inc) * 3 (9).
Row 5: 9 sc.
Row 6: 3 sc, 3 inc, 3 sc (12).
Row 7: 6 sc, sl st. Fasten off, leaving a long tail.
The Body
Using white yarn. Stuff firmly as you work.
Row 1: Ch 19. Starting in 2nd ch from hook, work: inc, 16 sc, 4 sc in one stitch, 16 sc, inc (36).
Row 2: 2 inc, 16 sc, 4 inc, 16 sc, 2 inc (44).
Row 3: (1 sc, inc) * 2, 16 sc, (1 sc, inc) * 4, 16 sc, (1 sc, inc) * 2 (52).
Row 4: 3 sc, 2 inc, 18 sc, 2 inc, 6 sc, 2 inc, 18 sc, 2 inc, 3 sc (64).
Row 5: 3 sc, (1 sc, inc) * 2, 18 sc, (1 sc, inc) * 2, 35 sc (68).
Row 6: 14 sc, join tail by crocheting around it for 12 sc, 17 sc, join first foot for 7 sc, 7 sc, join second foot for 7 sc, 5 sc (68).
Rows 7-10: 68 sc.
Row 11: 2 sc, dec, 28 sc, dec, 34 sc (66).
Row 12: 66 sc.
Row 13: (9 sc, dec) * 6 (60).
Rows 14-18: 60 sc (5 rows).
Row 19: (8 sc, dec) * 6 (54).
Rows 20-24: 54 sc (5 rows).
Row 25: (7 sc, dec) * 6 (48).
Rows 26-30: 48 sc (5 rows).
Row 31: 8 sc joined to wing, 12 sc, 8 sc joined to wing, 20 sc (48).
Row 32: (6 sc, dec) * 6 (42).
Row 33: (5 sc, dec) * 6 (36).
Row 34: (4 sc, dec) * 6 (30).
Row 35: (3 sc, dec) * 6 (24).
Rows 36-43: 24 sc (8 rows).
Finish: Work 8 more sc, sl st to close. Fasten off.
The Beanie
Using mustard yellow yarn. This hat is made of 4 identical wedges. Work in rows using BLO. In even rows, work the last sc through both loops for a cleaner edge.
Wedge Pattern:
Row 1: Ch 21. Starting in 2nd ch from hook, work 13 sc, sl st.
Row 2: 14 sc.
Row 3: 14 sc, sl st.
Row 4: 15 sc.
Row 5: 15 sc, sl st.
Row 6: 16 sc.
Row 7: 16 sc, sl st.
Row 8: 17 sc.
Row 9: 17 sc, sl st.
Row 10: 18 sc.
Row 11: 18 sc, sl st.
Row 12: 19 sc.
Row 13: 19 sc, sl st.
Row 14: 20 sc.
Make 4 of these wedges. Join the edges together using slip stitches up to the top of the hat. Fold up the brim for a cozy look.
The Tiny Camera
Lens: Using black yarn.
Row 1: 8 sc in MR.
Row 2: 8 inc (16).
Row 3: (1 sc, inc) * 8 (24). Change to graphite grey.
Rows 4-5: 24 sc in BLO (2 rows).
Row 6: (3 sc, inc) * 6 in BLO (30).
Row 7: 30 sc. Fasten off.
Camera Body: Using graphite grey.
Row 1: Ch 21. Starting in 2nd ch from hook: inc, 18 sc, 4 sc in one stitch, 18 sc, inc (48).
Row 2: 2 inc, 18 sc, 4 inc, 18 sc, 2 inc (56).
Row 3: (1 sc, inc) * 2, 18 sc, (1 sc, inc) * 4, 18 sc, (1 sc, inc) * 2 (64).
Rows 4-5: 64 sc in BLO (2 rows).
Rows 6-20: 64 sc (15 rows). Fasten off.
Camera Lid: Repeat rows 1-3 of the body. Join the lid to the body using slip stitches.
Strap: Attach graphite yarn to the side of the body, ch 5, and attach back to the body, skipping 3 stitches. Repeat on the other side. Using blue yarn, attach to the side loop, ch 65, attach to the second loop, and work 64 sc back across the chain. Fasten off.
Finishing
Now it is time to bring your seagull to life!
- Beak: Sew the orange beak to the center of the face.
- Face: Use a needle and black yarn to embroider the whites of the eyes, small eyebrows, and a tiny smile if you wish.
- Head: Sew the head securely to the body.
- Camera: Sew the lens onto the camera body and attach the camera to the seagull’s wing or side.
- Hat: Place the mustard beanie on the head and adjust the brim.
- Details: You can embroider tiny buttons or a flash indicator on the camera with any bright color of your choice!
Tips for Success
- Tension: Amigurumi requires tight tension. If you see stuffing poking through, try dropping down a hook size.
- Stitch Markers: Since most of this pattern is worked in continuous spirals, always use a stitch marker at the start of each round to avoid losing your place.
- Stuffing: Stuff the body and head firmly, but be gentle with the legs so they can bend naturally.
- Customization: Feel free to change the colors! A blue beanie or a red camera would look just as cute.