Free Chunky Amigurumi Monkey Crochet Pattern | Easy Plush Tutorial
Adorable Chunky Amigurumi Monkey Crochet Pattern
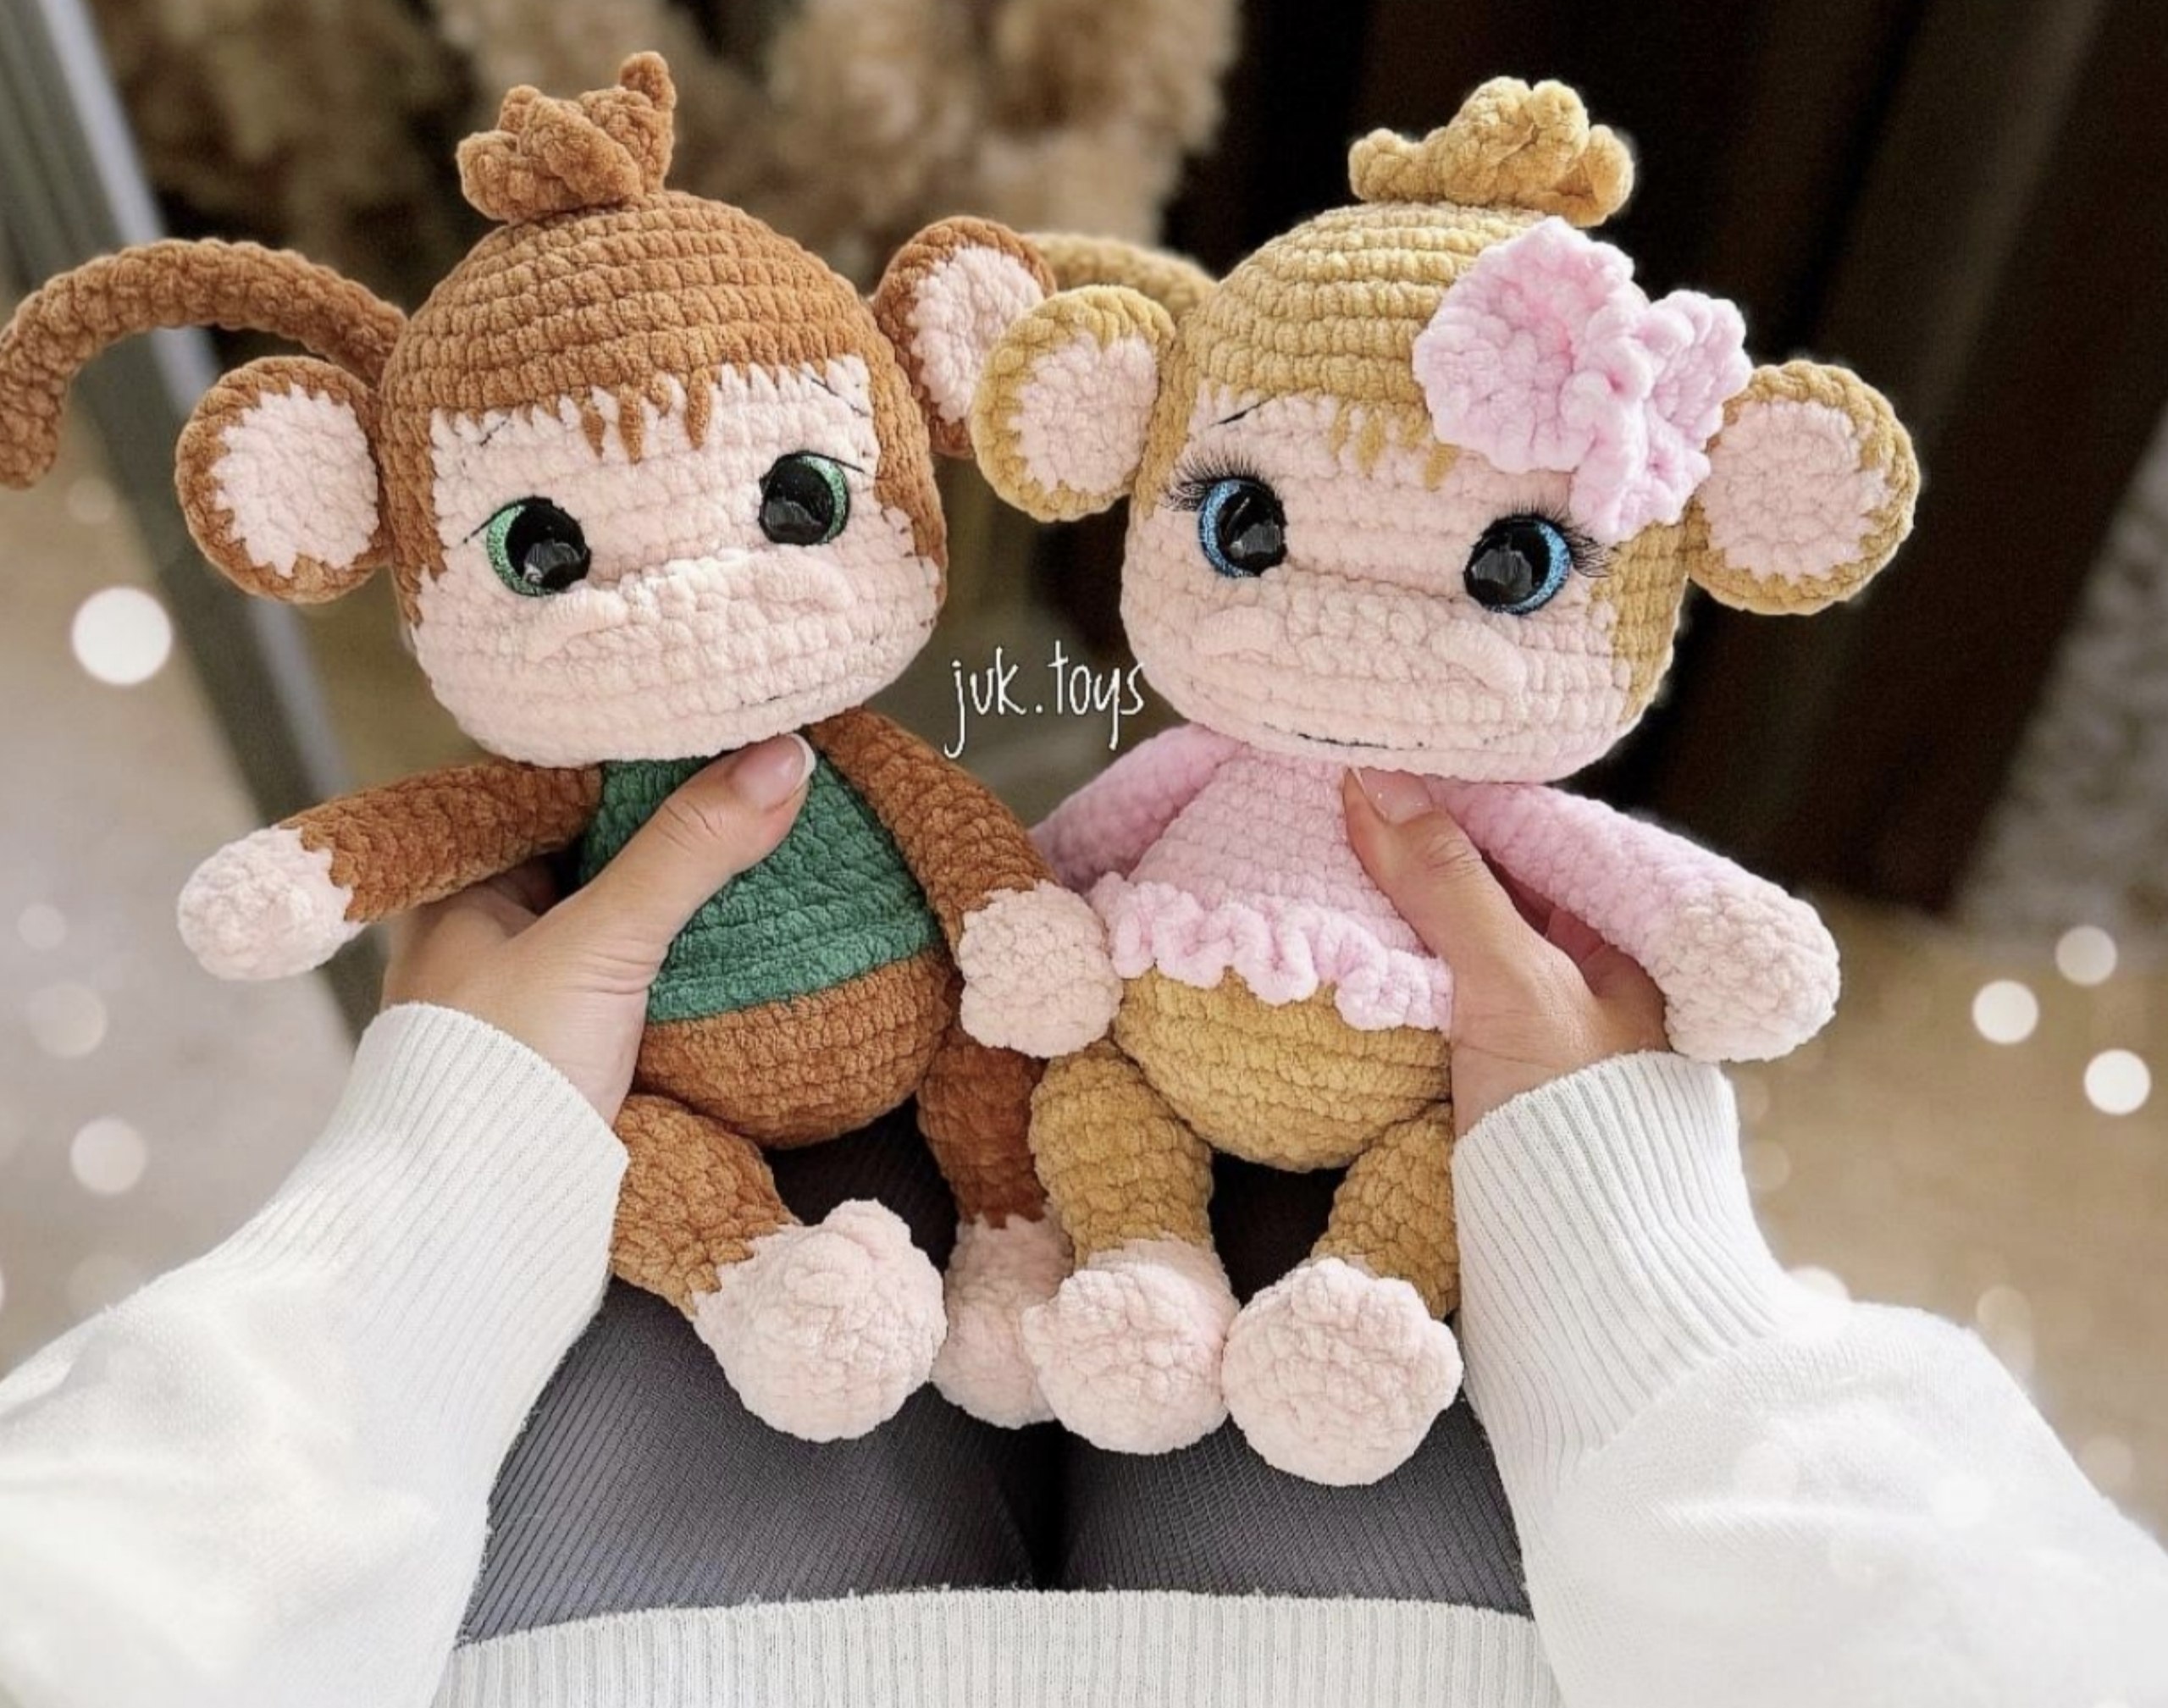
Looking for a cozy, huggable project? This chunky amigurumi monkey is the perfect addition to any nursery or a wonderful handmade gift for a loved one. Using plush chenille yarn, this monkey turns out incredibly soft with a professional, “store-bought” look. Whether you want to make a little boy monkey in a green tee or a sweet girl monkey with a pink bow, this detailed tutorial will guide you through every stitch.
This pattern is designed for crocheters who have a basic understanding of amigurumi. We will be working in continuous spirals, so using a stitch marker is highly recommended to keep track of your rounds. The finished monkey stands approximately 11 to 11.5 inches tall, depending on your tension and the specific brand of plush yarn you choose.
Materials & Abbreviations
Supplies Needed
- Yarn: Super bulky chenille or velvet yarn (similar to Wolans Bunny Baby).
- For the Boy Monkey: Brown (main body), Peach/Skin tone (face, hands, feet, inner ears), and Green (shirt).
- For the Girl Monkey: Sandy Beige (main body), Peach/Skin tone (face, hands, feet, inner ears), and Pink (shirt and bow).
- Crochet Hook: 4.0mm (G/6)
- Safety Eyes: 20mm safety eyes with sparkles.
- Stuffing: High-quality polyester fiberfill.
- Tools: Yarn needle, scissors, stitch markers, black embroidery thread for facial details, and a strong matching thread for sculpting (shaping) the face.
US Crochet Terms & Abbreviations
- ch: chain
- MR: magic ring
- sc: single crochet
- inc: increase (2 sc in one stitch)
- dec: decrease (sc 2 together)
- hdc: half double crochet
- dc: double crochet
- sl st: slip stitch
- ( ) * X: repeat the instructions inside the parentheses X times
- (Number): total stitch count at the end of the round
Step-by-Step Instructions
The Head and Body
We start with the main color. The head is worked as an oval base rather than a standard circle to give the monkey its characteristic face shape.
Phase 1: Shaping the Head
Round 1: Ch 9. Starting in the 2nd ch from hook, work 7 sc, 3 sc in the last chain. Rotate to work along the other side of the chain: 6 sc, 1 inc. (18)
Round 2: inc, 6 sc, 3 inc, 6 sc, 2 inc. (24)
Round 3: 1 sc, inc, 6 sc, (1 sc, inc) * 3, 6 sc, (1 sc, inc) * 2. (30)
Round 4: 2 sc, inc, 6 sc, (2 sc, inc) * 3, 6 sc, (2 sc, inc) * 2. (36)
Round 5: 3 sc, inc, 6 sc, (3 sc, inc) * 3, 6 sc, (3 sc, inc) * 2. (42)
Round 6: 42 sc. (42)
Round 7: 4 sc, inc, 6 sc, (4 sc, inc) * 3, 6 sc, (4 sc, inc) * 2. (48)
Phase 2: Adding the Face Color
From Round 8, we will carry two colors: the main color and the skin tone. Use the tapestry crochet method or carry the yarn to switch colors across the row.
Rounds 8-12: 2 sc main color, 16 sc skin tone, 30 sc main color. (48) Repeat for 5 rounds.
Rounds 13-14: 1 sc main, 6 sc skin, 8 hdc skin, 4 sc skin, 29 sc main. (48) Repeat for 2 rounds.
Round 15: (Skin tone) 5 sc, inc, 11 sc, inc, 2 sc. (Switch to main color) 3 sc, inc, 5 sc, inc, 6 sc, (5 sc, inc) * 2. (54)
Round 16: (Skin tone) 6 sc, inc, 12 sc, inc, 2 sc. (Switch to main color) 4 sc, inc, 6 sc, inc, 6 sc, (6 sc, inc) * 2. (60)
Pro Tip: To create the indented look for the cheeks, turn the work inside out. Carefully snip the strands of yarn that create the color transitions in the center of the face and tie them together. This pulls the fabric inward and creates a 3D effect.
Eyes: Insert safety eyes between rounds 11 and 12, spaced 10 sc apart.
Phase 3: Closing the Head and Neck
Round 17: (Skin tone) 6 sc, dec, 6 sc, (6 sc, dec) * 2. (Main color) 6 sc, dec, 12 sc, dec, 3 sc. (Skin tone) 3 sc, dec. (54)
Round 18: (Skin tone) 5 sc, dec, 6 sc, (5 sc, dec) * 2. (Main color) 5 sc, dec, 11 sc, dec, 3 sc. (Skin tone) 2 sc, dec. (48)
Round 19: (Skin tone) (4 sc, dec) * 4, (Main color) (4 sc, dec) * 3, 3 sc, (Skin tone) 1 sc, dec. (40)
Round 20: (Skin tone) (3 sc, dec) * 4, (Main color) (3 sc, dec) * 4. (32)
Repeat the inside-out cutting and tying technique here to further shape the lower face. Start stuffing the head firmly, especially the neck area.
Round 21: (2 sc, dec) * 8. (24)
Round 22: (2 sc, dec) * 6. (18)
Phase 4: The Body
Round 23: (2 sc, inc) * 6. (24)
Switch to shirt color (Green or Pink).
Round 24: (7 sc, inc) * 3. (27)
Round 25: 27 sc. (27)
Round 26: (8 sc, inc) * 3. (30)
Round 27: (9 sc, inc) * 3. (33)
Round 28: 33 sc. (33)
Round 29: (10 sc, inc) * 3. (36)
Round 30 (Belly shaping): Work 8 sc, 6 inc, 22 sc. (42)
Round 31: 8 sc, (1 sc, inc) * 6, 22 sc. (48)
Round 32: 48 sc. (48)
Switch back to skin tone color. Work the following round in the Back Loop Only (BLO).
Round 33: 48 sc. (48)
Round 34: (6 sc, dec) * 6. (42)
Round 35: (5 sc, dec) * 6. (36)
Round 36: (4 sc, dec) * 6. (30)
Stuff the body firmly.
Round 37: (3 sc, dec) * 6. (24)
Round 38: (2 sc, dec) * 6. (18)
Round 39: (1 sc, dec) * 6. (12)
Round 40: 6 dec. (6)
Fasten off and weave in ends.
Arms, Legs, and Ears
Arms (Make 2)
Start with skin tone. Stuff as you go up to round 11.
Round 1: 6 sc in MR. (6)
Round 2: 6 inc. (12)
Round 3: 12 sc. (12)
Round 4: In first stitch work 3 dc together (cluster), then 11 sc. (12)
Round 5: (2 sc, dec) * 3. (9)
Switch to main color or shirt color.
Rounds 6-16: 9 sc. (9) Total of 11 rounds.
Fold the arm in half so the fingers point outward, crochet 4 sc across the opening, and leave a tail for sewing. Sew between rounds 22 and 23 of the body.
Legs (Make 2)
Start with skin tone. Stuff as you go up to round 15.
Round 1: Ch 6. In 2nd ch from hook, 4 sc, 3 sc in last ch, 3 sc on other side, 1 inc. (12)
Round 2: inc, 3 sc, 3 inc, 3 sc, 2 inc. (18)
Round 3: 1 sc, inc, 3 sc, (1 sc, inc) * 3, 3 sc, (1 sc, inc) * 2. (24)
Round 4 (Toes): Work in BLO. 8 sc, 3 dc together, 1 sc, 3 dc together, 1 sc, 3 dc together, 11 sc. (24)
Round 5: 6 sc, 6 dec, 6 sc. (18)
Round 6: 5 sc, 4 dec, 5 sc. (14)
Round 7: 5 sc, 2 dec, 5 sc. (12)
Round 8: 4 sc, 2 dec, 4 sc. (10)
Switch to main color.
Rounds 9-10: 10 sc. (10)
Round 11: (1 sc, inc) * 5. (15)
Round 12: 15 sc. (15)
Round 13: (2 sc, inc) * 5. (20)
Round 14: 20 sc. (20)
Round 15: (2 sc, dec) * 5. (15)
Round 16: (1 sc, dec) * 5. (10)
Round 17: 10 sc. (10)
Flatten the end and sc 5 across. Sew between rounds 34 and 35 of the body.
Ears (Make 4)
Make 2 in skin tone and 2 in main color.
Round 1: 6 sc in MR. (6)
Round 2: 6 inc. (12)
Round 3: (1 sc, inc) * 6. (18)
For the skin tone ears, sl st and fasten off. For the main color ears, do not fasten off. Place a skin tone ear inside a main color ear and sc around the edge to join them. Sew between rounds 7 and 12 of the head, 5 sc away from the eyes.
The Tail and Hair
Tail: 6 sc in MR, then 6 sc in the next round. Continue working sc in a spiral until the tail reaches 11 inches (28 cm). Fold the end and sc 3 to close. Sew to the bottom of the body and loop it over the head for a cute look.
Hair: Ch 8, work 7 sl st back. Ch 6, work 5 sl st back. Repeat until you have 5 strands. Join the 1st and 5th strands with a sl st and sew this “top knot” to the crown of the head.
Finishing Touches
Facial Sculpting
To give your monkey a cute expression, use a strong thread and needle. Insert the needle from the bottom of the neck (between rounds 22 and 23), bring it up through the inner corner of the eye (between rounds 12 and 13), cross to the other eye, and go back down to the neck. Pull tight to create an indentation. Repeat 2-3 times for a deep-set eye look.
Embroidery & Details
- Brows & Eyelashes: Use black thread to stitch small, angled eyebrows. For the girl monkey, add a few delicate eyelashes.
- Mouth: Embroider a small smile between rounds 17 and 18. For the boy, make it slightly diagonal; for the girl, keep it centered.
- Nostrils: Use skin-colored thread to make two tiny dots for nostrils.
The Clothing Edge
Attach yarn to Round 33 where you worked the BLO.
- For the Girl: (Ch 2, sc in next stitch) repeat around. This creates a ruffled hem.
- For the Boy: Work a round of slip stitches around the hem for a clean, flat edge.
The Bow (Girl Only)
Ch 8. Starting in 3rd ch from hook, work 6 hdc, then ch 2. Work 6 hdc in the same stitch, ch 2. Continue this pattern to create a small rectangular patch. Work a border of (ch 2, sc, ch 2, sc) around all edges. Fold in half, sew the center, and attach to the head.
Tips for Success
- Filling: Stuff the head and neck very firmly. If the neck is too soft, the heavy head may flop over.
- Yarn Management: Chenille yarn can be slippery. If you struggle with the Magic Ring, you can ch 2 and work your first round of sc into the first chain.
- Tension: Keep your stitches tight. Because plush yarn is so thick, loose stitches can leave gaps where the stuffing might peek through.
- Invisible Decreases: Always use the invisible decrease (front loops only) for a smoother finish on amigurumi.