Pocket-Sized Hugs: How to Crochet an Adorable Mini Teddy Bear
Adorable Crochet Baby Teddy Bear Pattern
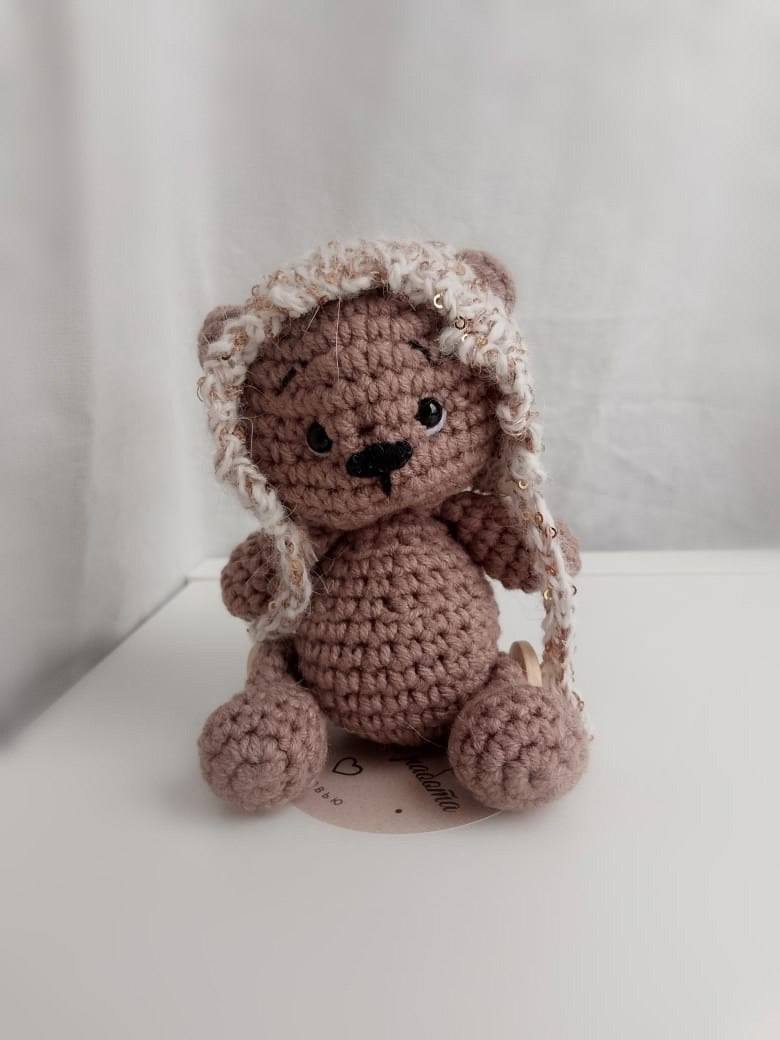
Create your own miniature companion with this detailed guide to crocheting a tiny, cuddly baby teddy bear. This pattern is perfect for beginners and experienced crocheters alike, resulting in a finished toy approximately 4 inches (10 cm) tall.
Materials Needed
- Yarn: YarnArt Jeans (or a similar sport-weight cotton/acrylic blend) in brown or your preferred color.
- Crochet Hook: 1.75 mm
- Safety Eyes: 6 mm
- Embroidery Thread: Black and white for facial details.
- Tools: Yarn needle, scissors, and stuffing.
- Optional: Small buttons (to help the bear sit).
Abbreviations (US Terms)
- MR: Magic Ring
- sc: Single Crochet
- inc: Increase (2 sc in one stitch)
- dec: Decrease (sc 2 together)
- sl st: Slip Stitch
- dc: Double Crochet
- st: Stitch
Step-by-Step Crochet Pattern
Lower Paws (Make 2)
- Round 1: 6 sc in MR (6)
- Round 2: inc x 6 (12)
- Rounds 3-4: sc around (12)
- Round 5: 4 sc, 2 dec, 4 sc (10)
- Rounds 6-10: sc around (10)
Finishing: Fold the piece in half and sc 5 stitches across to close. Fold it in half once more and sc through the corners to create a rounded foot. End with a sl st and leave a long tail for sewing.
Upper Paws/Arms (Make 2)
- Round 1: 6 sc in MR (6)
- Round 2: 1 sc, inc x 3 (9)
- Rounds 3-7: sc around (9)
Finishing: Fold the piece in half and sc 4 stitches across to close. Fold it in half once more and sc through the corners. End with a sl st and leave a long tail for sewing.
The Head
- Round 1: 6 sc in MR (6)
- Round 2: inc x 6 (12)
- Round 3: 1 sc, inc x 6 (18)
- Round 4: 2 sc, inc x 6 (24)
- Round 5: 3 sc, inc x 6 (30)
- Rounds 6-11: sc around (30)
- Round 12: 3 sc, dec x 6 (24)
- Round 13: 2 sc, dec x 6 (18)
- Round 14: 1 sc, dec x 6 (12)
Eyes Placement: Insert safety eyes between rounds 8 and 9, leaving 4 sc between them.
Finishing: End with a sl st and leave a long tail for sewing to the body.
The Body
- Round 1: 6 sc in MR (6)
- Round 2: inc x 6 (12)
- Round 3: 1 sc, inc x 6 (18)
- Round 4: 2 sc, inc x 6 (24)
- Rounds 5-9: sc around (24)
- Round 10: 2 sc, dec x 6 (18)
- Rounds 11-12: sc around (18)
- Round 13: 1 sc, dec x 6 (12)
- Round 14: sc around (12)
Finishing: End with a sl st and fasten off.
The Ears
Join your yarn to the top of the head. Work 5 dc into a single stitch to create a small shell, then finish with a sl st. Fasten off and weave in the ends. Repeat for the second ear.
Assembly and Finishing Touches
Putting it Together
- Sewing: Secure the head to the body. Attach the upper arms to the shoulders and the lower paws to the base of the body.
- Pro Tip: If you want your bear to sit upright, you can sew small buttons to the back of the lower paws before attaching them to the body.
Facial Details
- Muzzle: Use a needle and yarn to create a “pull” (sculpting) on the muzzle area to give the face more dimension.
- Embroidery:
- Use black thread to embroider a small triangular nose and a mouth.
- Add delicate eyebrows and eyelashes for a sweet expression.
- Use white thread to add tiny highlights (catchlights) to the eyes to make the bear look alive.
Your little crochet bear is now complete and ready for a new home