Stitch Your Own Feathered Friend: The Ultimate Amigurumi Goose Pattern
How to Crochet a Cute Amigurumi Goose: Step-by-Step Pattern
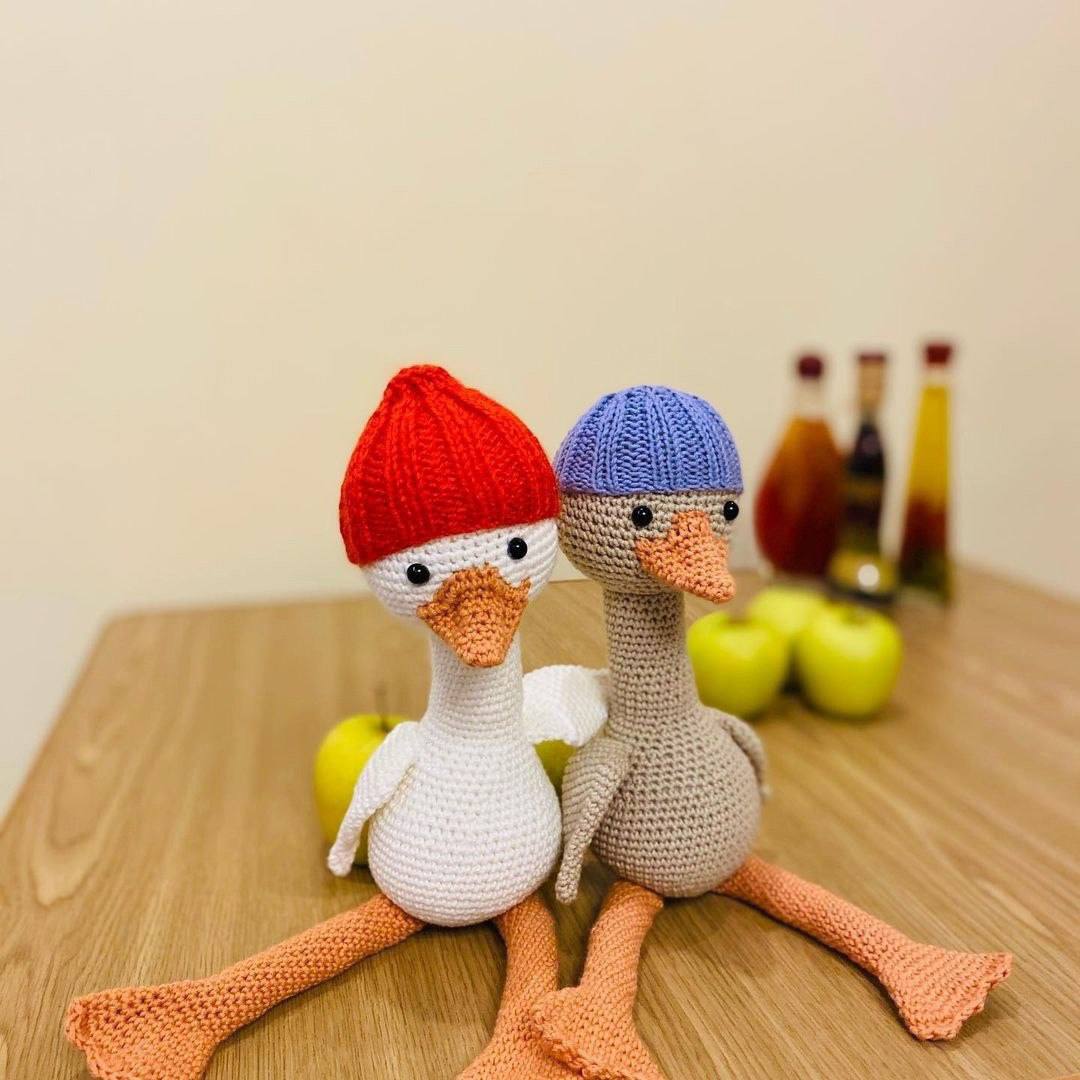
Create your own adorable crochet goose with this detailed amigurumi guide. This project is perfect for intermediate crocheters looking to make a charming handmade companion or a unique gift. Follow our step-by-step instructions to bring this feathered friend to life!
Materials Needed
- Crochet yarn in white (or grey), orange, and your choice of color for the hat.
- Crochet hook suitable for your yarn weight.
- Polyfill stuffing.
- Safety eyes.
- Yarn needle and scissors.
- Stitch markers.
Crochet Abbreviations (US Terms)
- MR: Magic Ring
- sc: Single Crochet
- inc: Increase (two sc in one stitch)
- dec: Decrease (sc two stitches together)
- sl st: Slip Stitch
- ch: Chain
- dc: Double Crochet
Step-by-Step Pattern
The Head
Start with the main color of the goose.
- Round 1: 6 sc in MR (6)
- Round 2: inc in each st (12)
- Round 3: (1 sc, inc) x 6 (18)
- Round 4: (2 sc, inc) x 6 (24)
- Round 5: (3 sc, inc) x 6 (30)
- Round 6: (4 sc, inc) x 6 (36)
- Round 7: (5 sc, inc) x 6 (42)
- Round 8: (6 sc, inc) x 6 (48)
- Rounds 9-14: sc in each st (48)
- Round 15: (7 sc, inc) x 6 (54)
- Round 16: sc in each st (54)
- Round 17: (8 sc, inc) x 6 (60)
- Round 18: sc in each st (60)
- Round 19: (8 sc, dec) x 6 (54)
- Round 20: sc in each st (54)
- Round 21: (7 sc, dec) x 6 (48)
- Round 22: sc in each st (48)
- Round 23: (6 sc, dec) x 6 (42)
- Round 24: (5 sc, dec) x 6 (36)
- Round 25: (4 sc, dec) x 6 (30)
- Round 26: (3 sc, dec) x 6 (24)
- Round 27: (2 sc, dec) x 6 (18)
- Round 28: (1 sc, dec) x 6 (12)
- Round 29: dec x 6 (6)
Fasten off and leave a tail for sewing. Stuff firmly.
The Beak
Use orange yarn.
- Round 1: 6 sc in MR (6)
- Round 2: (2 sc, inc) x 2 (8)
- Round 3: (3 sc, inc) x 2 (10)
- Round 4: (4 sc, inc) x 2 (12)
- Round 5: (5 sc, inc) x 2 (14)
- Round 6: (6 sc, inc) x 2 (16)
- Round 7: (7 sc, inc) x 2 (18)
- Round 8: (8 sc, inc) x 2 (20)
- Round 9: (9 sc, inc) x 2 (22)
Fold the piece in half and sc 10 stitches across the edge to close. For the bottom edge, use slip stitches. For the top edge, use sc with a yarn-over to create a slightly raised shape. Sew to the head as shown in your design preference.
The Body and Neck
Start with the main color.
- Round 1: 6 sc in MR (6)
- Round 2: inc in each st (12)
- Round 3: (1 sc, inc) x 6 (18)
- Round 4: (2 sc, inc) x 6 (24)
- Round 5: (3 sc, inc) x 6 (30)
- Round 6: (4 sc, inc) x 6 (36)
- Round 7: (5 sc, inc) x 6 (42)
- Round 8: (6 sc, inc) x 6 (48)
- Round 9: (7 sc, inc) x 6 (54)
- Rounds 10-17: sc in each st (54)
- Round 18: (7 sc, dec) x 6 (48)
- Round 19: sc in each st (48)
- Round 20: (6 sc, dec) x 6 (42)
- Round 21: sc in each st (42)
- Round 22: (5 sc, dec) x 6 (36)
- Rounds 23-24: sc in each st (36)
- Round 25: (4 sc, dec) x 6 (30)
- Rounds 26-27: sc in each st (30)
- Round 28: (3 sc, dec) x 6 (24)
- Rounds 29-42: sc in each st (24)
The final section forms the neck. Stuff the body firmly and the neck moderately. Sew the neck to the head.
The Wings (Make 2)
- Round 1: 6 sc in MR (6)
- Round 2: sc in each st (6)
- Round 3: (2 sc, inc) x 2 (8)
- Round 4: sc in each st (8)
- Round 5: (3 sc, inc) x 2 (10)
- Round 6: (4 sc, inc) x 2 (12)
- Round 7: (5 sc, inc) x 2 (14)
- Round 8: (6 sc, inc) x 2 (16)
- Round 9: (7 sc, inc) x 2 (18)
- Round 10: (8 sc, inc) x 2 (20)
- Round 11: (9 sc, inc) x 2 (22)
- Round 12: sc in each st (22)
- Round 13: (10 sc, inc) x 2 (24)
- Round 14: (11 sc, inc) x 2 (26)
- Round 15: sc in each st (26)
- Round 16: (9 sc, 2 dec) x 2 (22)
- Round 17: (7 sc, 2 dec) x 2 (18)
- Round 18: (5 sc, 2 dec) x 2 (14)
- Round 19: (6 sc, 1 dec) x 2, sl st to finish.
The Feet (Make 2)
Use orange yarn.
- Row 1: Ch 12, join with a sl st to form a ring.
- Rows 2-30: sc in each st around (12 sc per row).
- Row 31: (5 sc, inc) x 2 (14)
- Row 32: (6 sc, inc) x 2 (16)
- Row 33: (7 sc, inc) x 2 (18)
- Row 34: (8 sc, inc) x 2 (20)
- Row 35: (9 sc, inc) x 2 (22)
- Row 36: (10 sc, inc) x 2 (24)
- Row 37: (11 sc, inc) x 2 (26)
- Row 38: (12 sc, inc) x 2 (28)
- Row 39: (13 sc, inc) x 2 (30)
Fold the piece in half and sc across both layers to close. To create the toes, work three small bumps using a combination of dc and sc to shape the webbed foot. Sew the feet to the bottom of the body.
The Tail
Use the main color.
- Round 1: 6 sc in MR (6)
- Round 2: sc in each st (6)
- Round 3: (2 sc, inc) x 2 (8)
- Round 4: (3 sc, inc) x 2 (10)
- Round 5: (4 sc, inc) x 2 (12)
- Round 6: (5 sc, inc) x 2 (14)
- Round 7: (6 sc, inc) x 2 (16)
Fasten off and sew to the back of the body.
Final Assembly
- Eyes: Place safety eyes on the head before stuffing and closing.
- Sewing: Attach the head to the neck, the wings to the sides of the body, and the feet to the base.
- Finishing Touches: Add the beak and tail. You can crochet a simple beanie hat to match the images by working a basic cylinder with a decreased top