Stitch Your New Best Friend: The Ultimate Squishy Crochet Bunny Pattern
Adorable Plush Crochet Bunny Pattern
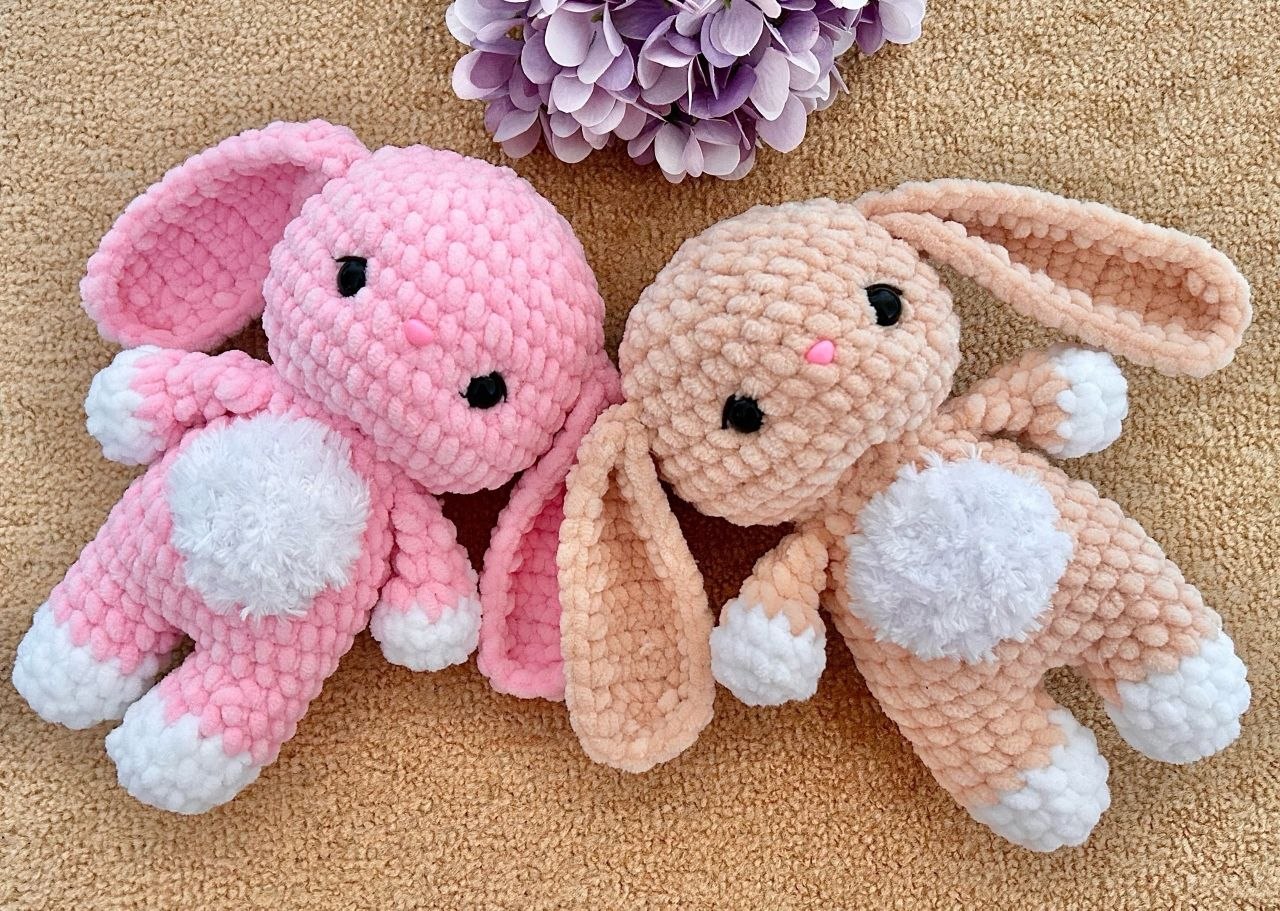
Create your own cuddly companion with this detailed crochet pattern. This plush bunny is designed to be soft, squishy, and perfect for gifts or nursery decor. Using chenille-style yarn, you’ll achieve a professional, store-bought look with a handmade touch.
Materials Needed
- Main Yarn: Chenille/Velvet yarn (e.g., Himalaya Dolphin Baby) in Pink (less than 1 ball) and a small amount of White.
- Accent Yarn: Faux fur yarn (e.g., Yarnart Fable Fur) in White for the chest.
- Crochet Hook: 4.0mm
- Safety Eyes: 14mm
- Safety Nose: 10mm
- Embroidery Thread: Black yarn or thread for eye details.
- Tools: Yarn needle, fiberfill stuffing.
- Finished Size: Approximately 20cm (8 inches).
Crochet Abbreviations (US Terms)
- MR: Magic Ring
- ch: Chain
- sc: Single crochet
- inc: Increase (2 sc in one stitch)
- dec: Decrease (sc 2 together)
- sl st: Slip stitch
Step-by-Step Instructions
The Head
1. 8 sc in MR (8)
2. 8 inc (16)
3. (1 sc, inc) * 8 (24)
4. (3 sc, inc) * 6 (30)
5. 2 sc, inc, (4 sc, inc) * 5, 2 sc (36)
6. (5 sc, inc) * 6 (42)
7-9. 42 sc (42)
Placement: Insert safety eyes between rounds 8 and 9, leaving 6-7 sc between them. Insert the safety nose between rounds 8 and 9.
10. (5 sc, dec) * 6 (36)
11. 36 sc (36)
12. (4 sc, dec) * 6 (30)
Begin stuffing the head firmly.
13. (3 sc, dec) * 6 (24)
14. (2 sc, dec) * 6 (18)
15. (1 sc, dec) * 6 (12)
16. 6 dec (6)
Fasten off and weave in ends.
The Arms (Make 2)
Starting with White yarn:
1. 6 sc in MR (6)
2. 6 inc (12)
3. 12 sc (12)
Switch to Pink yarn:
4. 6 dec (6)
5-6. 6 sc (6)
Stuff the tips of the arms. Fold the arm in half and crochet 3 sc through both layers to close the bottom. Fasten off.
The Legs and Body
Leg 1 (Start with White):
1. 6 sc in MR (6)
2. 6 inc (12)
3-4. 12 sc (12)
Switch to Pink:
5-6. 12 sc (12)
Fasten off the first leg.
Leg 2: Repeat the steps for Leg 1, but do not fasten off. Continue to the body.
Joining the Legs:
7. Ch 2, 12 sc around the first leg, 2 sc in the chain, 12 sc around the second leg, 2 sc in the chain (28)
8. (13 sc, inc) * 2 (30)
9-10. 30 sc (30)
11. (4 sc, dec) * 5 (25)
12-13. 25 sc (25)
14. (3 sc, dec) * 5 (20)
15-16. 20 sc (20)
17. 4 sc, 3 sc together with the arm, 6 sc, 3 sc together with the other arm, 4 sc (20)
Stuff the body firmly and leave a long tail for sewing to the head.
The Tail
1. 6 sc in MR (6)
2. 6 inc (12)
3. 12 sc (12)
Stuff lightly and leave a tail for sewing.
The Ears (Make 2)
Note: These are worked in rows.
1. Ch 6
2. 5 sc, ch 1 (5)
3. 5 sc, ch 1 (5)
4. 2 sc, inc, 2 sc, ch 1 (6)
5-9. 6 sc, ch 1 (6)
10. 2 sc, dec, 2 sc, ch 1 (5)
11. 5 sc, ch 1 (5)
12. 1 sc, dec, 2 sc, ch 1 (4)
13. 4 sc, ch 1 (4)
14. 2 dec, ch 1 (2)
15. Dec
Do not fasten off. Sc around three sides of the piece to create a neat border. Fold the ear at the base and sew it securely to create a crease.
The Chest
Using White Faux Fur yarn:
1. 6 sc in MR (6)
2. 6 inc (12)
3. (1 sc, inc) * 6 (18)
Fasten off and leave a tail for sewing.
Assembly and Finishing Touches
- Ears: Sew the ears to the head at the level of round 11.
- Chest: Sew the fluffy white chest piece to the center of the body.
- Tail: Sew the tail to the back of the body between rounds 9 and 11.
- Facial Details: Use black thread to embroider a small line or “eyelash” above the safety eyes to give the bunny more expression.
- Final Step: Sew the head to the body and ensure all stuffing is balanced