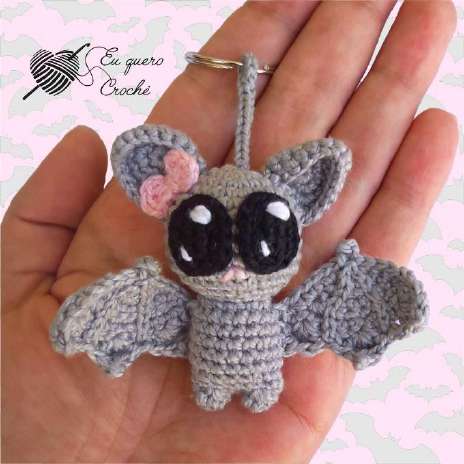
Crochet a Spooky-Cute Companion: Free Little Bat Amigurumi Pattern
Materials & Tools
- Yarn: Small amounts of sport/fingering weight yarn in Black, Grey, and Pink. The sample uses Circulo’s Anne brand.
- Crochet Hook: 1.75 mm.
- Filling: Polyester fiberfill.
- Notions: Tapestry needle, scissors, stitch marker.
- For Eyes: Black and white embroidery thread.
- Optional: Fabric glue for securing eyes.
Finished Size: Approximately 7 cm / 2.75 inches long.

Crochet Abbreviations (US Terms)
- MR: Magic Ring
- Ch: Chain
- Sl st: Slip Stitch
- Sc: Single Crochet
- Dc: Double Crochet
- Tr: Treble Crochet
- FLO: Front Loops Only
- Inc: Increase (2 sc in one stitch)
- 3-sc-inc: 3 sc in the same stitch
- Sc2tog: Decrease (sc 2 stitches together)
- Bobble4dc: Bobble stitch (4 dc in same stitch, closed together at top)
- ( ) x6: Repeat instructions inside parentheses 6 times.
- Sk: Skip
- Join: Join round with a sl st
- Turn: Turn your work
Important Notes:
- The pattern is worked partly in continuous rounds (spiral) and partly in joined rounds. Follow the instructions carefully.
- Use a stitch marker! Mark the first stitch of each round and move it up as you go.
- Work through both loops of the stitch unless the pattern specifies otherwise (like FLO).
Step-by-Step Crochet Instructions
Part 1: The Head & Body (Worked in One Piece)
Use Black yarn.
- 6 sc in MR (6).
- 6 inc (12).
- (1 sc, inc) x6 (18).
- (2 sc, inc) x6 (24).
- (3 sc, inc) x6 (30).
- Rounds 6-10: Sc in each st around (30).
- (3 sc, sc2tog) x6 (24).
- (2 sc, sc2tog) x6 (18).
- (1 sc, sc2tog) x6 (12).
- Firmly stuff the head now.
- FLO (Front Loops Only): (1 sc, inc) x6 (18). (This creates a neat ridge for the neck.)
- Rounds 15-19: Sc in each st around (18).
- (4 sc, sc2tog) x3 (15).
- 15 sc.
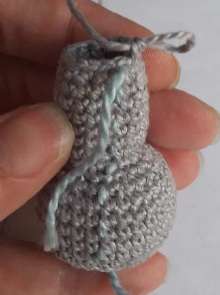
- Now, stuff the body firmly.
- Closing Row: Fold the open edge in half. You will crochet through both layers to close. Work: 1 sc, 1 Bobble4dc, 3 sc, 1 Bobble4dc, 1 sc (7 sts total). Fasten off, leaving a long tail. Use this tail to sew the seam neatly closed, hiding the final row’s edge as shown in the pattern picture.
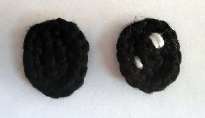
Part 2: The Ears (Make 2)
Use Black yarn.
- 6 sc in MR (6).
- (1 sc, 1 “3-sc-inc”) x3 (12). *(A “3-sc-inc” means 3 sc all in the same stitch.)*
- 2 sc, (1 “3-sc-inc”, 3 sc) x2, 2 sc (16).
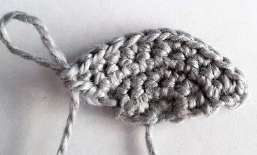
- 3 sc, (1 “3-sc-inc”, 5 sc) x2, 1 sl st (20). Fasten off, leaving a tail.
- Shaping: Fold the ear point and sew the last 2 stitches together at the tip to give it a defined shape, as shown in the photo.
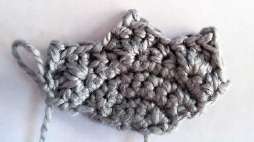
Part 3: The Wings (Make 2)
Use Grey yarn.
Work in rows, turning after each one.
- 5 sc in MR. Turn.
- Ch 1, inc, 3 sc, inc. Turn (7).
- Ch 1, 3 sc, inc, 3 sc. Turn (8).
- Ch 1, inc, 6 sc, inc. Turn (10).
- Ch 1, inc, 3 sc, inc, 4 sc, inc. Turn (13).
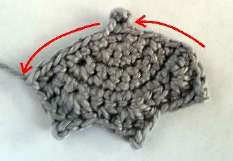
- Ch 1, 1 sc, (sk 1 st, in the next st work: [1 dc, 1 tr, ch 1, sl st into the top of the tr just made, 1 tr, 1 dc], sk 1 st, 1 sc). Repeat from * to * two more times (total of 3 “points”). Turn (19 sts/points created).
- Edging: Now, work an edging around the wing shape. Work sc evenly up the side edge, across the starting Magic Ring, and down the other side. When you get to the center top (the MR), work: [1 sc, ch 3, sl st into the last sc made (forms a picot), 1 sc]. Continue sc down the other side. Join. Fasten off, leaving a long tail for sewing.
- Wing Details: With black yarn and a tapestry needle, work 12 surface slip stitches along the wing to create bone details, as shown in the picture.
Part 4: The Eyes (Make 2)
Use Black yarn.
- Ch 4. Starting in the 2nd ch from hook: 2 sc, 1 “3-sc-inc”, 1 sc, 1 inc. Join with sl st to first sc (8).
- Ch 1, inc, 1 sc, 3 inc, 1 sc, 2 inc. Join (14). Fasten off.
- Embroider two small white “sparkle” stitches on each eye for a cute, animated look.
Part 5: The Bow
Use Pink yarn.
- In a MR: (Ch 2, 3 dc, ch 2, sl st) into the ring. Repeat once more so you have two loops. Fasten off, leaving a tail.
- Use the tail to wrap tightly around the center of the bow several times, cinching it to form the bow shape. Knot securely and weave in the end.
Assembly: Bringing Your Bat to Life
- Attach the Ears: Sew the pointed ears to the top of the head.
- Attach the Bow: Sew or glue the pink bow between the ears, at the front of the head.
- Attach the Eyes: Sew or glue the eyes to the face, referring to the photo for placement.
- Embroider the Nose: Using pink yarn, embroider a tiny triangle or upside-down “V” for the nose between and slightly below the eyes.
- Attach the Wings: Sew the wings securely to the back of the body. Position them so they look like they’re wrapped around.
Tips for a Perfectly Adorable Bat
- Stitch Marker is Essential: With such small rounds, it’s very easy to lose your place. A stitch marker in the first stitch of every round is a must!
- Stuffing Small Parts: Use the end of a hook, a chopstick, or tweezers to firmly but gently stuff the head and body. The head should be very firm, the body can be slightly softer.
- Wing Magic: The wing row with the dc/tr/picot clusters might look tricky, but take it one cluster at a time. It creates the beautiful pointed wingtip detail.
- Surface Slip Stitch: For the wing bones, simply run your needle under the surface stitches of the grey wing in a straight line, pulling the black yarn through to create a raised line. Don’t pull too tight.
- Safety for Little Ones: If this bat is for a very young child, consider embroidering the eyes entirely instead of using small pieces.
Congratulations! Your delightful Little Bat is ready to take flight!